Trackplans
Like any model railway trackplan, this one went through some substantial changes in the effort of finding the best plan that met all the givens and druthers (to use John Armstrong’s terms) that I had laid out for the layout.
The first version of the plan (unfortunately not yet scanned) included the Stockett Junction wye at the south end of the basement (extreme left if you’re looking at the PDF’s below) and a lightly compressed version of Wellcox Yard in the centre of the basement along with the signature ferry slip complete with a removable ship. That plan also was a double-deck layout which put the majority of the Port Alberni sub into staging and blocked off a good portion of the back end of the basement. This version was eliminated when Cam and I realized the ship being in port would force the wider among us to duck under the layout as there wasn’t enough space between the ship and the wall.
The second version of the plan increased the length of the Wellcox spur (the original was very short) and wrapped the track around to have Wellcox yard flipped around. It was discarded rather quickly due to the lack of space for the ship and accessibility to the trackage behind it.
The third version of the plan – not in existance anymore, I’m going from memory – eliminated the Stockett Wye and Wellcox, kept a double-deck layout, flipped the peninsula around to come off the north wall, but still did not include the Port Alberni sub. The rough trackplan was roughly the same shape as the current plan. When Cam jokingly suggested we could go to three decks, I saw a real possibility and we worked towards realizing this plan and thus what you see today.
And after numerous slight revisions (and odds are likely there will be more changes to come), here is the plan we intend to build. Each of the plans were drawn out on 24×36″ sheets of paper – there are definite benefits to working at Carbon Copy Digital as they have Océ printers capable of running these at size – and scanned once drawn into PDF format. Some of the changes contemplated following the scans of these drawings are to include a one-turn helix on the middle deck after Bryn to lengthen the distance between Bryn and Parksville, and to include the team/bulk unloading track at Parksville. The upper deck still needs to be finalized with respect to how we’re going to handle the outer reaches past the yard in Port Alberni. In addition to the scenicked stuff, the staging yard also needs some decisions made with respect to whether it’s a double-ended yard with a pinwheel ladder or a transfer table/sector plate. If you have any thoughts as to this, let me know.

Click here to view a PDF.
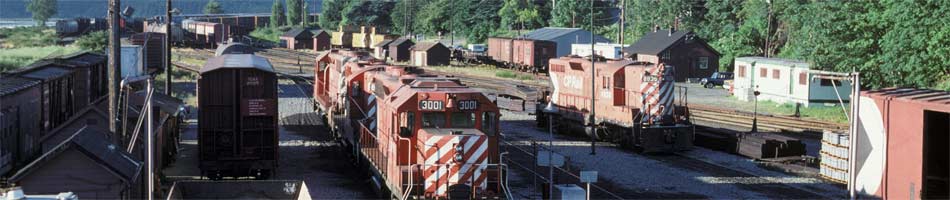
This is the space we had to work with. For the most part, a completely clear space except for a single telepost to work into the layout. The first bit on the left hand side is the stairwell down from the main floor, the area where the wye comes into is my workbench underneath the stairs, and the area to the right of the stairwell is the utilities area – Furnace, Hot Water Heater, and storage area. Currently, we have a Hot Water Tank with an accompanying headknocker for a flue. This will very likely be replaced in the coming months with a tankless Hot Water Heater which should remove the flue. The staging will be entered by trains via a lift-out/swing bridge which is the only restriction for humans to get out of the basement. I don’t like duckunders anymore after whacking my head at CMT!

The Middle Deck - Click here for a PDF
Despite the fact this is the middle deck, it’s actually the southernmost portion of the modelled railway. Staging representing everything south of Nanaimo is in the utility room and along the bottom of the drawing. A wye from staging to the workbench area allows for turning equipment if necessary and to program decoders. Access from staging to the rest of the layout is afforded via a lift-out/swing bridge across the opening to the stairway upstairs. Continuing north through Nanaimo and it’s many switching opportunities, you’ll pass by Wellington siding, ICG Propane and then pass by Bryn and then enter a one turn helix around the dispatcher’s desk and emerge just south of Parksville where you’ll have the opportunity to switch the team track and National Silicates. Just beyond there is Parksville proper with it’s signature junction between the Port Alberni sub and the remainder of the Victoria sub. If you’re going to Courtenay, you’ll pass by FMC and then go down the helix several turns to the lower deck. If you’re going to Port Alberni, you’ll pass by a loading ramp and then go up the helix several turns and into Port Alberni.

The Lower Deck. Click here for a PDF file.
This is the lowest of the three decks on the layout. Coming out of the helix (far right), your train will traverse the Victoria Sub from approx. MP119 through to Courtenay, passing over Roswell Creek, past a ballast pit, through Mud Bay Siding, by Buckley Bay, Union Bay, over the Trent River Bridge, by BC Pole and possibly Dominion Tar & Chemical, ICG Propane with arrival at the end of the line in Courtenay. The trackplan shown above has been updated to remove Qualicum Beach, Dunsmuir and some other bridges which didn’t quite work for the compression that we introduced into the helix.

The Upper Deck - Click here to view a PDF.
Exiting the helix, you’ve just finished climbing up to the summit of the Port Alberni sub, and will cross a couple pile trestles and then begin the descent into Port Alberni. Once in Port Alberni, you’ll have the opportunity to switch ICG propane and leave the rest of the train for the local Alberni Pacific switcher to move cars to their various spots around the three major industries in PA. The Pacifica Paper mill, the Alberni Pacific Plywood plant and the Somass Lumber Mill. You’ll then get to pull all those cars back up to the summit and then to Nanaimo for connections elsewhere. Admittedly, this plan is also a little inaccurate. Since it’s been drawn, Cam and I have found out the majority of the plant switching tracks shown on the right hand side were built in 1990, a couple years beyond the timeframe of the layout. The climb up to the summit on the left hand side of the peninsula has been also moved back into the helix to afford a prototypical grade down to Port Alberni.
More changes will happen I’m sure, but they’ll be relatively minor and I’ll post updates here as I have updated drawings.
Leave a Reply to Gary Cancel reply