Yet another long awaited update…
So…Obviously the thought that I may be a little more frequent in my blog updates was completely and totally ignored. It’s been many many moons since the last update, and of course, I’m still working on the layout. Here’s a rough idea of what’s been going on:
- All the locos in the fleet are now equipped with keepalives. More specifically, they’re ESU PowerPack Minis, and the locos are all Loksound too. I do agree they’re pricey, but they are the smallest, easiest to find space for, and with not needing to be disconnected or switched off during programming, it’s well worth the many extra dollars. Athearn’s released their GP38-2’s and I did acquire one for the fleet and the install of a Loksound Select Direct and Powerpack Mini went quite well. I haven’t had a chance to actually run it in service though because:
- COVID-19 struck about a year ago, and while I was working for most of the time, there was about a month and a half where I was working 4 days a week instead of five. With that extra day off each week, I figured I’d bite the bullet and actually redo the entire staging yard to support Marine Interchange. More on that specific bit shortly, but with the scalehouse coming to the layout, and a bunch of extra time, I figured it would be well worthwhile to add some more operations to the layout and am adding a ferry slip. To do that necessitated a full on lifting of the majority of the trackage in the yard and laying it again in a different configuration. I’m also making the yard slightly more reminiscent of the prototype, though only in that the caboose track is going to be adjacent to the scalehouse, the engine service and RIP tracks are going to be present, and I’ve got a pair of team tracks to service. I also sold off four 40/30″ radius curved turnouts as they wouldn’t fit along with a funky crossover. The remaining turnouts were repurposed elsewhere in the yard and more than a few new turnouts were made, including the acquisition of yet another turnout assembly fixture from Fast Tracks capable of building curved #8 25/32″ radius turnouts. I built a few of them, including one during a Facebook Live event. At some point when the layout is clean, I’ll possibly take some pictures and post an updated track plan.
- As indicated above, I decided that I really, REALLY, wanted marine interchange. This goes back to the early track plans where I had planned on having a boat to switch, but had to give up after discovering a few gotchas during the building of the layout space. After doing more than a few switchings of the Doris Yorke and the Trailer Princess at David Bedard’s place back when he had the E&N, I wanted it still for myself. On the prototype back in the day, the Seaspan Doris and the Carrier Princess were the primary boats doing the work of transporting railcars between Vancouver and Nanaimo. I do admit, I was tempted to get the Doris Yorke from David when he was selling it, but decided that I really wanted the Carrier Princess instead. So I’m going to be building a scale model of the boat and putting it on wheels so I can actually “sail” it into and out of a ferry slip that is going to be roughly underneath where the middle deck Victoria Sub goes into the helix. This will allow me to give more work to the Nanaimo switch job – they’ll be responsible for unloading and loading the boat, classifying the cars going to the Port Freight, the Courtenay Turn and the Nanaimo switch job. I have my doubts that I’ll be pulling and spotting traffic that headed to Duncan and Victora though. The yard isn’t big enough for all of it.
This is going to require my spray booth to find another home – quite possibly out in the garage or perhaps even in my office upstairs. - In the rebuild of the yard, I decided early on that I wanted the ability to control the turnouts from touch panels. This eliminates the need for operators to know the switch numbers and for me to build physical panels. With all the turnouts being controlled by servos driven by Quad-LN’s from Tam Valley Depot, it should have been an easy thing to do up. Except…Well, let’s put it this way. I should’ve been able to have this entire yard done and controlled months ago if it weren’t for a number of things being problematic, like my Locobuffer-USB missing commands, the Zephyr command station not putting enough voltage into RailSync, the old iPad I acquired for the purpose not being new enough to handle the panels JMRI was handing out, and changing out the layout computer to one that is a little faster and equipped with more memory. It’s been very frustrating at times, but thankfully, everything is now properly working. I’m still working on the panels, but that should be completed reasonably soon.
- I’ve found a number of the servos in Port Alberni to be hanging from the layout every now and then, because the double sided tape I was using to hold them to the layout was losing it’s bond under the heat from the servo. Cam has been on my case for a while about getting a mount made for them so I can screw them to the layout. With the help of Chris Caswell in Nanaimo and his laser cutter (he runs BC Robotics), I’ve managed to design, prototype and make a bunch of three piece wooden mounts that are absolutely brilliant at having a servo do the work it needs without requiring a huge amount of space to do so, but yet providing a neat ability to adjust the position of the servo if needed after screwing it into the benchwork. My friend Andrew Underwood has these installed on his small switching layout and really likes them. I like them too…so much so that:
- I’m going to pull all the bullfrogs from the layout. I’ve already replaced the lower deck of the layout with Tortoises controlled by the Signalogic Systems Tortoise Controllers and Switch Control Panels, and will be replacing the remaining bullfrogs with servos due to the deck height limitations. This way, I can have all the turnouts (save for the ones in the Wellcox yard) controlled by a common interface that provides for route indication from the fascia.
- I finished up the process of acquiring, stripping, painting and decalling of a bunch of 50′ Proto2000 Flatcars into CP Rail Action Red. I now have proper spacer cars for the loads of poles coming out of the Courtenay Area. Also acquired a lot of Action Green boxcars for paper service. I still have two cars that I bought undecorated to suitably modify, paint and decal. Just need some pulling eyes to complete the modifications…Which leads me to my next point:
- I’m getting a 3D printer. David pointed out the fact the Elegoo Mars printers (he has a pair of them) were available on sale at Amazon for just $220, delivered, and I couldn’t really pass it up. Add a bottle of resin, a UV Curing lamp, cabinet for said lamp, and you’re virtually all set for less than $300. Plenty of detail parts will be coming from that over the next while, and perhaps even a caboose? It’ll be a rabbit hole to be absolutely certain!
Maybe, just maybe I’ll find more time to do updates to the blog, but this will do for the time being. See you in a couple years!
Lots of time, some progress
Yup. Still neglecting the blog.
But not really neglecting the layout.
It’s been over two years since the last blog post and I’ve managed to accomplish a few things:
1. Lighting. While the room lighting hasn’t changed (it’s still quite bright fluorescent at 6500K temperature), I have installed all the lighting for the lower decks. It’s all LED strip lights, stuck to narrow strips of white coroplast, and dependent on how deep the deck is determined whether I lit with one strip or two. 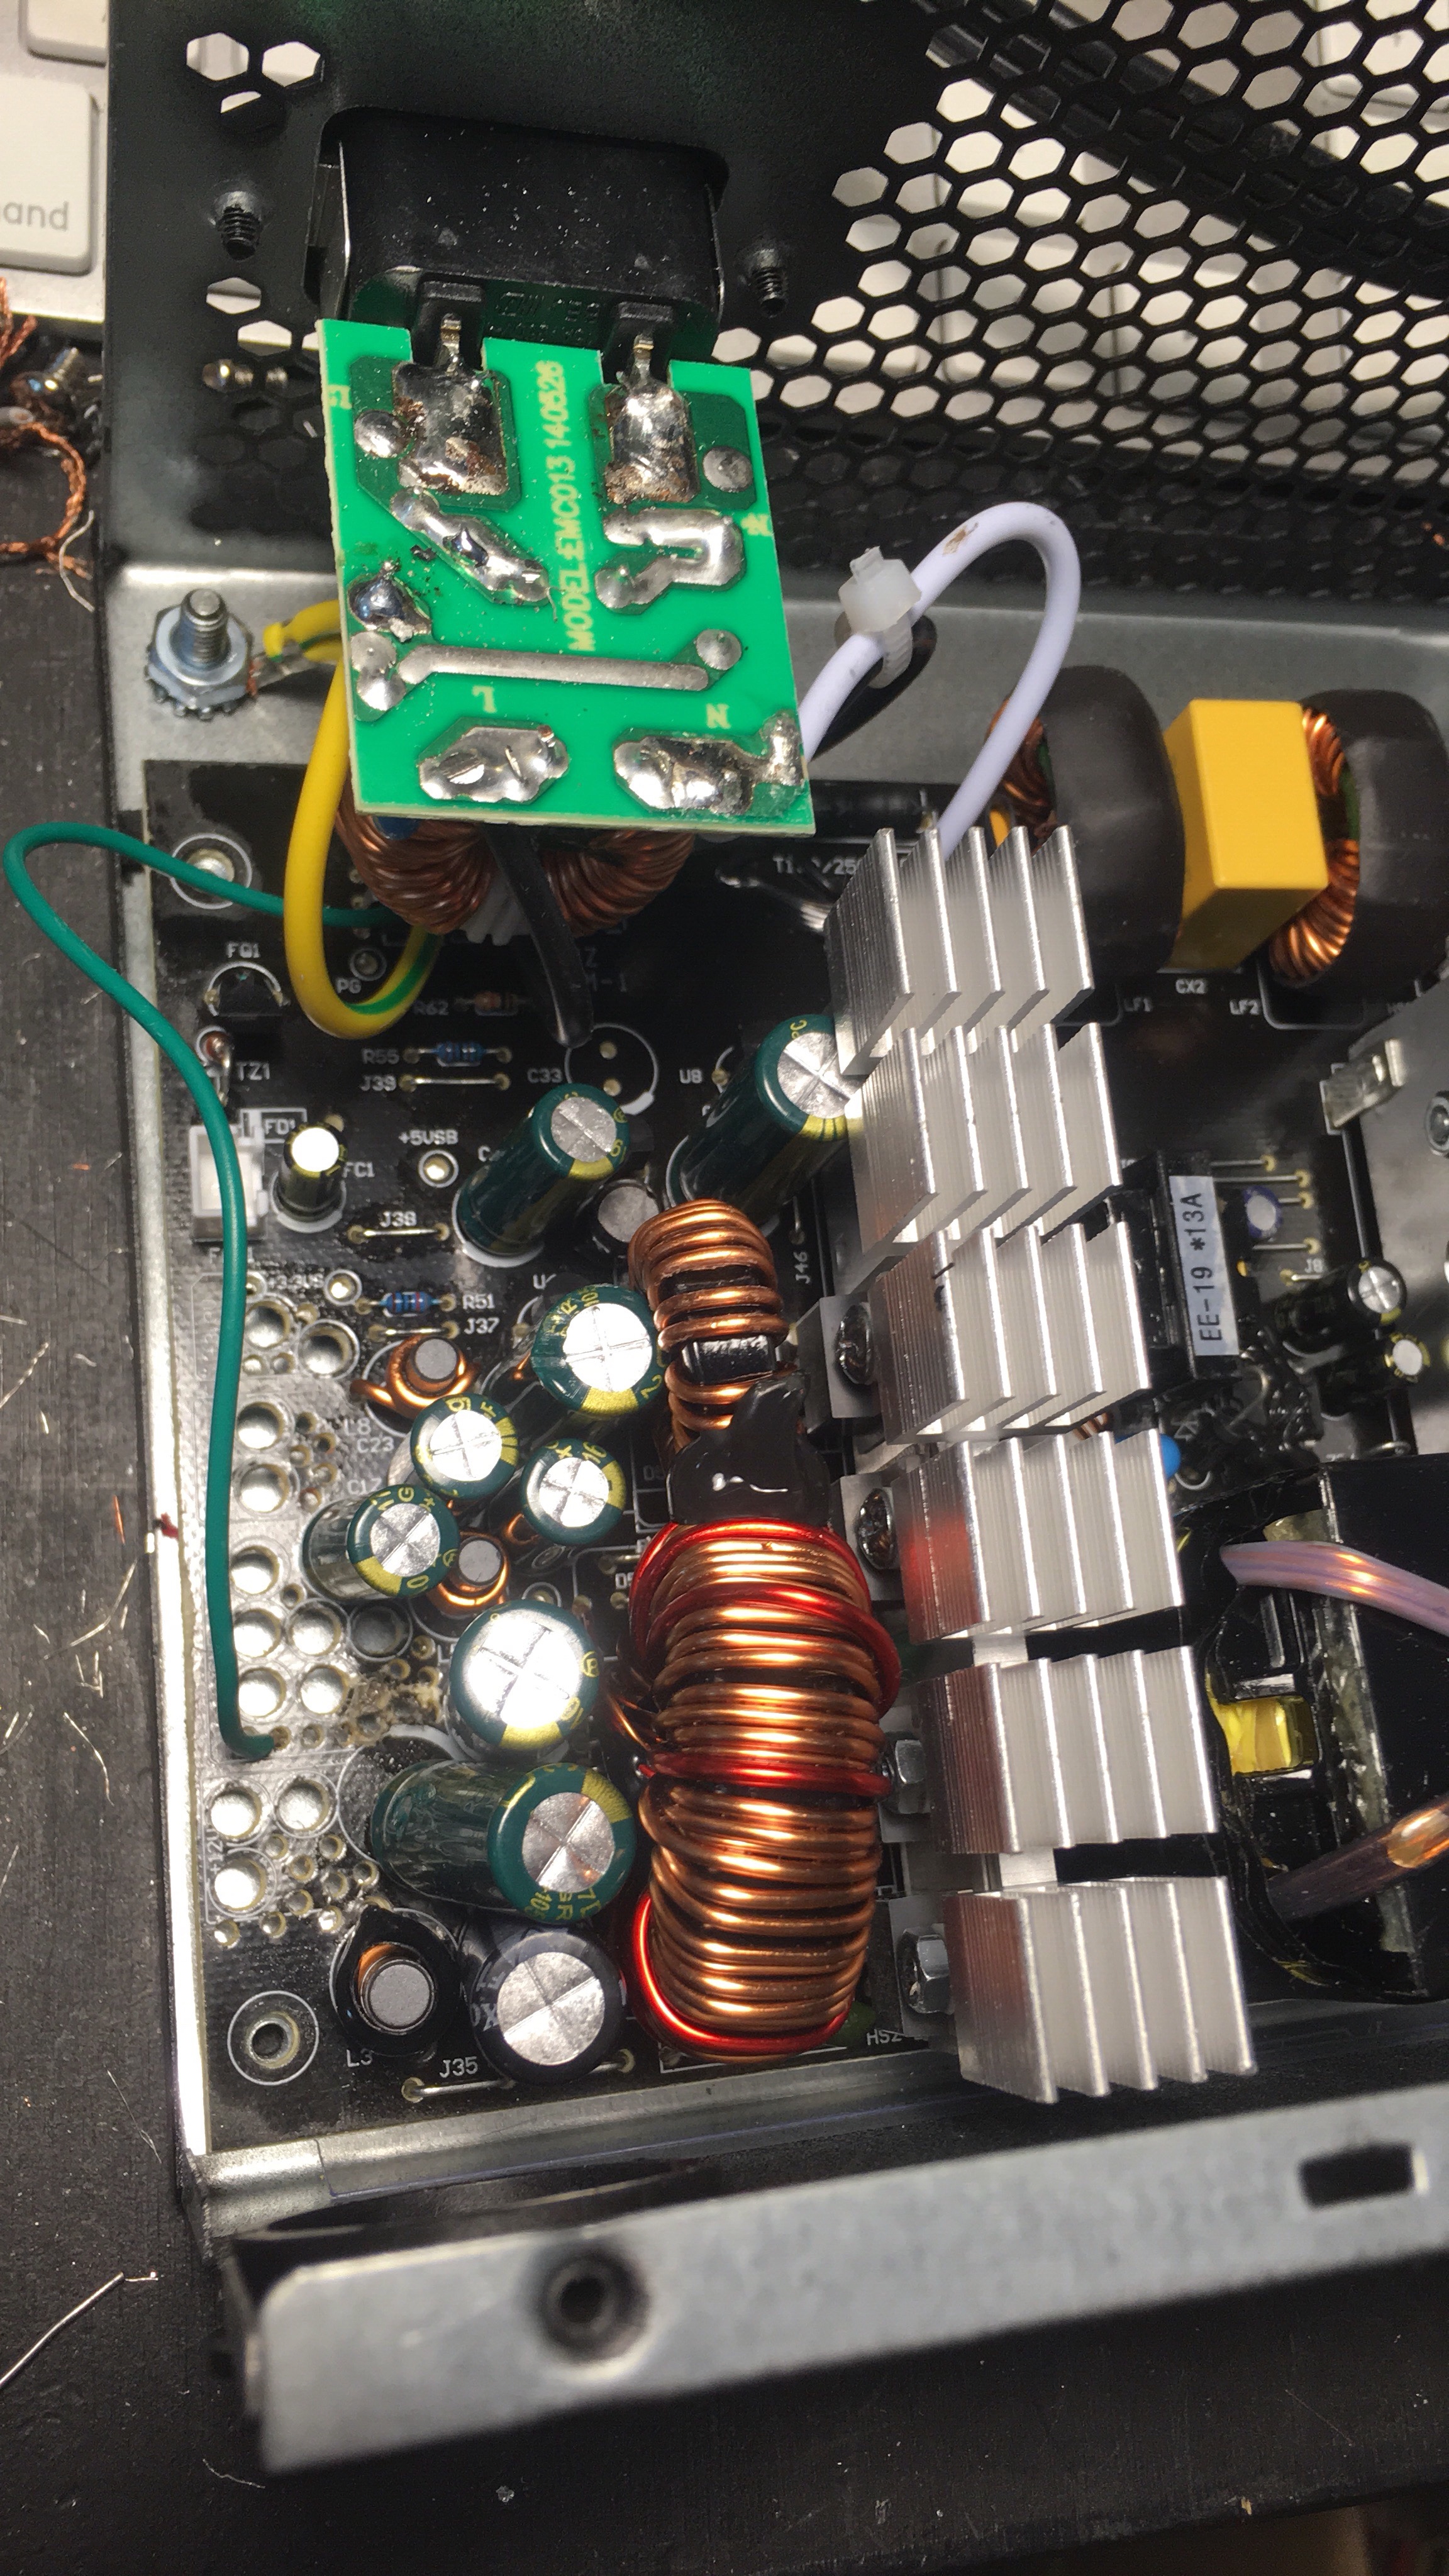
I also needed to power the many many meters of LED’s, and wasn’t terribly interested in using cheaper power supplies from China due to the noisy fans. I also happened to have a spare 625W ATX computer power supply kicking around not doing much so I decided to pop the cover, unsolder the loom of wire off the main board and then hook up some beefy wire to a terminal strip on the outside, where I connected the bus wire coming from the LED’s. Not coincidentally, the power supplies are located near the rest of the electronics, primarily because that’s a central point for everything. I did realize rather quickly however that the one power supply was not going to be enough. Another supply, this time 700W was purchased and similarly modified. At this point, Cam and I wondered it if wouldn’t be a bad idea to actually put these two power supplies on their own dedicated circuit in the breaker panel since they were going to be drawing so many amps….I figured it would be a good idea and had a spare breaker but no desire to bust open drywall to install the wire for it. I made some inquiries and found armored cable could be mounted on the surface and legally used, so we acquired more than a few meters of 14/2 BX, a surface mount box and a couple of switched receptacles, and had the entire shebang installed in an afternoon. Further work and testing proved all was good.
2. The ballast spur near Mud Bay siding has been removed. We’re now moving towards scenery and it was getting kinda awkward with how it was going to be done that far back, what with the half-loops of track behind there.
Besides, the ballast for the island was typically loaded out at Fiddick’s pit, south of Nanaimo. So, Cam and I removed the entire shebang.
3. I’ve had a few ops sessions, and for the most part, they’ve gone really well. One of them was for the guys from Rapido Trains, which included Jason, Dan and other Dan. Oh yeah, and Dan Hamilton was in on it too.
I do realize that despite my best efforts with track cleaning and wheel cleaning that I do need to install keep alive’s into the fleet as sound cutting in and out is REALLY annoying. It’ll be fun I’m sure…
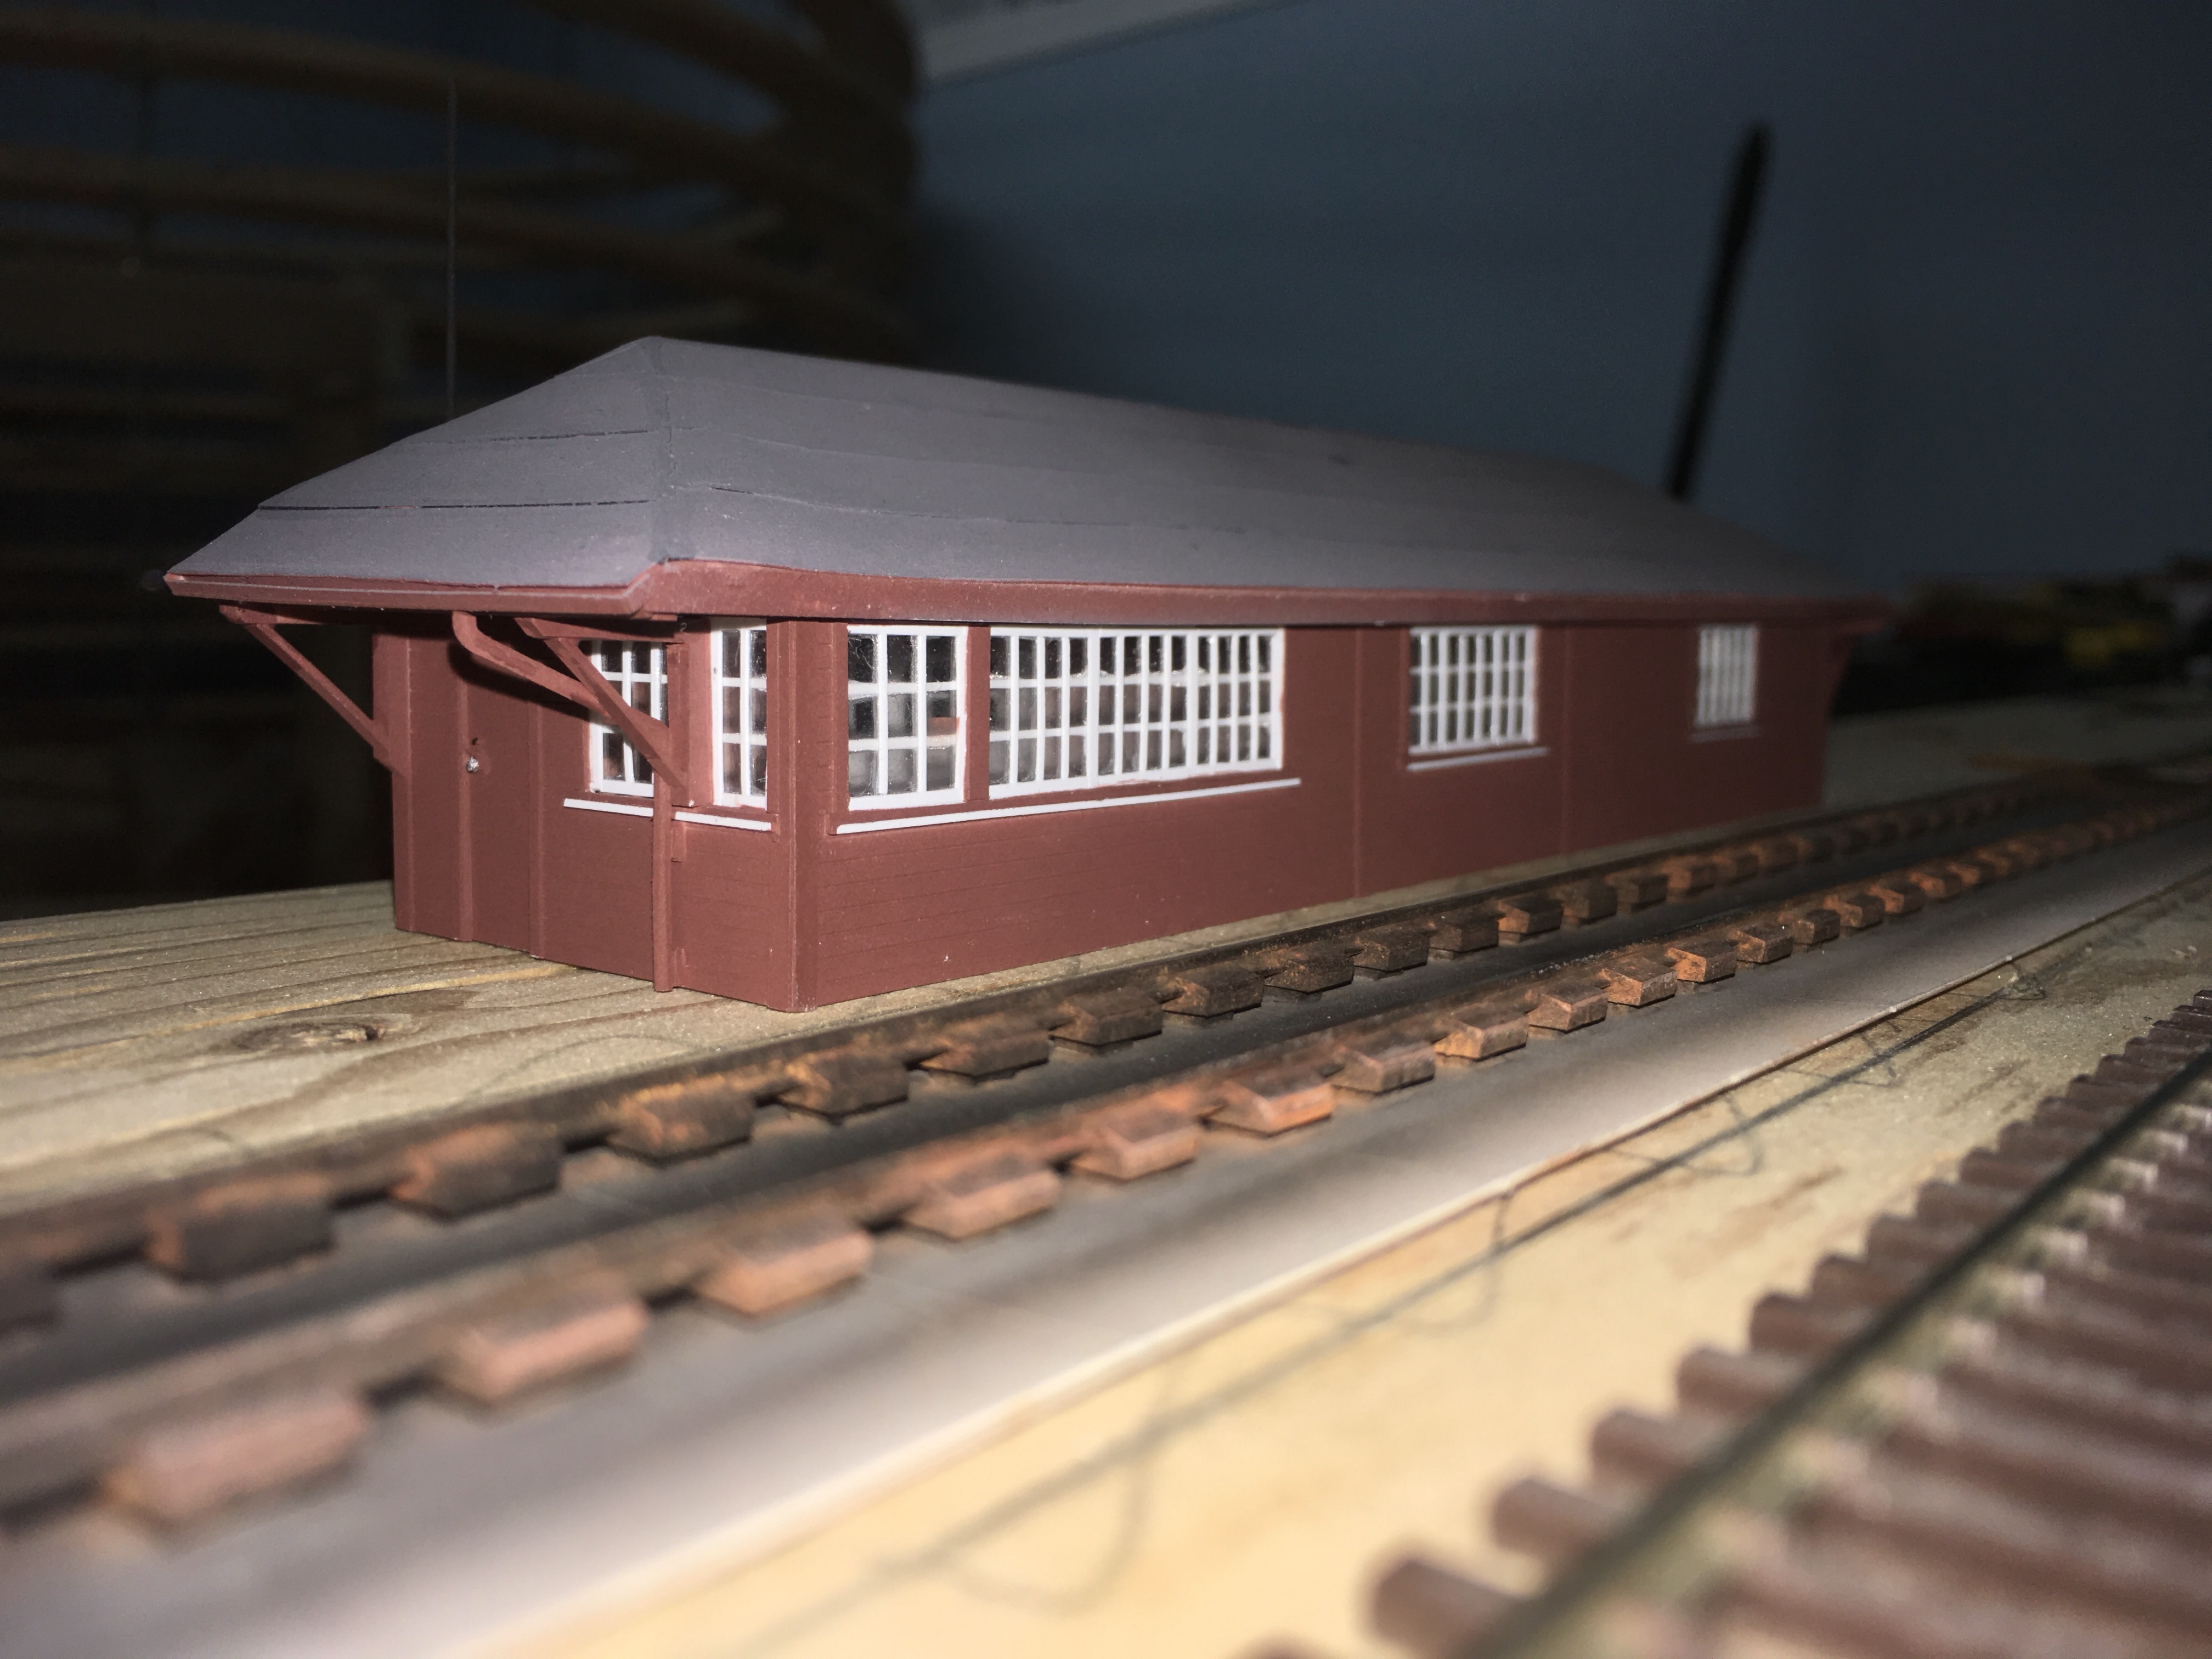
4. I built Parksville Station. Many and huge thanks to David Bedard for providing the tips, assistance, and overall inspiration to build it!
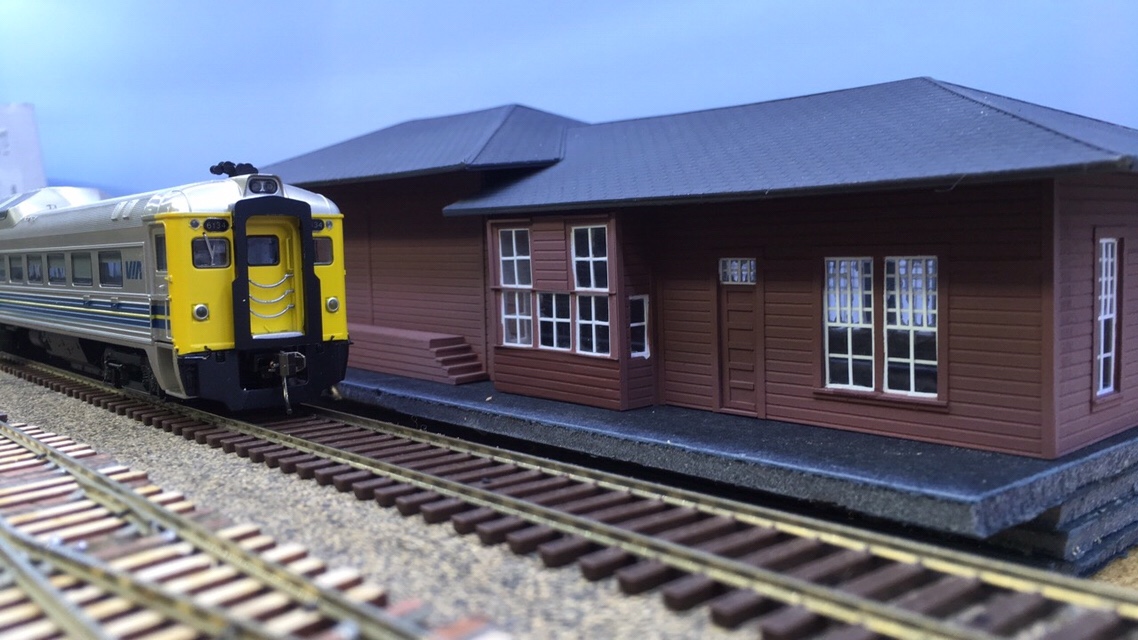
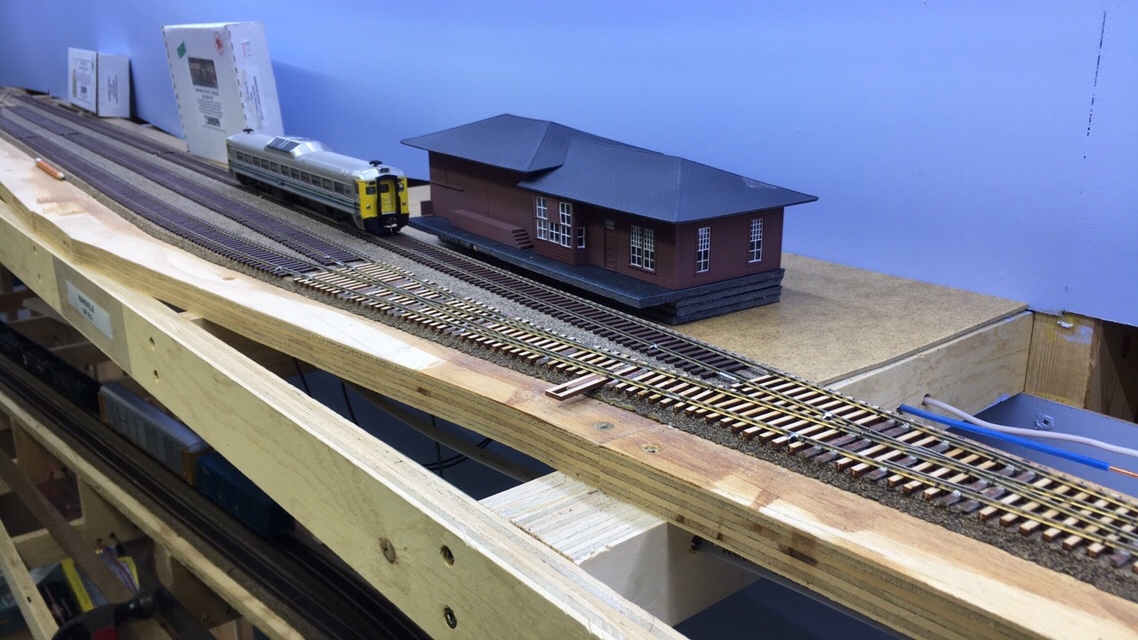
I still need to build a foundation to sit it on, plus a walkway and platform at some point…(plus everything else there!) I’m really happy with this one.
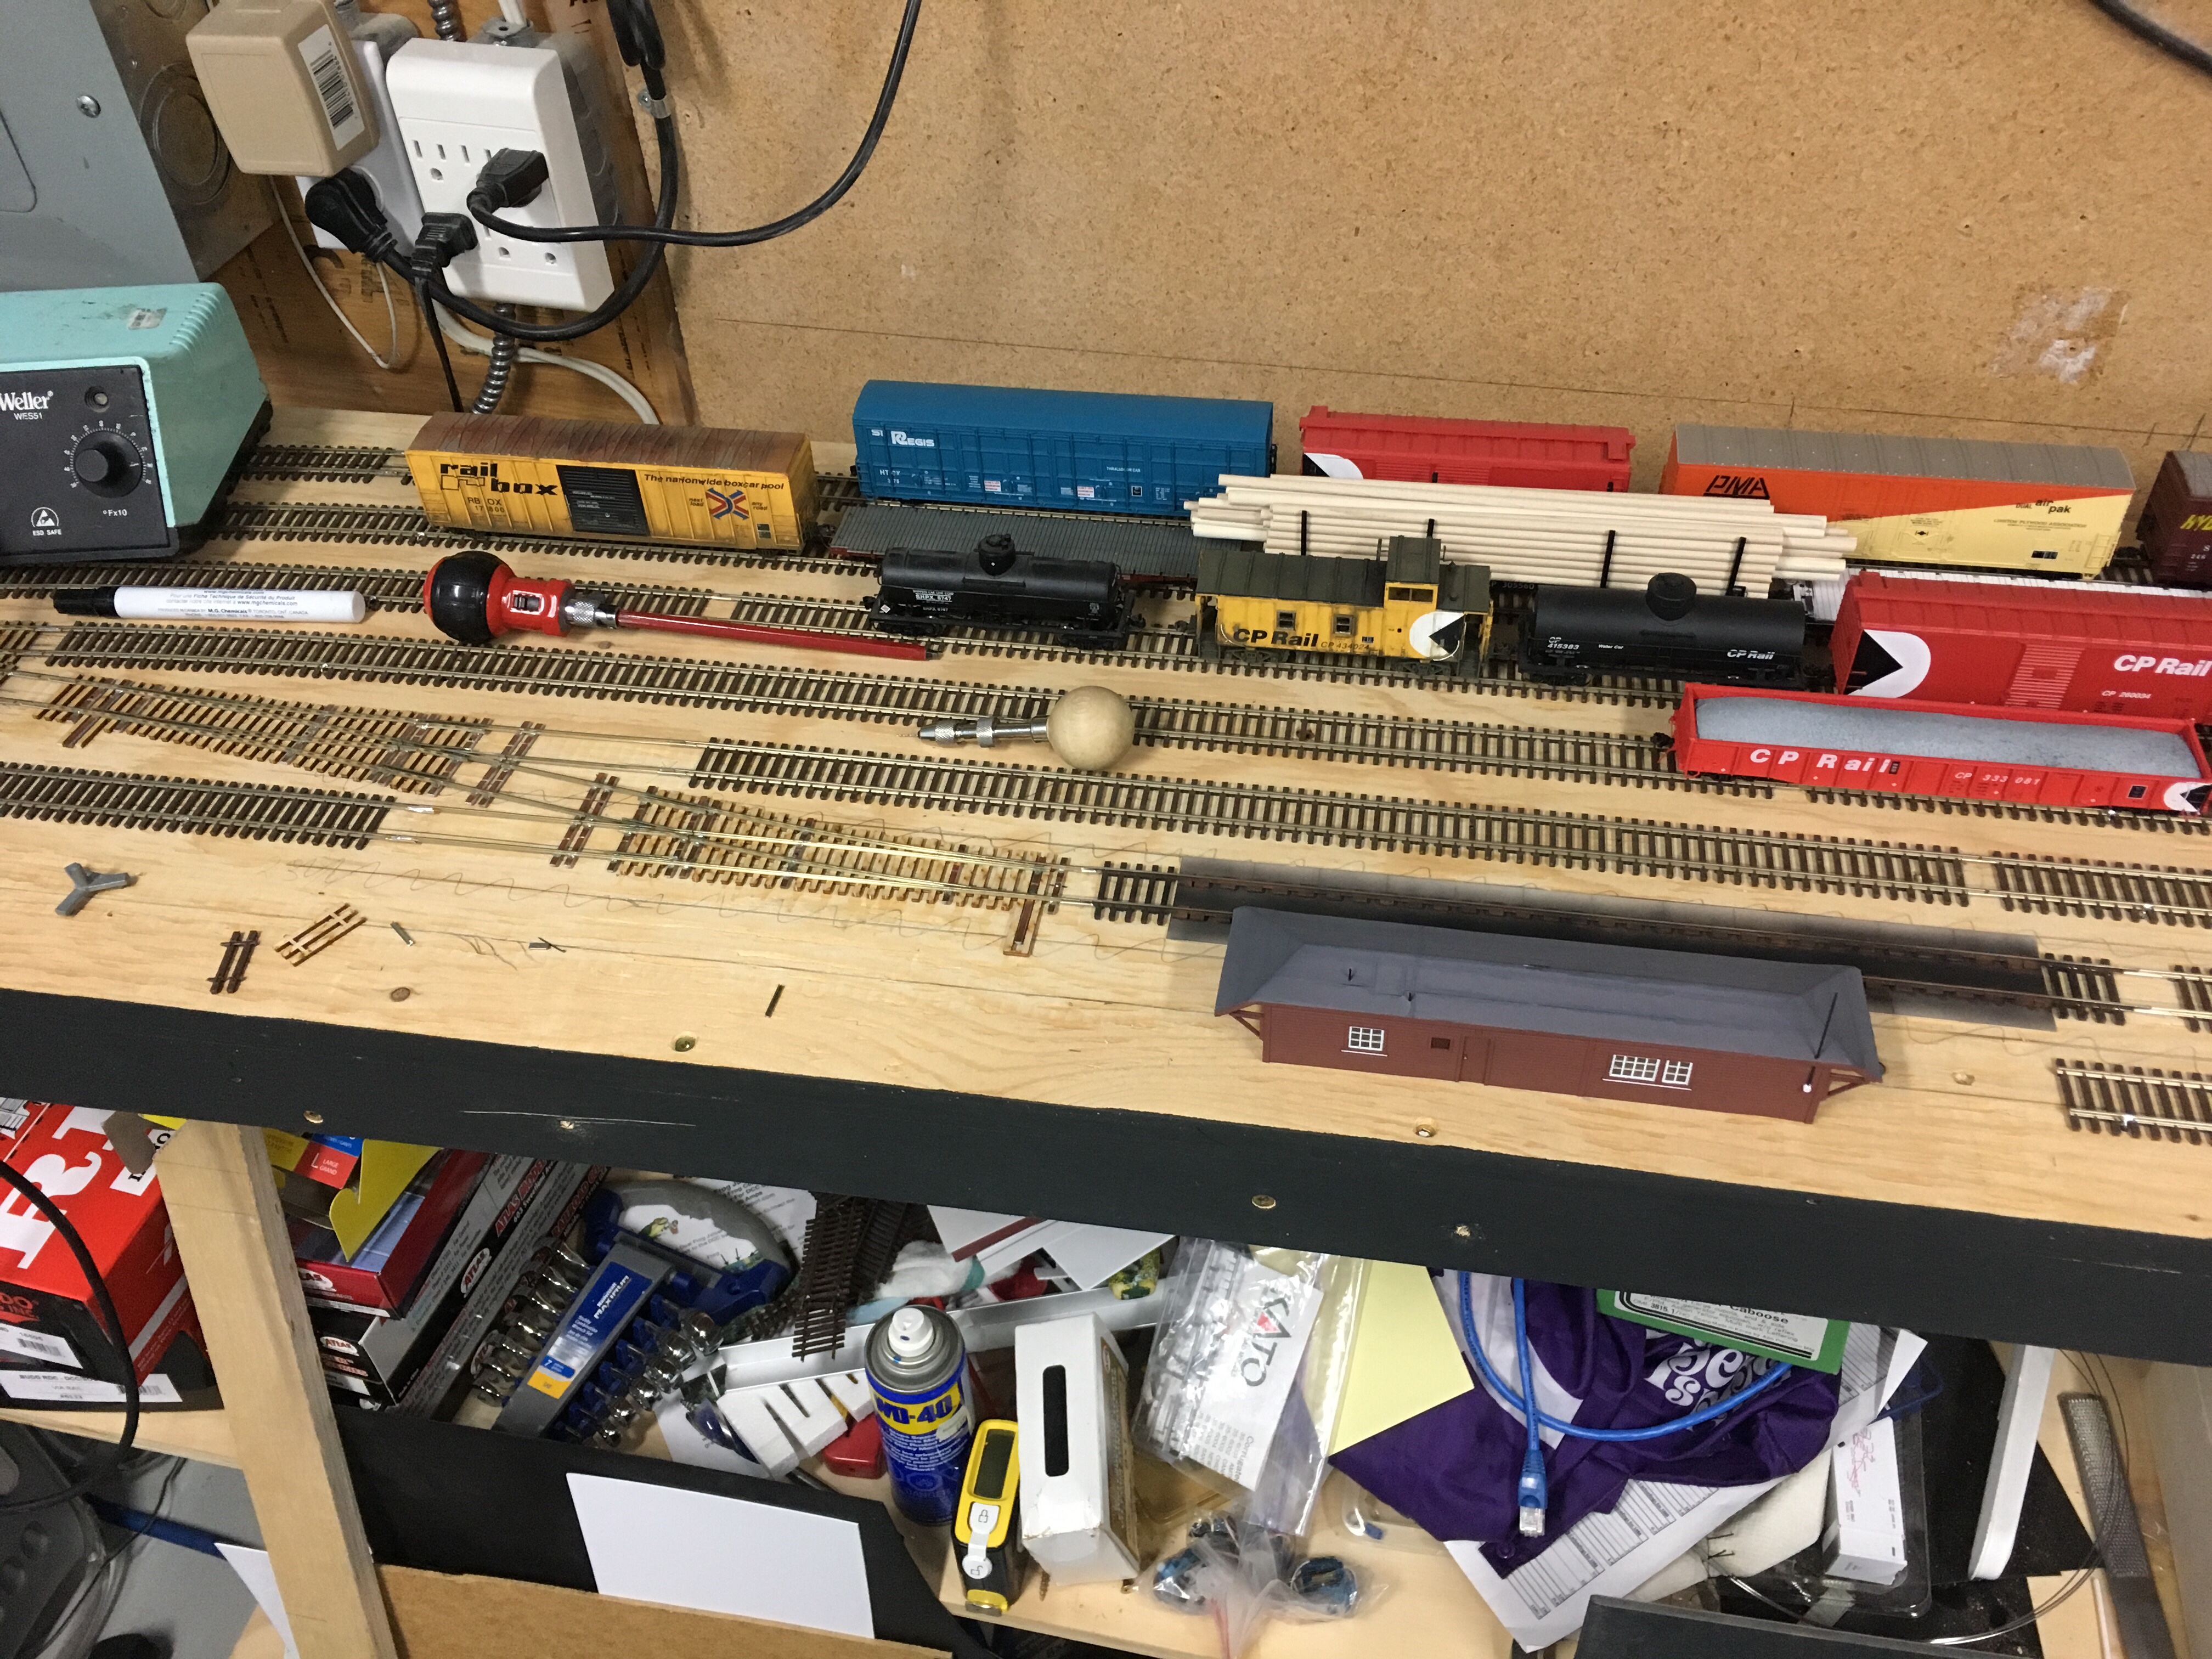
5. Speaking of David…he’s decided to change locations for his layout and as a result, all the structures plus the magnificent boats he scratchbuilt are going away. I bought the Wellcox Scale House (complete with scale track) plus a couple of the shelters which I’ll put to use on the layout and spent a bit of time quite recently installing. The crossover beside the scale track is also brand new to Wellcox and was just finished this afternoon.
So lots more work to do…
But now that I’m retired from the SUPERTRAIN Committee, I’m looking forward to putting more time into the layout. And maybe…just maybe I’ll also update the blog a little more frequently too.
Have I neglected my blog or what?
I’ve got a fair bit of time now to bring you guys and girls up to speed if you haven’t been able to see the layout in person, though I don’t know how many photos I have on my phone to share. Anyhow, here’s the story.
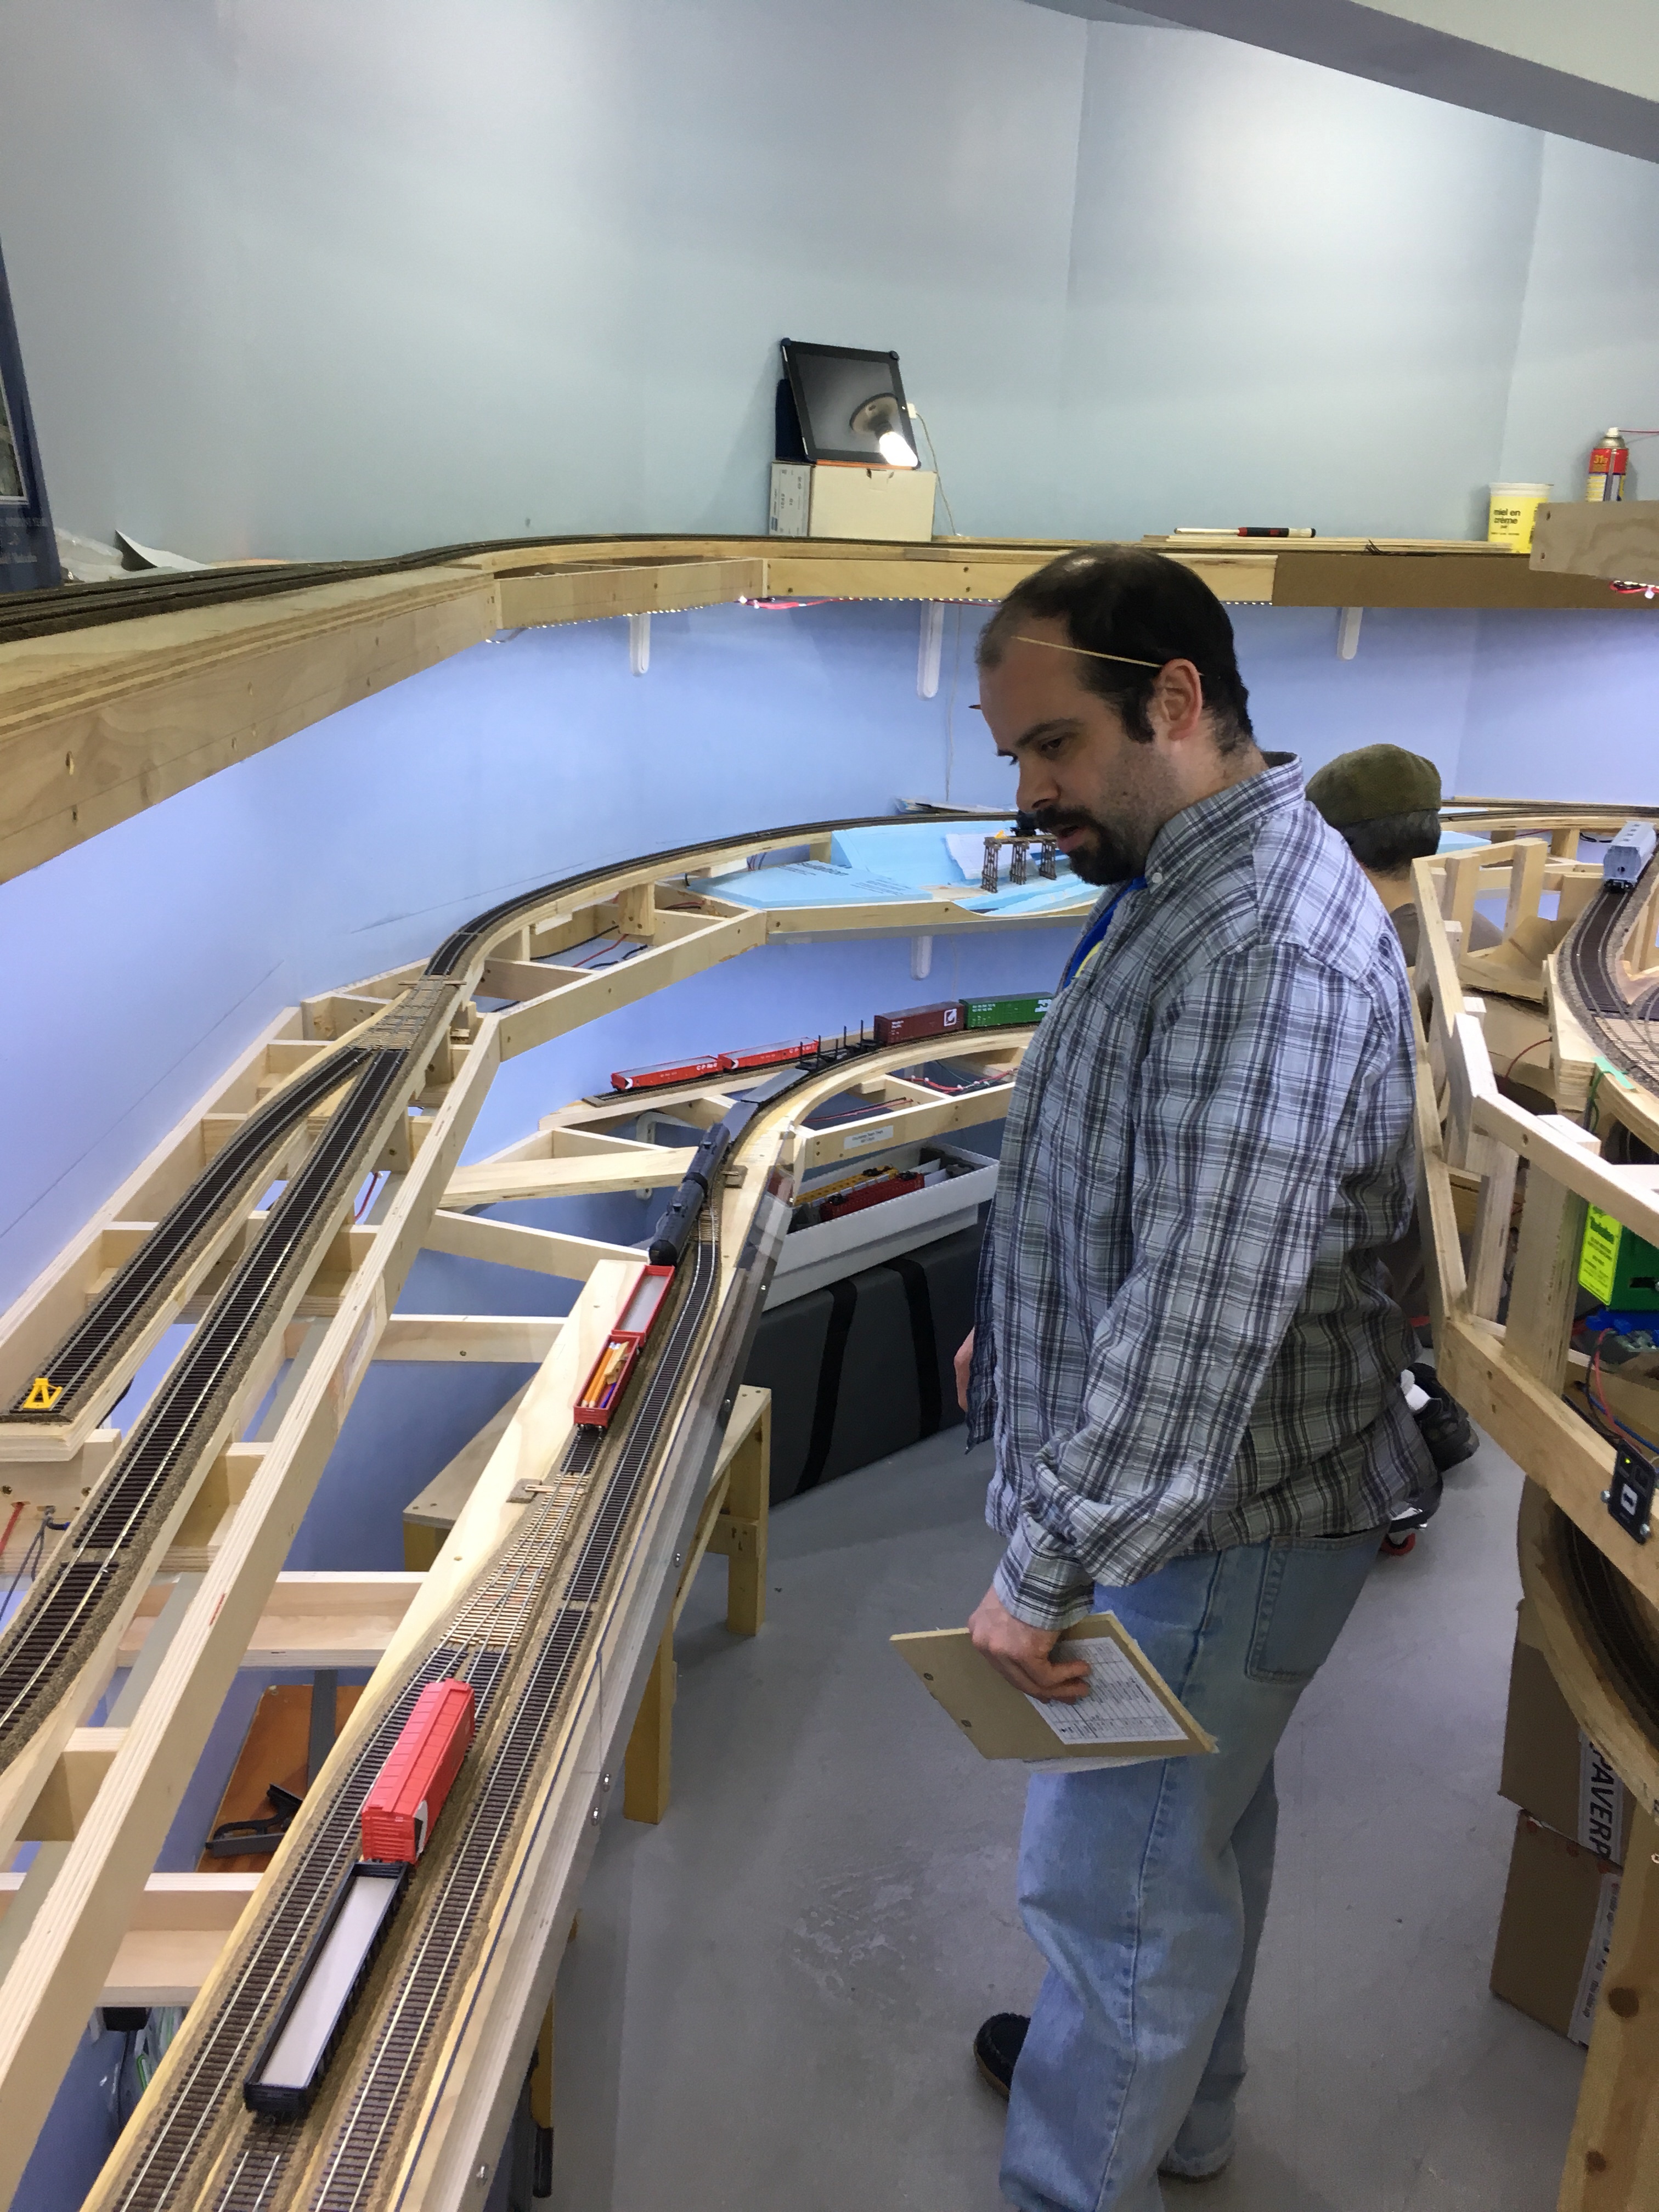
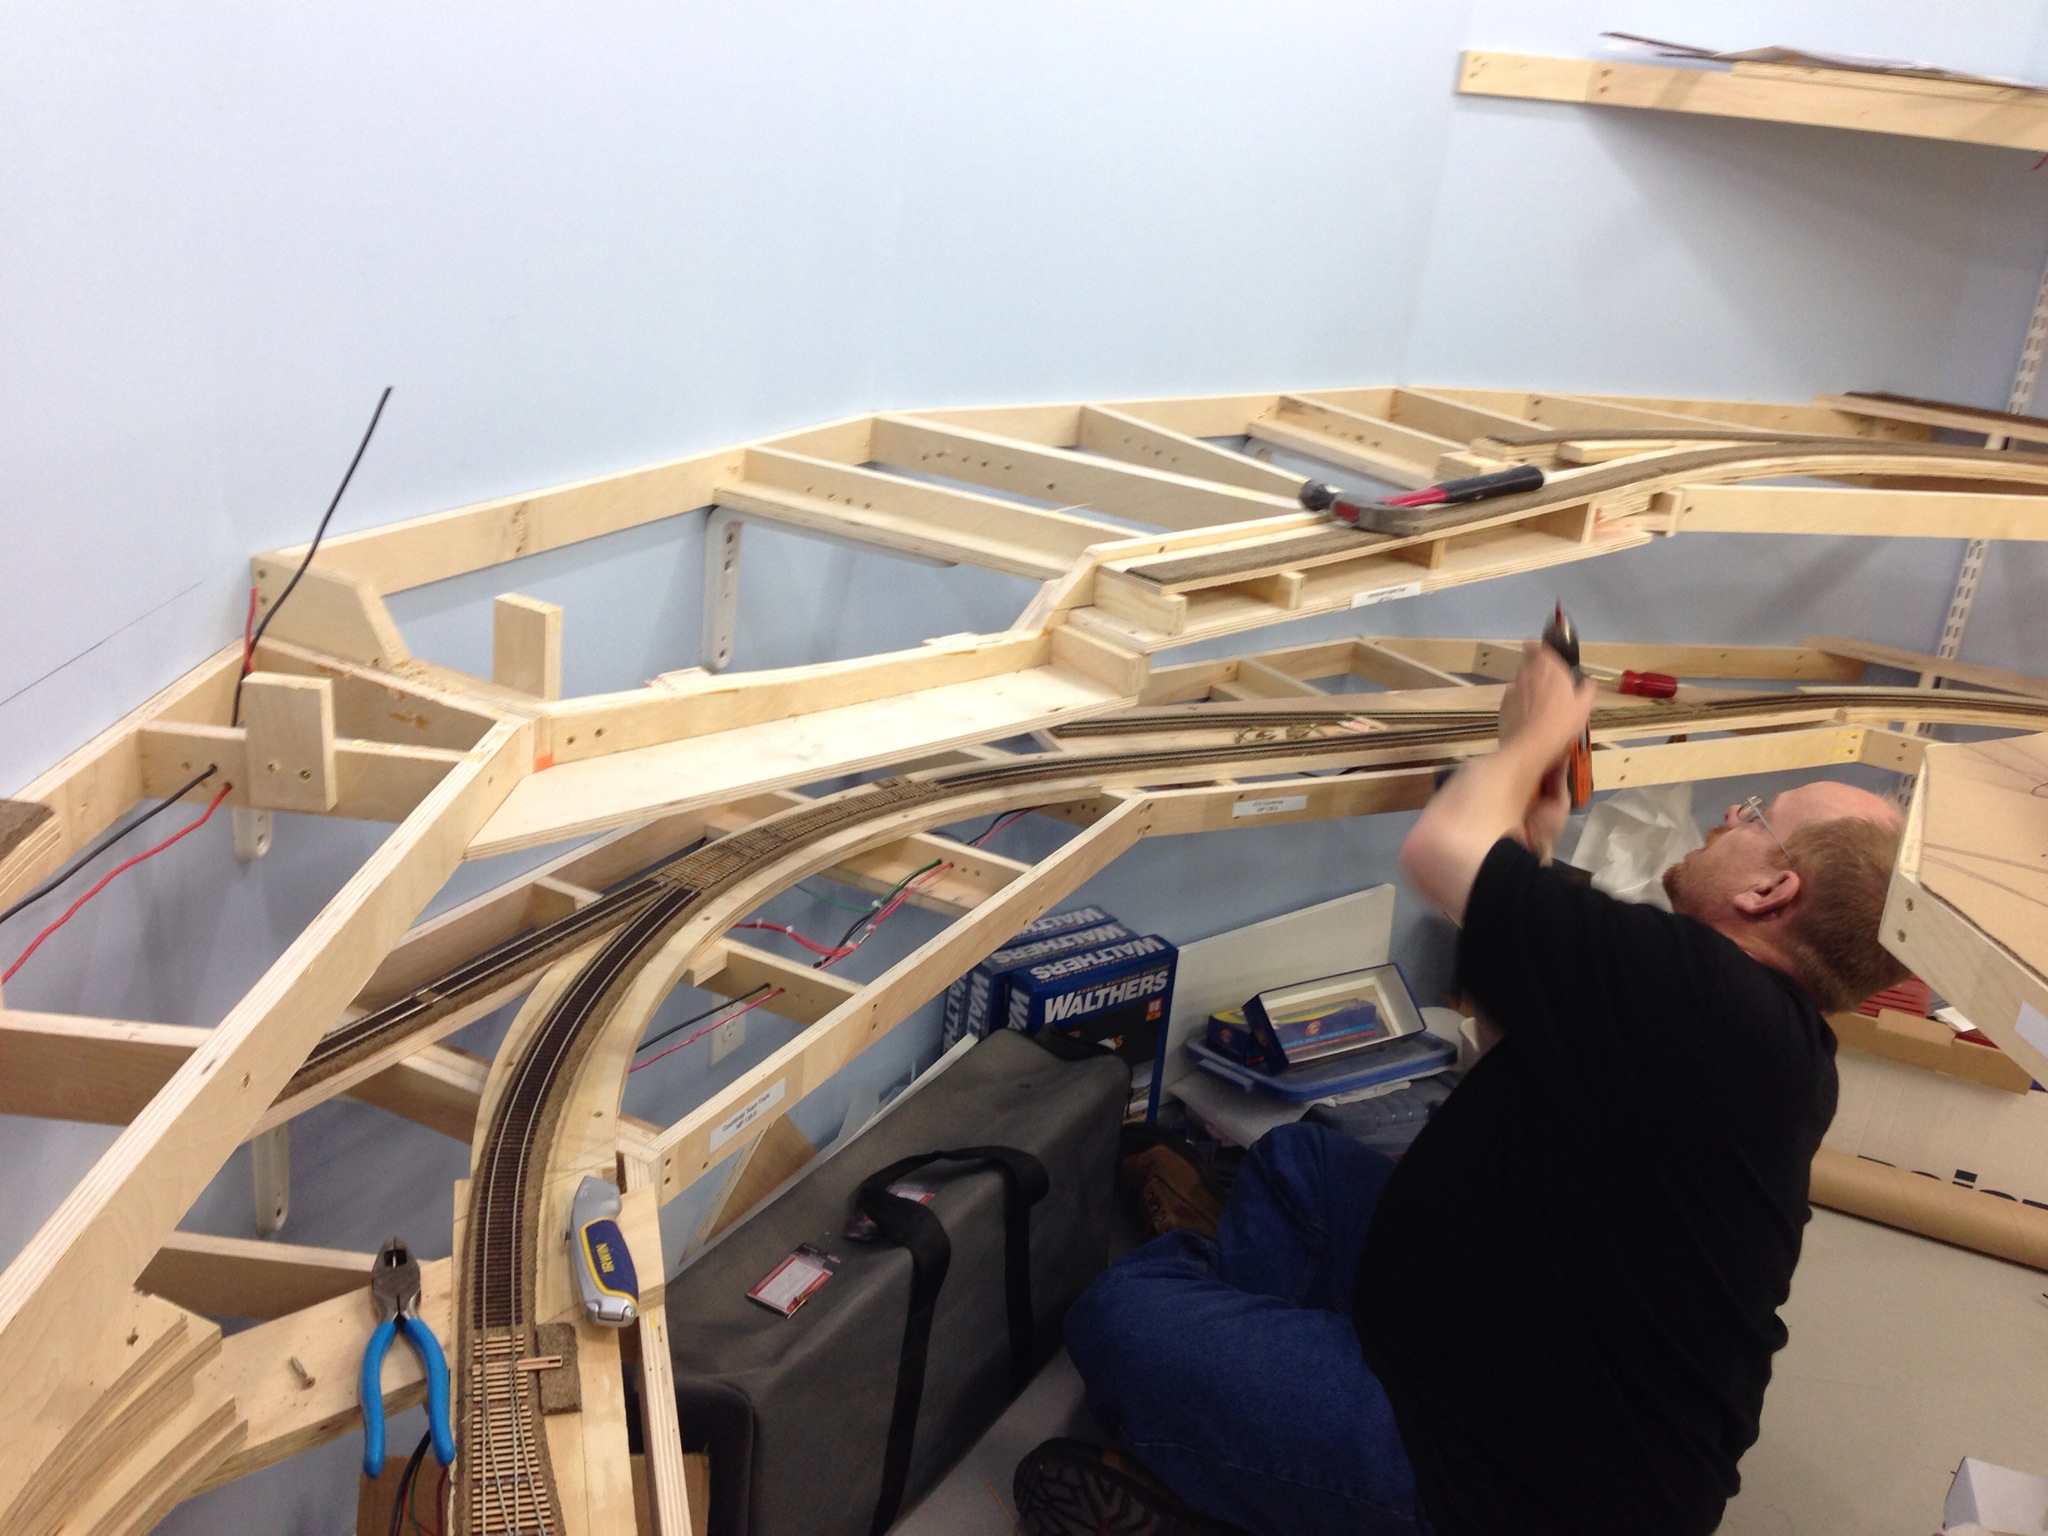
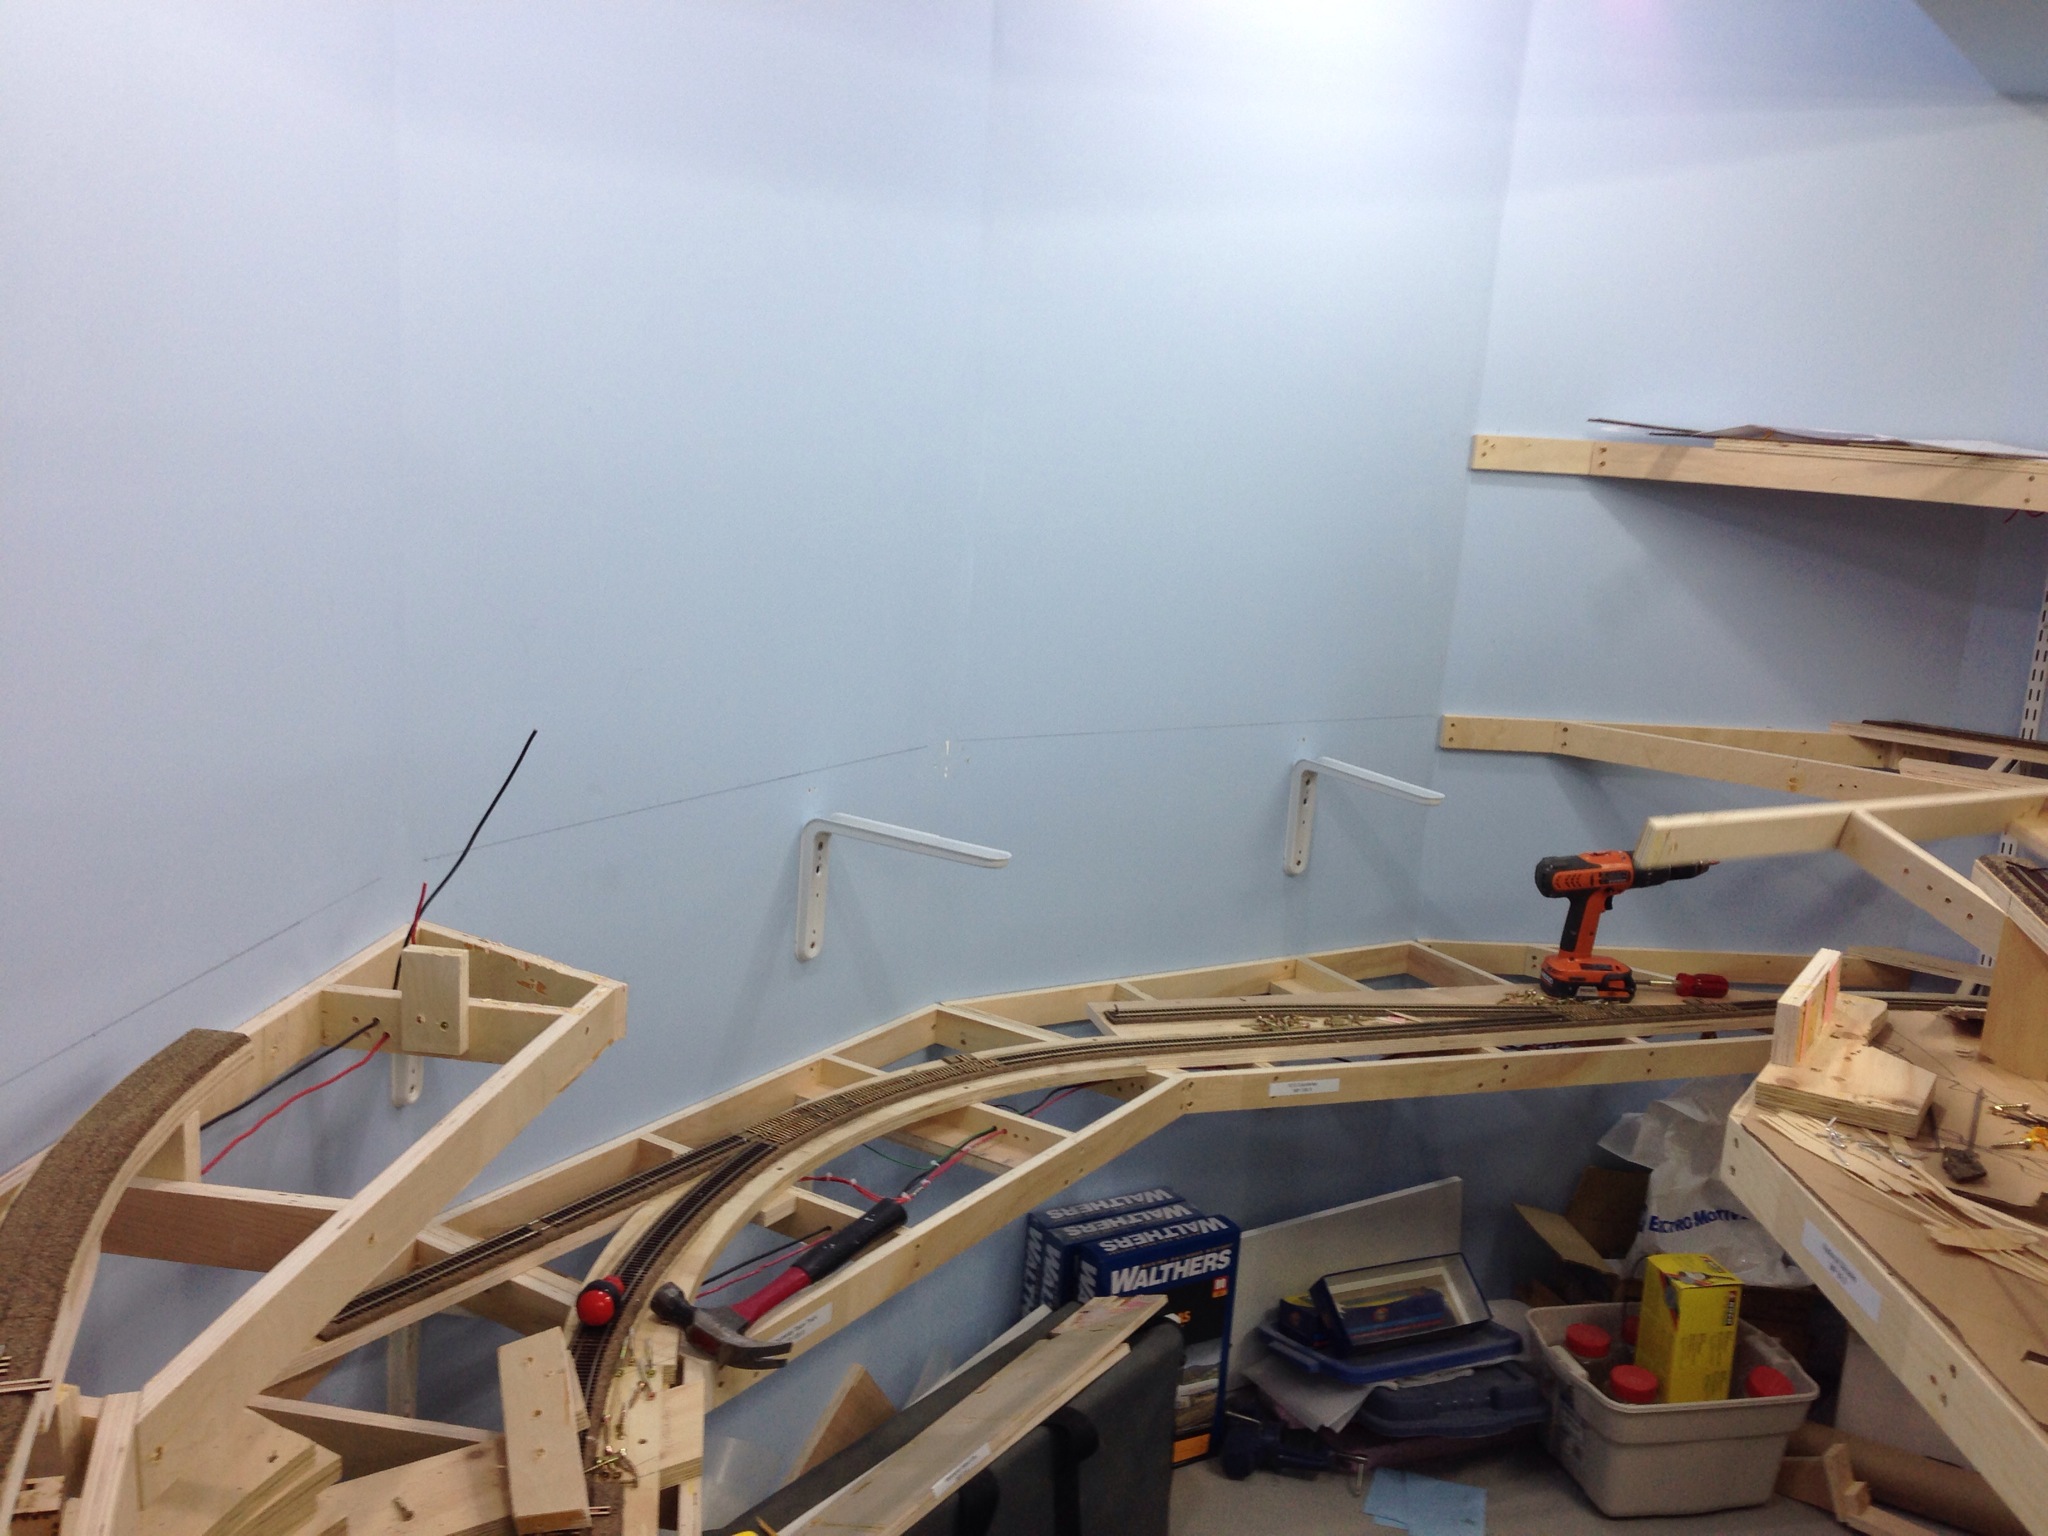
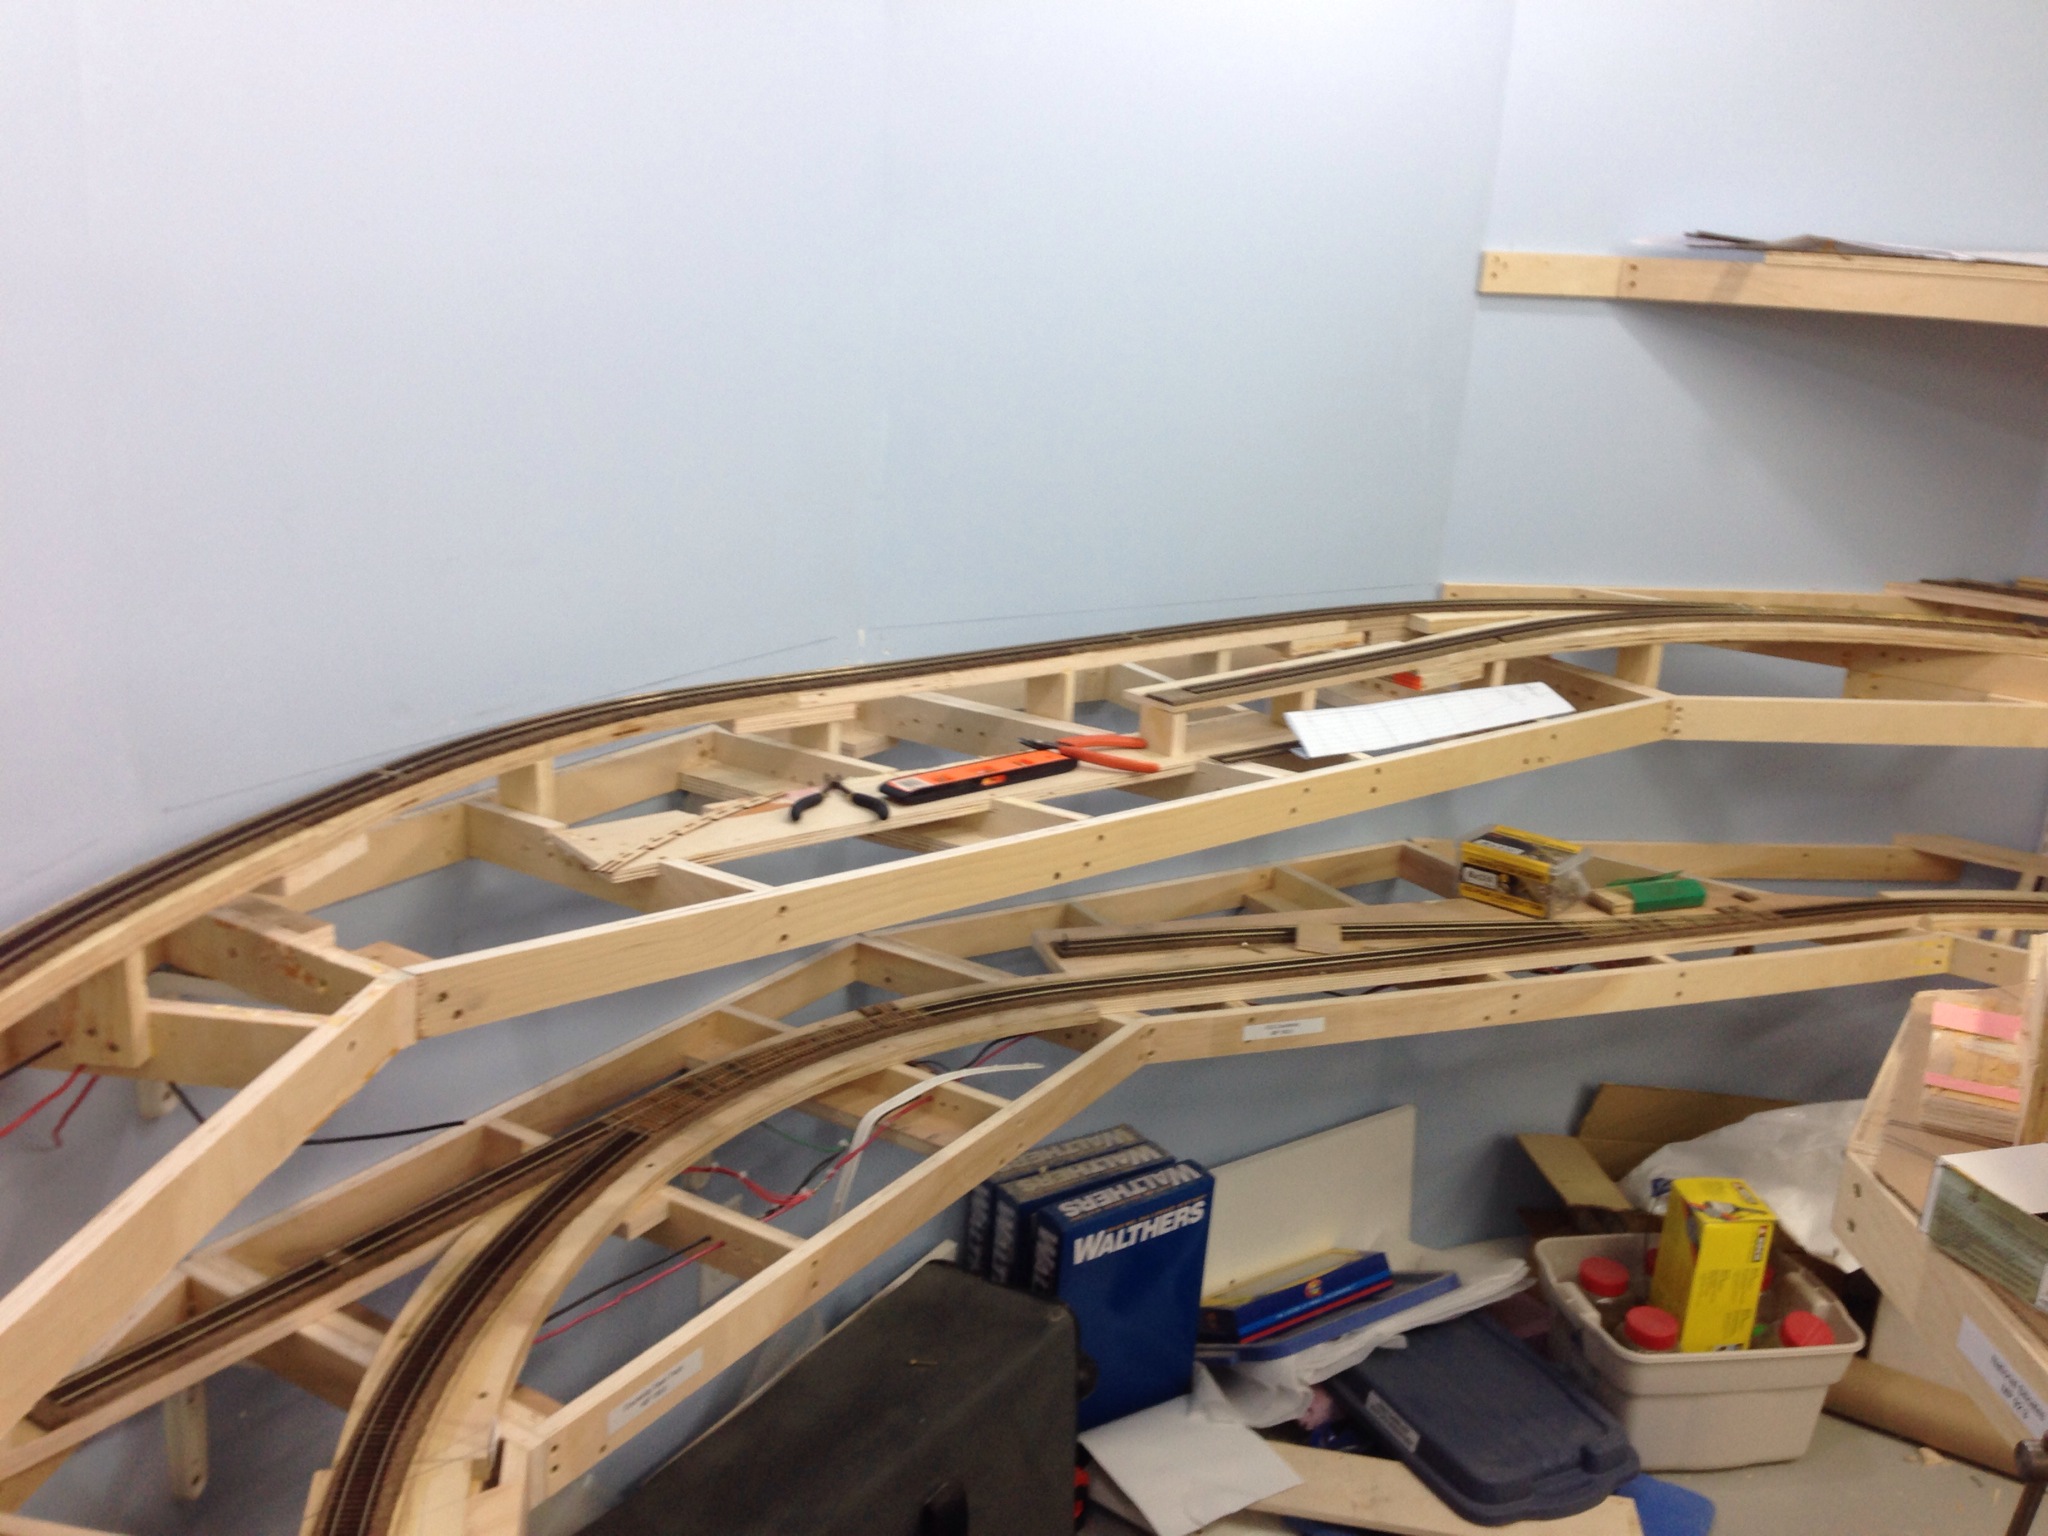
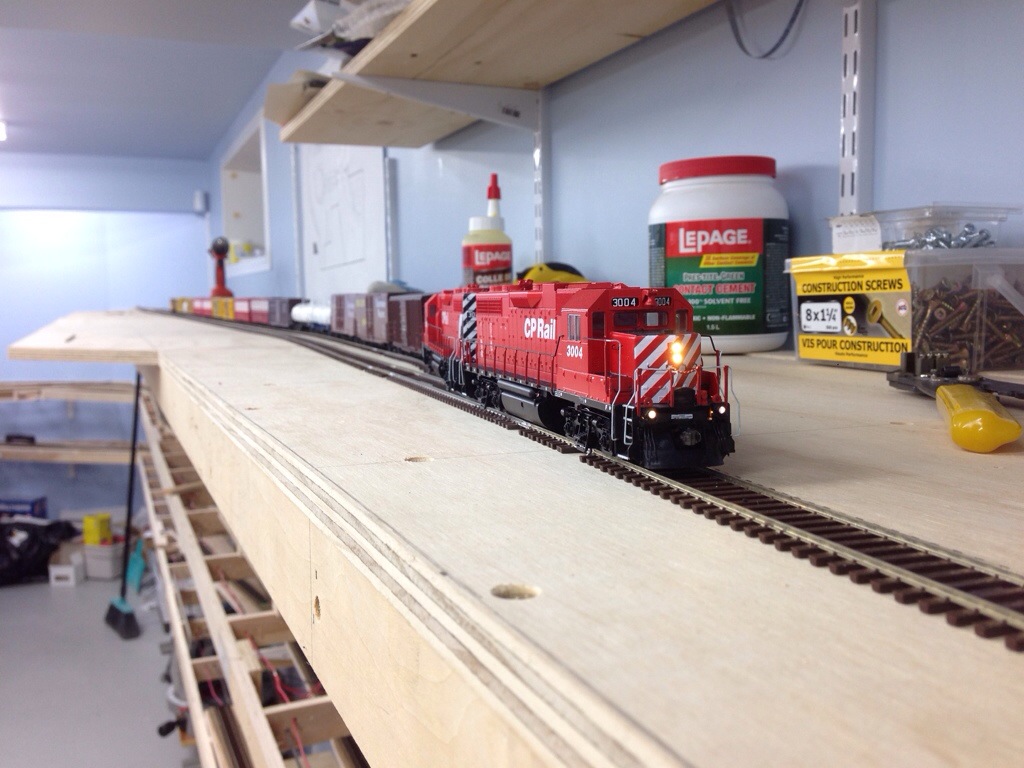
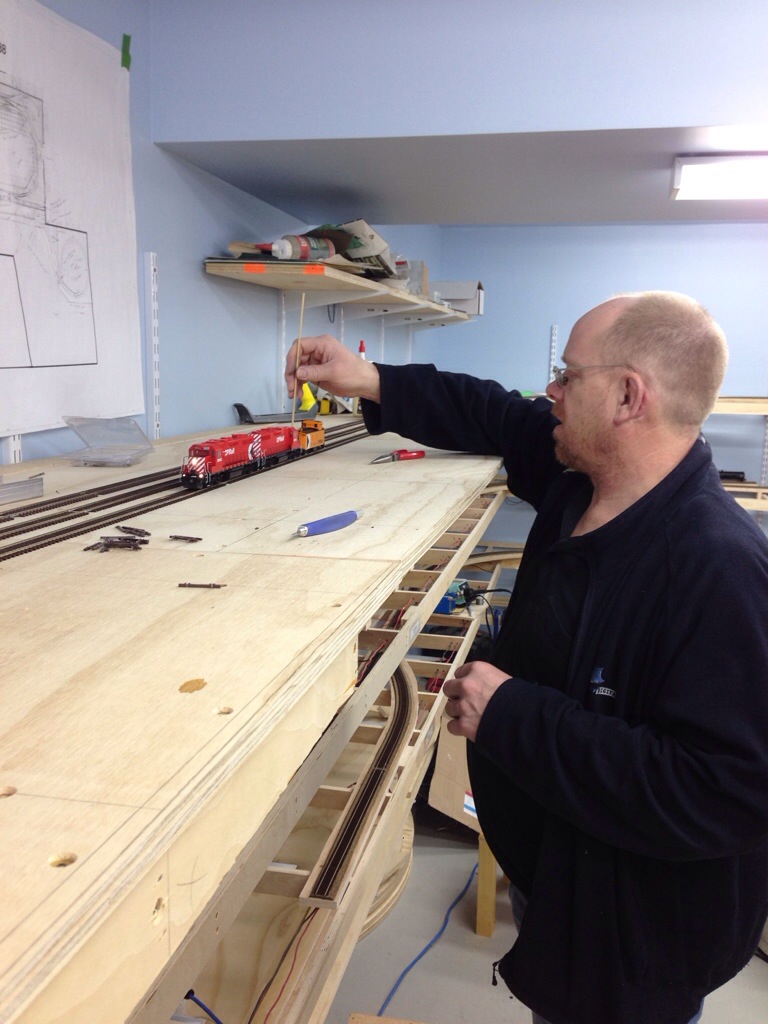
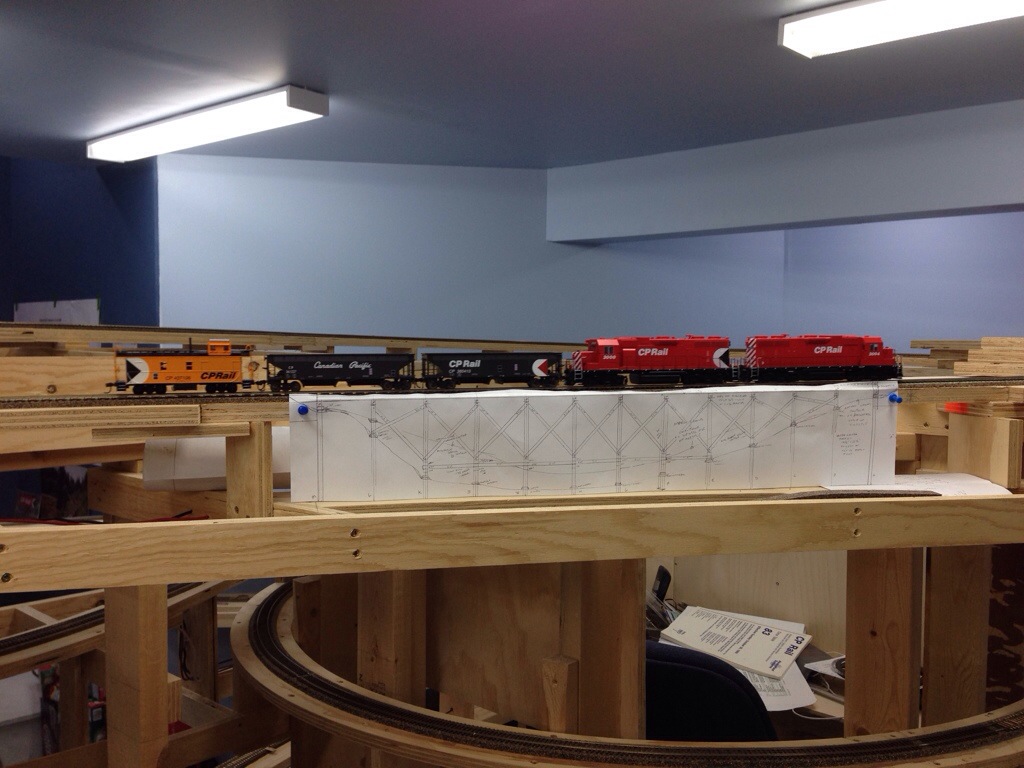
I could have had track completely finished a long time ago. But I decided that I wanted the trestle at Vancouver Island Gas in a more complete state. Unfortunately it was not to be. Cam wanted to figure out the best way to anchor the trestle to the benchwork but still have a good base for the scenery. The scenery would also dictate the angle bracing on the bents. So to have the bents actually in and on top of the plywood, and have scenery that drops from track level to much below track level would require some creative fiddling with the blue styrofoam that would support the shell. Here’s Cam checking to see if the work actually gives some level track:

The trestle at Vancouver Island Gas is being built
The first day of 2016 would be the final spike ceremony. Invitations were sent out a couple weeks prior to have a few friends and supporters over to see the final spike being driven into the track. Kevin Pyle brought a spike maul, used for driving spikes on the prototype, and I figured “why not?” Using the spike maul and a nail set was a little awkward, but it didn’t take more than three taps with that huge hammer to set the spike in place.
Cam received the honour of driving the final spike. He initially declined to use the spike maul but decided to use it for the “shiggles” factor.
Here is where I would insert a link to the video that was shot, but stupid me shot Cam’s video upside down and thankfully software exists to rotate the video to be right side up, but I just don’t have time at this time of year to edit it and make a better product so you’ll have to visit this page later to see the video.
After the spikes were set in place, trains were fired up and run over most of the layout. I say most because quite a few servos were not yet installed into Port Alberni yard so switching there wasn’t done much.
Since that date, more work was done in getting the servos installed and hooked up to the Tam Valley Depot Octopus III controllers. After some discussion with Kevin Rudko of Signalogic Systems, it was discovered that his switch control panels intended for use with his switch controllers would actually work with the Octopus controllers, with only some slight wiring tweaks. The only real hitch is that using momentary switch inputs could lead to some undesired action on the servos, but time will tell whether this was going to be a huge concern or not.
The next major event would be the Calgary Model Railway Society’s Layout Tours, happening at the end of February. Much cleaning was done, trains staged and switch lists generated, and my huge thanks to Dave Chomyn for coming over to run those trains during the six hours that the tour was running. We had 44 people over to see the layout that Sunday, which for me, was a huge success. Lots of people left favourable comments in the guest book, one guy who came over with a hatred for multi-deck layouts left quite impressed and now considering the idea has merit, and even a few women were impressed. Virtually all of them will be back for future tours to see how the scenery is progressing, and see how many of the “thousands upon thousands of trees” I’ve planted!
Of course, I’m also heavily involved in the organizing of SUPERTRAIN, Canada’s Largest Model Train Show. This year, I’m working on the Registrar duties (thanks to Jim Ironside for being my co-registrar), graphics design and printing, and new this year, organizing the Shuttle Bus operation between a large Transit park and ride lot and the show venue. Being able to combine my transit-geek and friendships with a bunch of bus drivers to help the show has been quite rewarding. This show takes up a lot of my time in the few months leading up to the show and I’m thankful for the opportunity to even get downstairs every now and then.
At some point I’ll be able to get back to the GP9’s that are needing to be completed, get some more scenery work done and who knows what else… Until then, keep your stick on the ice.
Turnouts complete, trackwork not far behind!
It’s extremely gratifying to finally report a completion of a few things, since a lot of progress has taken place with the layout since I’ve written last:
Firstly, I’m done with turnout building and placement! This weekend I finished spiking down the switch just outside the Port Alberni enginehouse. This was the last turnout to be laid.
I still need to hook up a lot of servos, connect them to the Tam Valley Depot Octopus III controllers and figure out how they will be thrown. Dave Bedard favours toggle switches, I like momentary push buttons. It would be awesome if I could get Signalogic Systems SCP controls to work; I have them running the few tortoise-powered turnouts on the layout, and to have just one interface would be great. It’s bad enough to have bullfrog knobs and another means, to introduce a third might make things confusing for the operators.
On other “almost completed” items, I’m less than five pieces of track being spiked down from the milestone of being done laying all trackage. Two bits of track into the enginehouse (will it be a structure or just the foundation? I’m trying to determine -without a lot of success- whether the current enginehouse was built prior to 1988 or not. If you have any info on this, please drop me a line!), the Vancouver Island Gas spur needs its trestle constructed and then two lengths of flex track near the Port Alberni depot need to be spiked down.
Wiring has been done for the majority of the yard in Port; the southern quarter of the yard plus the remaining trackage towards the plywood division still needs feeder wires hooked up. Some bus wires will also need to be strung too.
Will have to update this post with pictures later, along with updates on a few other bits – the GP9 fleet, the freight car fleet and more. Stay tuned!
On complex track work
On April 27, 2014, I sent out the following notice to my operating crew:
Effective immediately, all Port Alberni freights are annulled, account lack of destination trackage.
I had pulled up the entire temporary staging yard in the space of a couple hours, salvaging the track and turnouts for later use, and that left any chance of a Port freight running to nil. In Hunt for Red October, Captain Ramius said that “on his arrival in the new world, Cortez burned his ships. Thus, his men were well motivated.” I had effectively done the same thing.
With the temporary yard gone, I could get to work on building the proper one, and after acquiring appropriate materials (ie: a full box of sheet cork and way too many strips), Cam and I got to work on laying that down and securing it with contact cement. (Seriously, anyone who uses white/yellow glue for cork needs to learn about Contact Cement.)

A J-roller makes for good contact
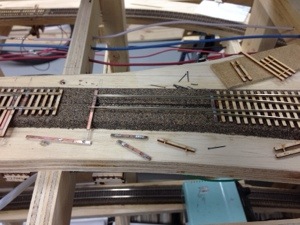
After that was all thoroughly sanded, tracklaying could begin. The first half of the Port trackage is rather complex. I spent on the order of several evenings fitting the skeletons of the turnouts together and discovered that I’ll have a route (not terribly likely to be used though) where you can travel about eight plus feet and not have the wheels touch any length of flex track – yes, all turnouts for 8 feet!
Fitting these turnouts together with a large amount of cutting, desoldering and resoldering bits to make crossovers, and butting points up close to the frog of the previous turnout all proved challenging but achievable. I would learn later that fitting the wooden quicksticks underneath would be just as much of a challenge.

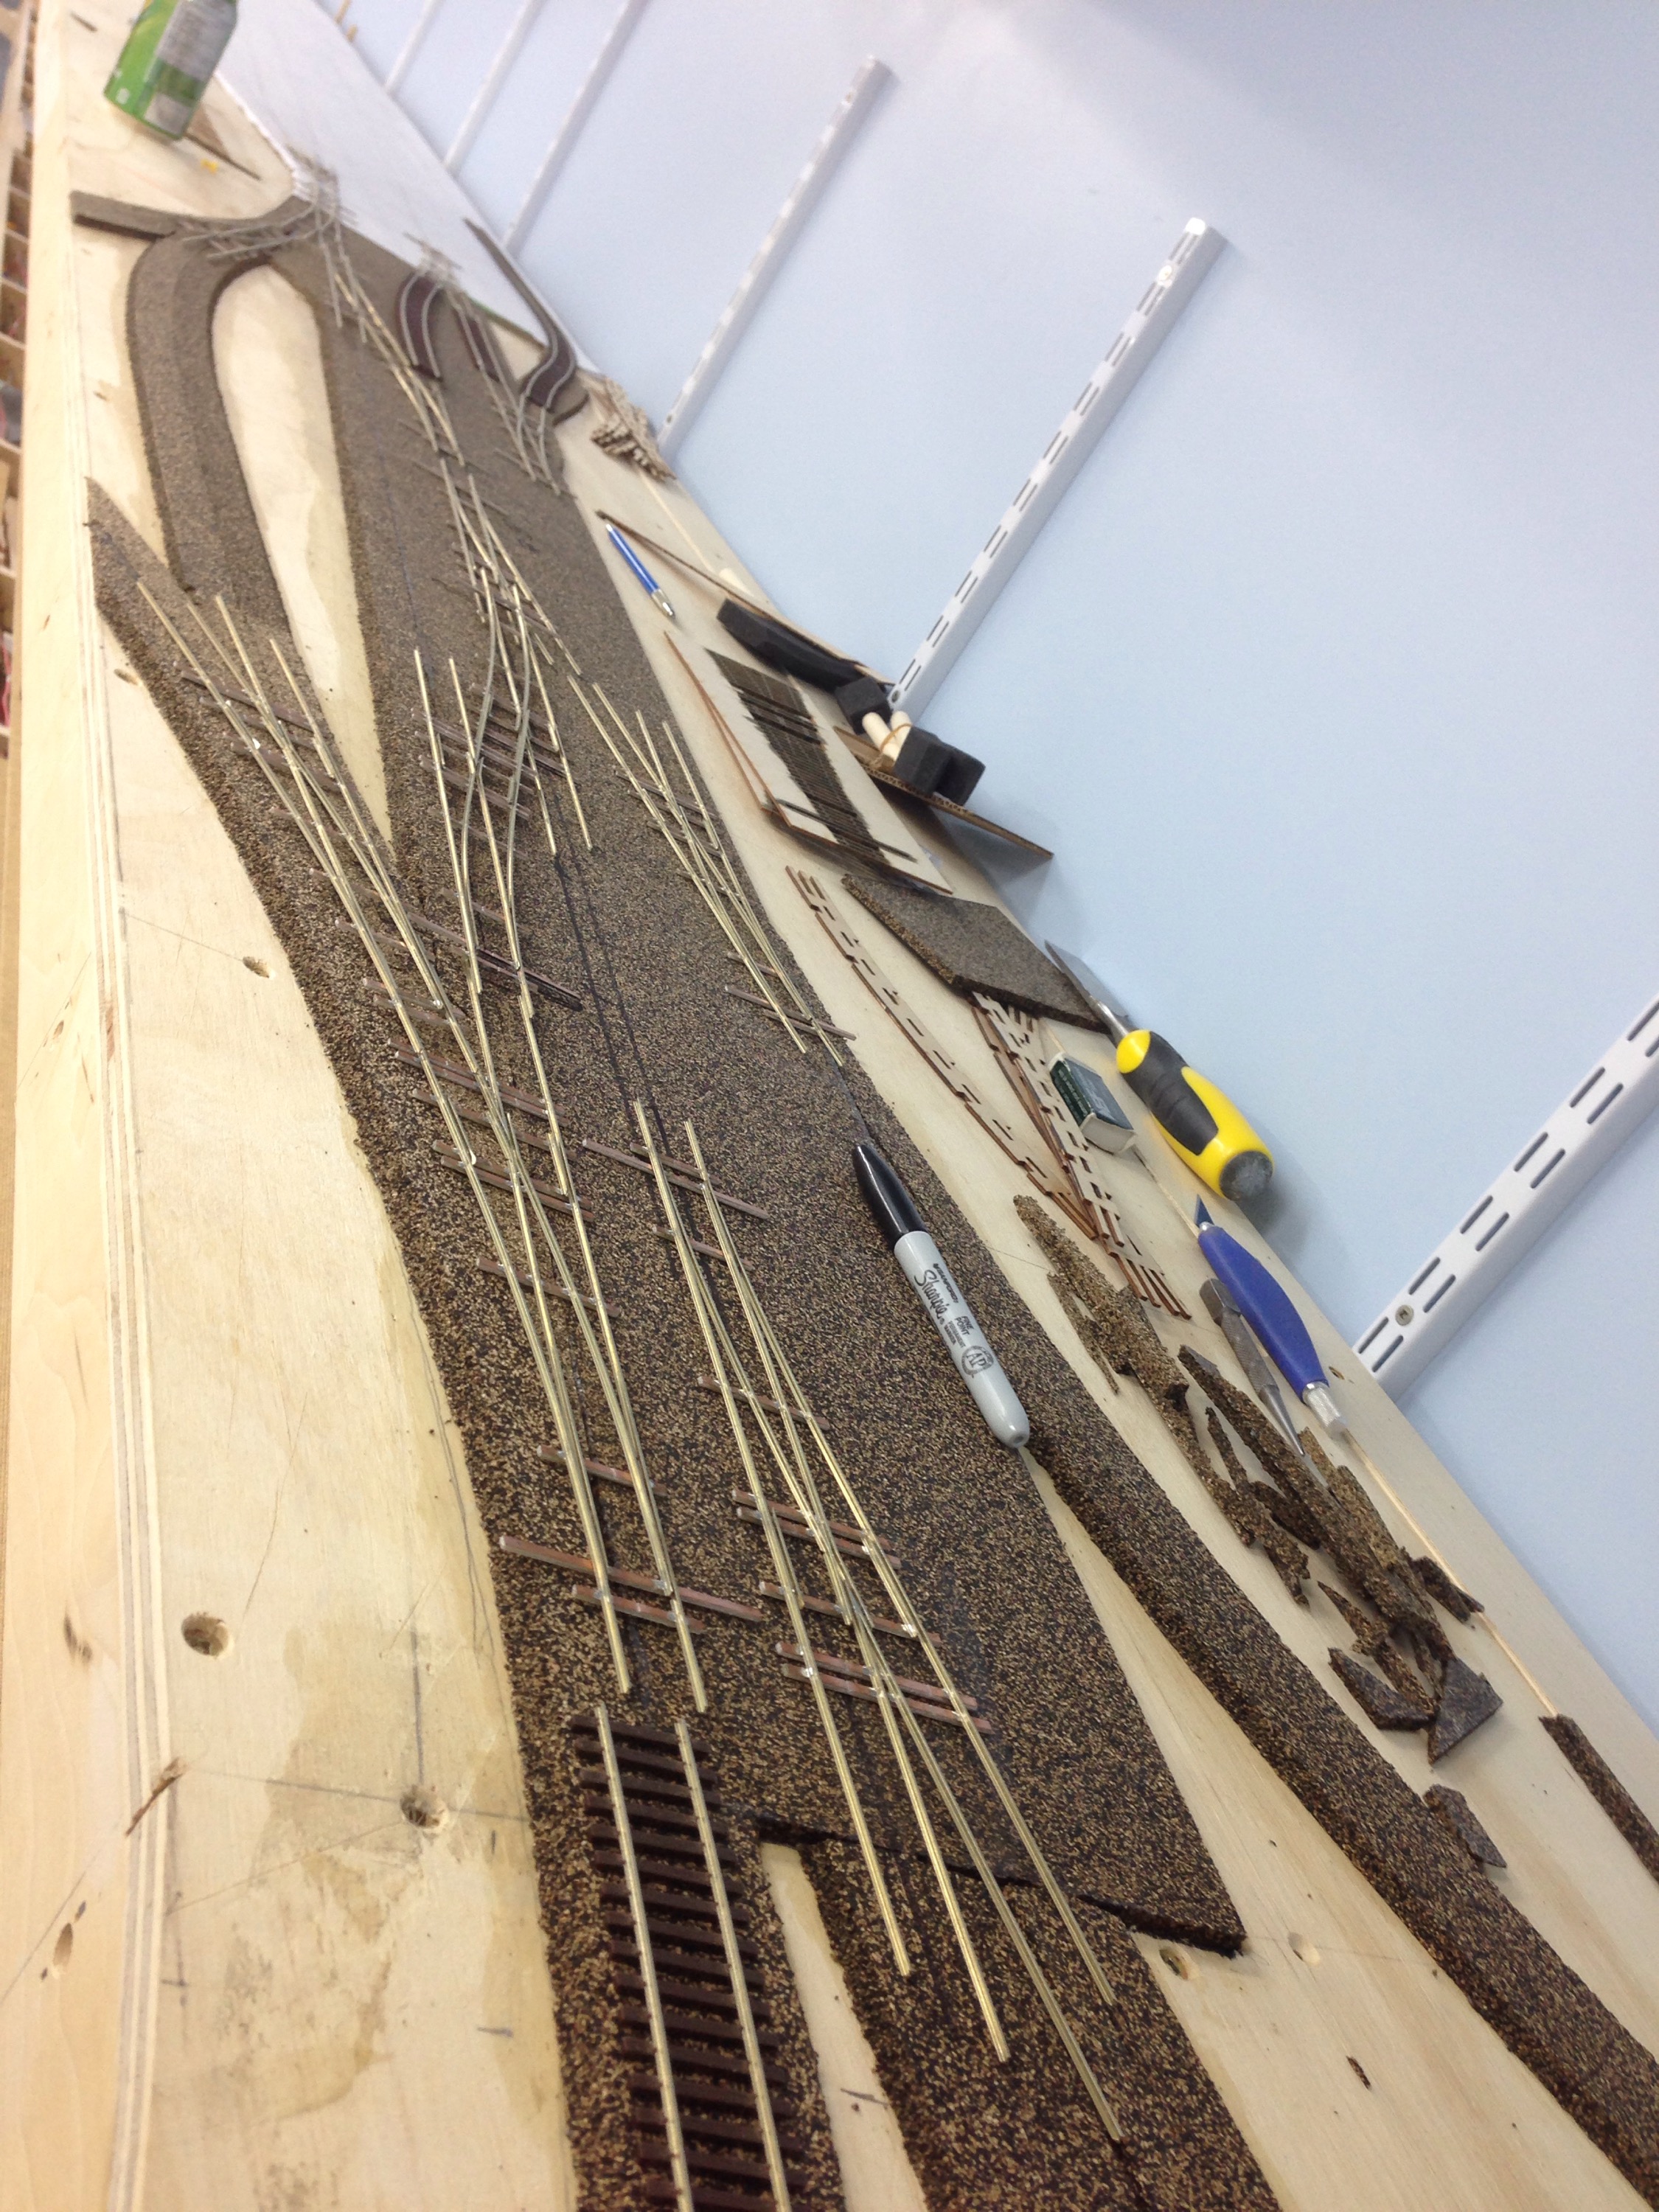
The past couple weekends I’ve been getting the finished turnouts all spiked down and linked with bits of flex, along with trackage into the pulp mill.

lots of turnouts!
 I’ve got to spike this all down, but this represents the difficult stuff. The yard will be easy, but time consuming with all the drilling and spiking. The last spike is in sight, likely with completion of track work to be later this summer.
Despite appearances, I have been working…
I will admit, having no updates since last October some six months ago is not doing many of you any favours. Allow me to bring you up to speed.
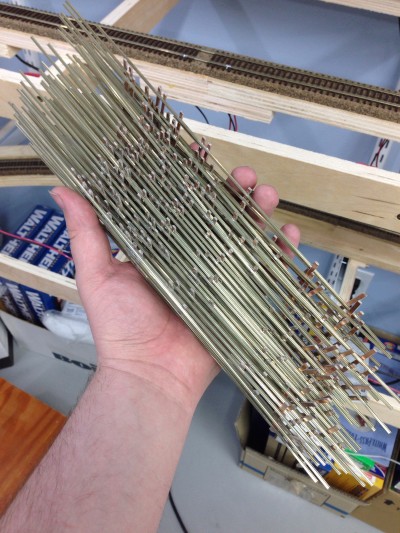
Fast Tracks Skeletons for Port Alberni Yard
In my hand is the cumulation of some hundreds of hours worth of work. Many evenings and weekend mornings building these at my workbench, plus a few made elsewhere over these past six months and they are all done! Unless anything serious goes wrong, I won’t need to make another turnout for this layout.
Over two dozen functional turnout skeletons (as well as two more non-functional scenery turnouts, not shown) which need a wash and to be glued and spiked to the quicksticks, and then the Port Alberni yard can be laid in it’s intended trackplan. Speaking of which, the trackplan was finished up on the computer in a program called Empire Express some time ago and printed full size. Cam and I have been trying to figure out how to transfer it to the benchwork, and my ever-so-smart wife said I needed graphite paper. Sure enough, a couple art supply stores in Calgary stock large sheets of the stuff, at exceedingly reasonable prices: $1.80 for a 20×26″ sheet. Works much the same as the carbons of ye olde time. Place it between what you want to copy onto and your pattern, draw over the pattern and the paper leaves marks. Works for me. Except I have a temporary staging yard occupying the benchwork. Well, as of a few nights ago, make that ‘had’ a staging yard. Some judicious use of a soldering iron and a pair of nippers and the yard is gone. Track laying will commence rather soon…
Other updates:
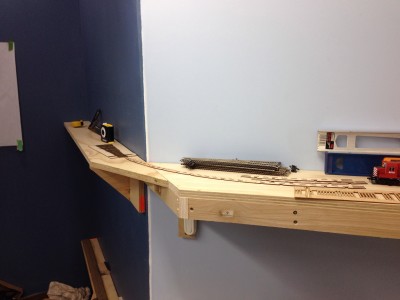
Benchwork Extension into Plywood Division
I decided that the track plan for the plywood division wasn’t quite up to snuff and decided to extend the benchwork for it around the corner and into the stairwell. The trackage to the prototype was such that a train would continue out of the south/timetable west end of the yard past the depot, then into a short siding to allow the locos to run around the train, and push the cars into a facing point switch and the two tracks. Those two tracks are in the stairwell, with the runaround track where the staging was going to be. The engineering of the extension had to take the drawbridge into account which thankfully clears with about an inch of space.
Another update is for Courtenay. We weren’t happy with the number of moves needed for turning a Courtenay train and decided to do something. We’ve extended the siding track around the corner and it’s now long enough to account for a standard length train. Unfortunately the spur for the CP Express building at Courtenay is now single-ended as a result, but an acceptable compromise. The tail track is still long enough for a pair of locos, the water car and caboose.
GP9’s
Work continues on these. All shells have paint and most decals applied but still needing more, like frame dots, warning labels, etc. Work on the chassis still needs to happen in addition to decoder/lighting installs.
Pole loads
I’ve spent more than a few hours at Kevin Pyle’s drill press and have made quite a few poles. Sadly, only enough for about half a car’s worth!
And on a last note:
SUPERTRAIN, Canada’s largest model train show, is an event which I assist in organizing, happened a couple weekends ago. This year, the show was held only a few minutes walk away from my house and I took the opportunity to host an open house for a few friends visiting from out of town. Was surprised when they brought a few other friends. I’m rather proud that I had manufacturers (well, at least their reps) galore looking at my layout. Scott from Bowser, Matt from ESU, Jeff from Prairie Shadows, Dan from Rapido Trains, Grant from Southern Alberta Rail, and always, Michaelea from Sign Reflectionz. Cam, Mark Kaluza, Josh Anderchuk and Matt Soknacki were also there and fun was had by all. Next year guys, the trackage will be completed!
Finishing benchwork
I’m done!
Well, okay, so there’s a lot of work still to be done, but a significant milestone was achieved a little over a week ago when Cam and I secured the last of the benchwork to the wall for the Alberni Pacific Plywood division. That bit of benchwork means that everywhere I want to install trackwork, I have the wood to support it.
Admittedly, it’ll be a fairly lengthy time before I can actually run trains on it due to the fact I’m needing to build all the turnouts for the Port Alberni yard first, and could have worked on them first, but I wanted to get the major amounts of woodwork completed and get the chopsaw out of the basement and make use of the space this tool vacated. As well as having a clean floor too.
Fixing deficiencies
I suppose thanks are due here to a good friend of mine – Grant Eastman. Many times I’ve been to his very impressive N scale layout of the protolanced Southern Alberta Rail, and found substantial sections of benchwork and track completely replaced.
His motivation?
He simply didn’t like how it was previously done and decided to do something about it. For example, he didn’t like how one would have to leave the train and walk around the laundry facilities, furnace and hot water tank. So he relocated, not the track, but the latter three items to allow one to stay with the train. He rebuilt the staging loops and to provide a better track plan, rebuilt the stairway into the basement, changing it’s configuration in the process. He also changed all the code 80 track out with code 55, even in the fully scenicked areas for better appearance. I could go on but you get the idea. Enough about his layout and back to mine.
I wanted Vancouver Island Gas to be a signature scene on the layout, but disliked the fact the aisleway around the nose of the basement was tightened up substantially, and that the trestle was right up against said aisleway. Sure, I could protect the future structure and rolling stock with a sheet of lexan (high-grade plexiglas) but it did nothing to reduce the amount of dead space behind the track that would need scenicking.
So, after consultation with Cam and Dan, I decided to follow Grant’s lead and do something about it. Track was lifted, feeders cut, bus wiring separated, benchwork pried apart and then removed. Here’s a couple shots of the work in progress. The first shows Cam undoing screws to take off the benchwork and the next after everything save for the brackets have been removed.
Sadly, I neglected to take a ‘before’ picture as we jumped right into the work.
Some people showed considerable concern over the fact I was in demolition mode before the layout was even complete, but after reassuring them with why, they were supportive.
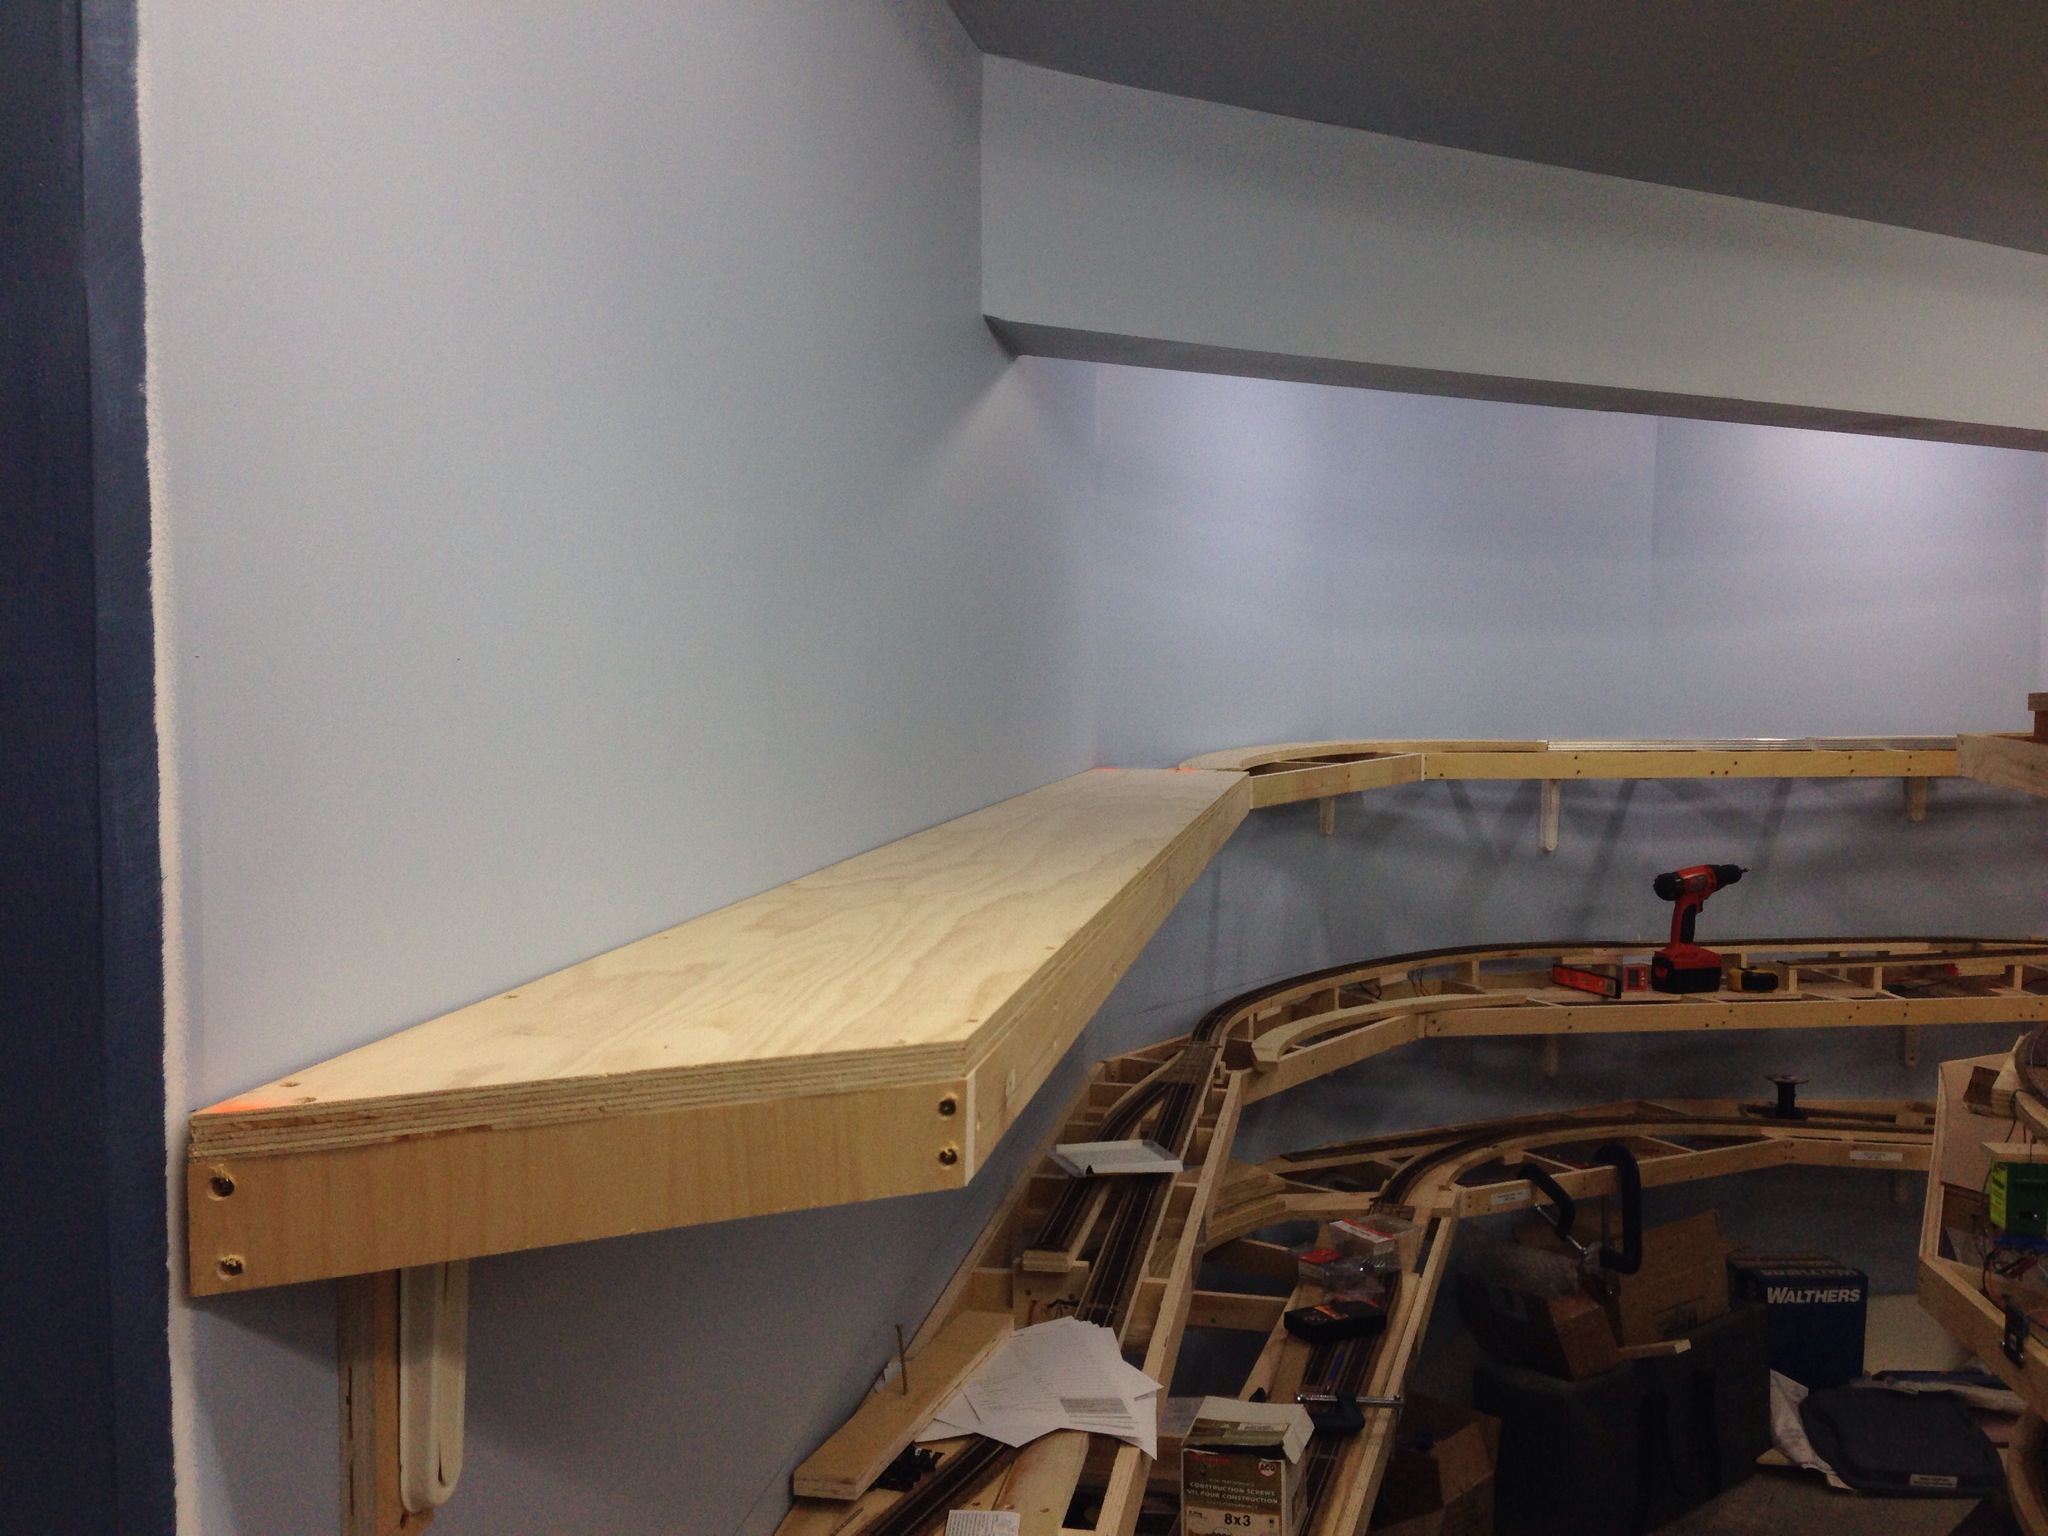
Several weekends later, the benchwork was reinstalled and track relaid and wired in. Thankfully, some pieces were reused, and only a few sections of track needed to be added in. Here’s a couple shots of what it looks like after everything was done:
The aisleway gained enough width (give or take another 7 inches), the space behind the track was substantially reduced and there’s space in front of the spur.
Sadly, one consequence of the work is the loss of the needed height to properly model the trestle. It’ll end up being compressed in both directions, but I couldn’t achieve that height without really impacting the space below. Oh well. I’m still happy I did this.
Additions to the GP9 Fleet
As I eluded to in my last post, I’ve been working on a few GP9’s for the layout. I have two functioning units on the layout now, but that’s nowhere near enough for what was on the island in 1988 and earlier timeframes. (slight aside here: Cam keeps wanting to wind the wayback machine to 1986 to model a whole ton of log trains when truckers went on strike…and unfortunately, all the locos on the island then were GP9’s…Not hard to figure why I want to model 1988 – a lot more variety in motive power that year!)
Back when Proto was affiliated with Hobbycraft Canada, the GP9 models produced in CP Action Red were done with only a single number (maybe two, but I can’t say I saw it), and trying to find this paint job on ebay was getting quite frustrating. Too expensive or simply not available. So I started looking and found a few relatively cheap GP9’s in Santa Fe and CN paint schemes which were mechanically similar to the units I had – specifically, equipped with Dynamic Brakes. I was also informed that stripping the paint off these units would be pretty safe and easy – simply dunk them for a period of time in 99% Isopropyl Alcohol.
One paint scheme was easy. Others…Not so much. Put it this way, if I’m going to go for more units, I’m looking for Santa Fe black and silver units. The CN noodle required grit blasting with baking soda to remove, and the blue and yellow Santa Fe paint scheme spent days in the alcohol and numerous brushings to remove the paint whereas the black scheme was completely cleaned off after a mere 8 hours in the dip and a gentle brushing with an old toothbrush! Two other units were stripped as well, but cannot recall what paint schemes they were in. Something tells me one of them was a CP Tuscan scheme. This has been a longstanding project… I also acquired one undecorated GP9 as well, but it presented a unique issue in that it came without dynamic brakes. Oops. Cam found an appropriate part from Bachmann of all places. It’ll do!
Once the units were all completely stripped, and with advice from Cam, we started in on making them more appropriate for CP Rail. First off was acquiring a bunch of detail parts – a proper CP horn, high hood bell, sinclair antennas, sand hatches, handbrake wheels and 48″ fans. These models were originally delivered with 36″ fans for primary cooling, but most of the prototypes with 36″ fans were sent for rebuild prior to 1988. So four of the units on the layout will be equipped with 48″ fans, which required a fairly substantial patch job. One that Cam readily agreed to do… Thanks! Over the course of several evenings at Dave’s place, these parts were installed onto the stripped shells, fans installed and generally, the shells made ready for paint.
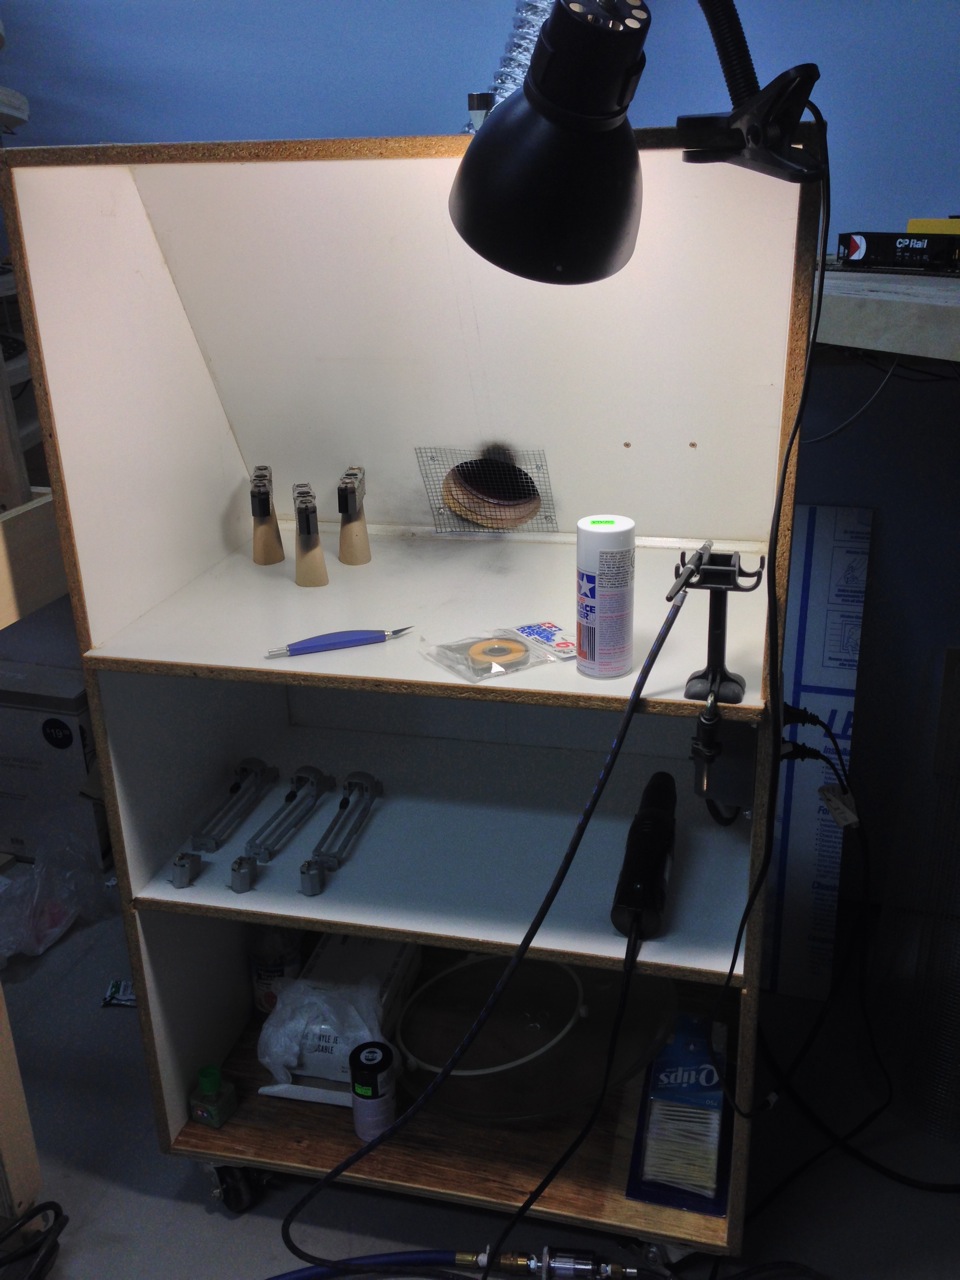
Concurrently to all this was the preparation of my new spraybooth built by Garth Prestegaard (apologies Garth if I’ve spelled your last name incorrectly) many many moons ago. Off the old spraybooth was the fan and electrics, and onto the new cabinet was the same fan and new wiring. Once plugged in, flick a switch and the fan turns on and turns on anything plugged into the electrical outlet beside it – used for lighting and a hair dryer. Works well!
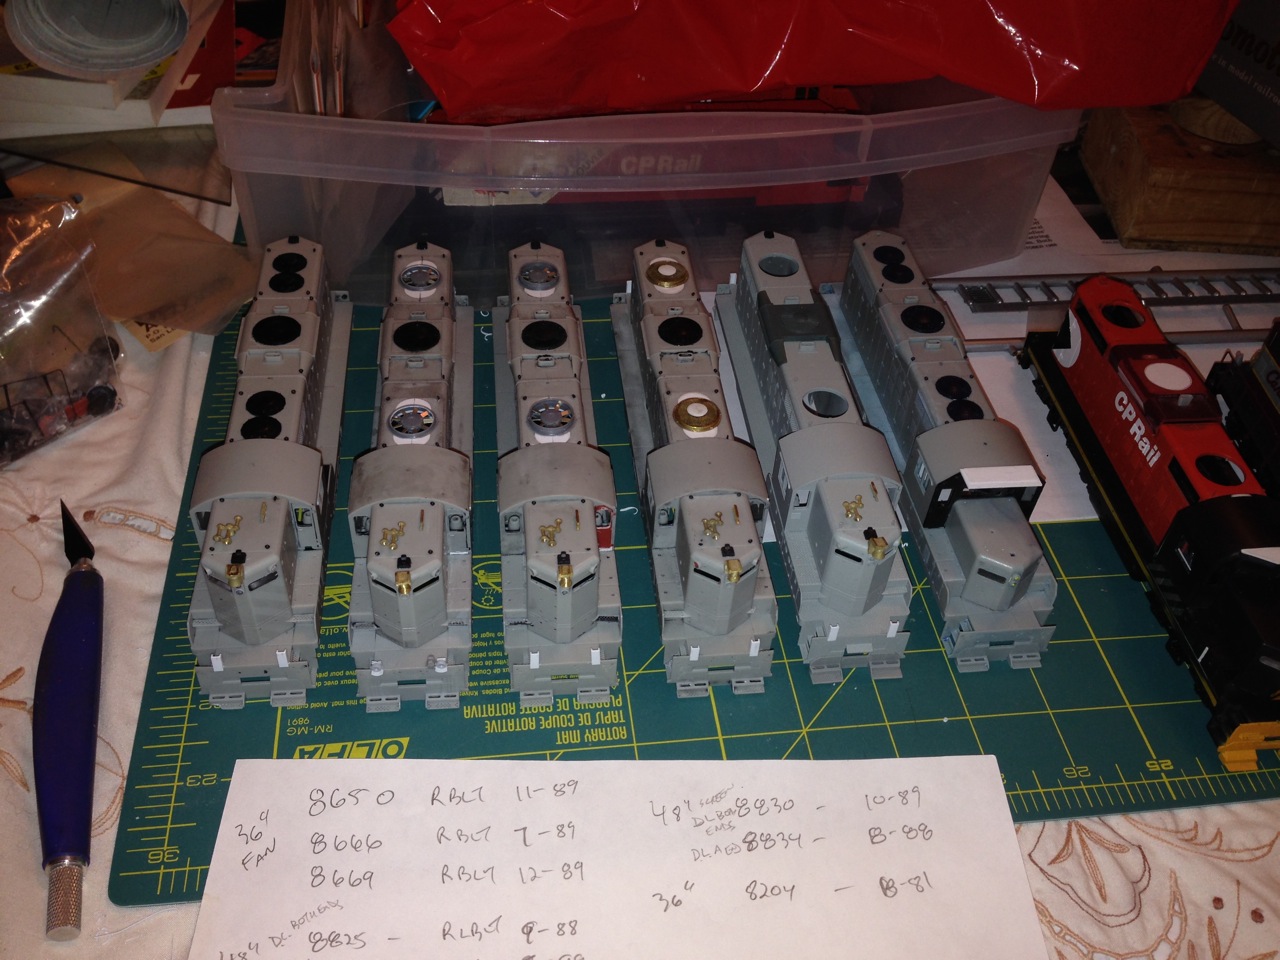
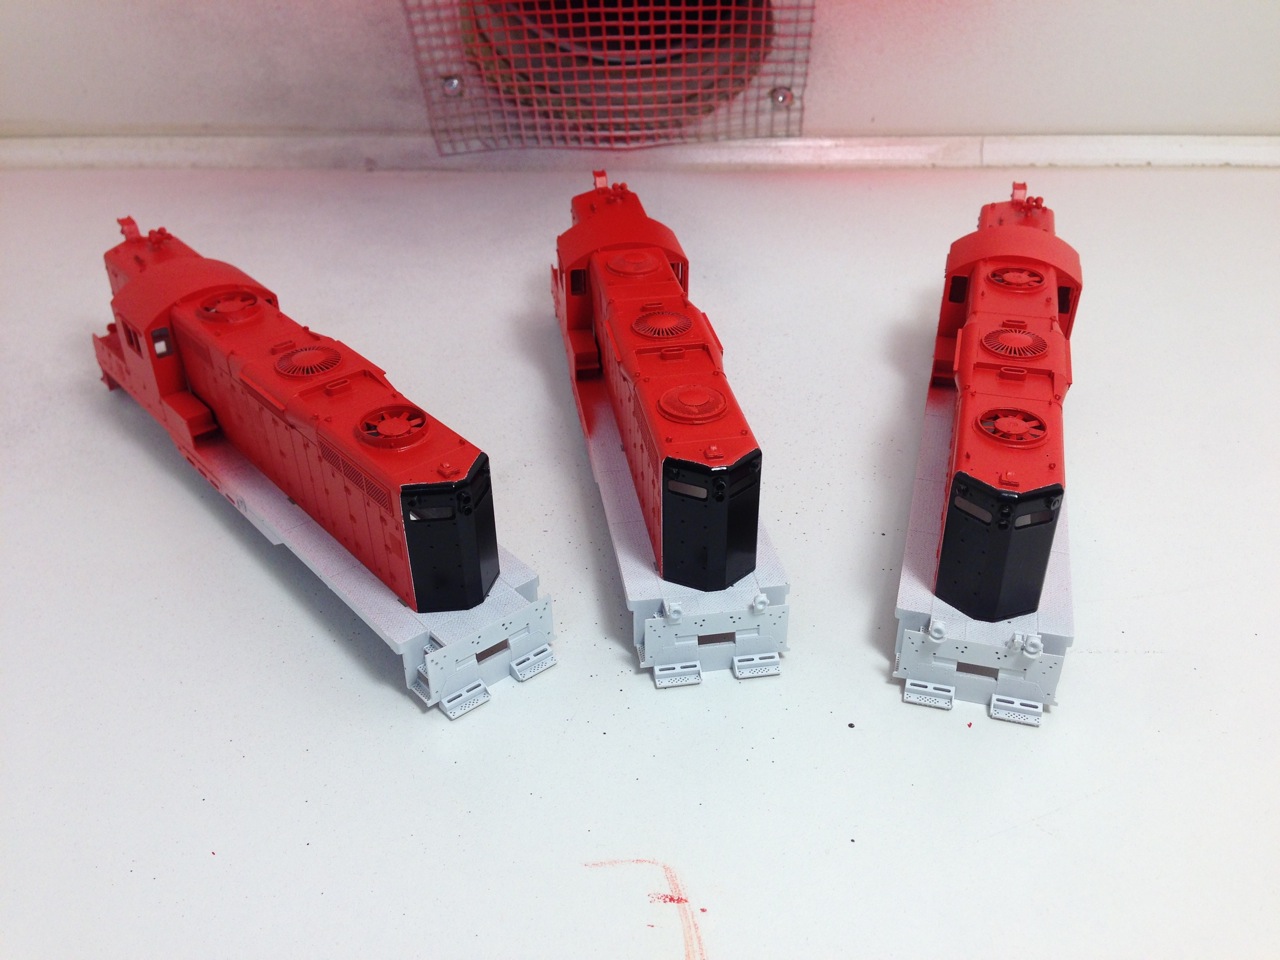
Six shells, three ready for paint, three needing some work
Which generally brings me up to today. I have six units soon to be ready – three units with 48″ fans all complete and ready for painting. One unit with 36″ fans required installation of the winterization hatch which I forgot to strip first, a second unit with 48″ fans required fans that I didn’t already have, and the third not-quite-ready unit which will be 8204 isn’t done owing to the fact it’s undergoing a more extensive amount of work – a short-hood upgrade. That one is the one on the far right in the above picture.
On advice from Dave, I washed the three units, air dried, and then painted the rear end with Tamiya Gloss Black out of a spray can. Very good stuff!
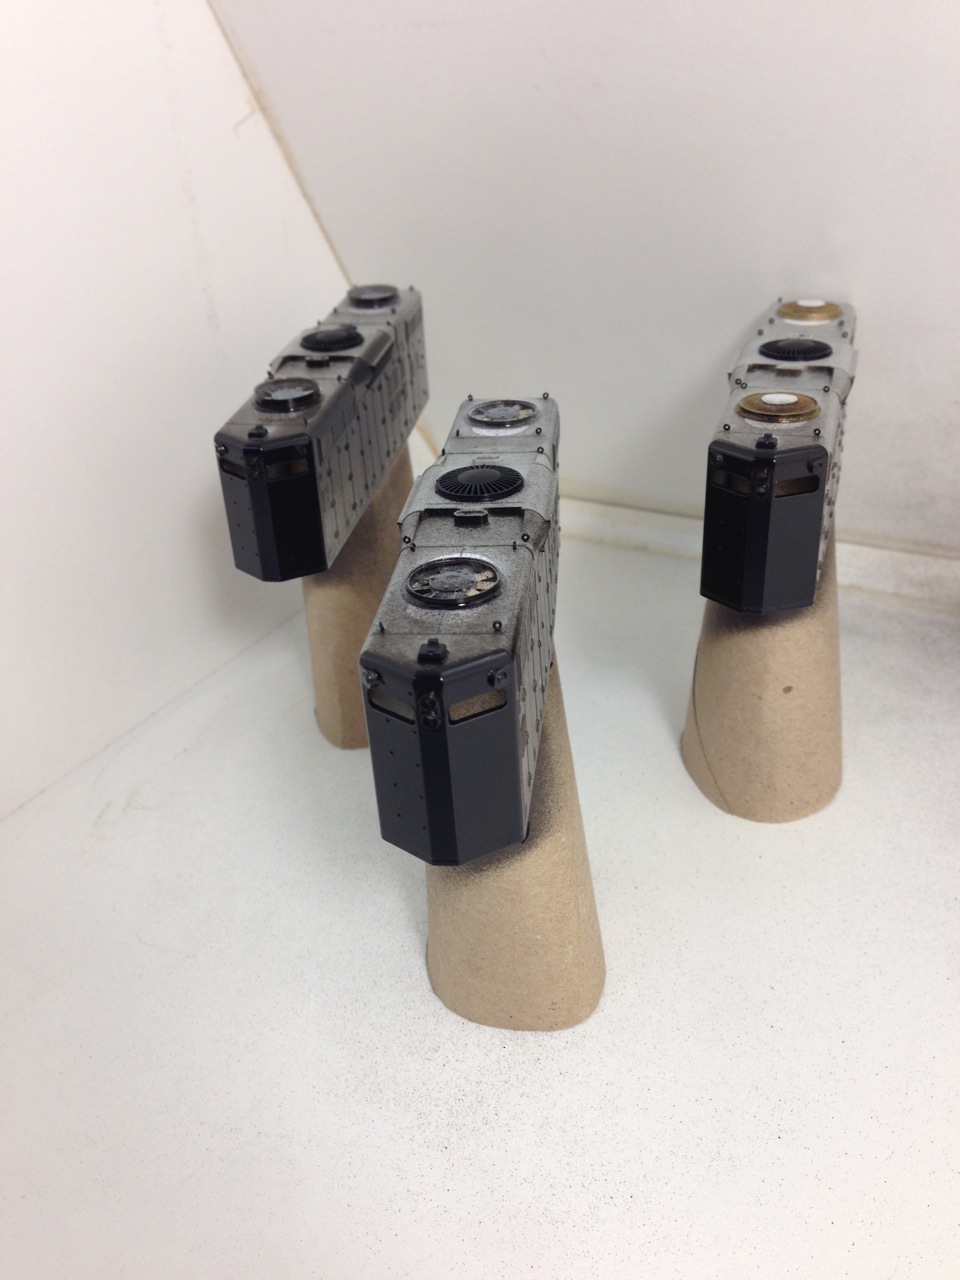
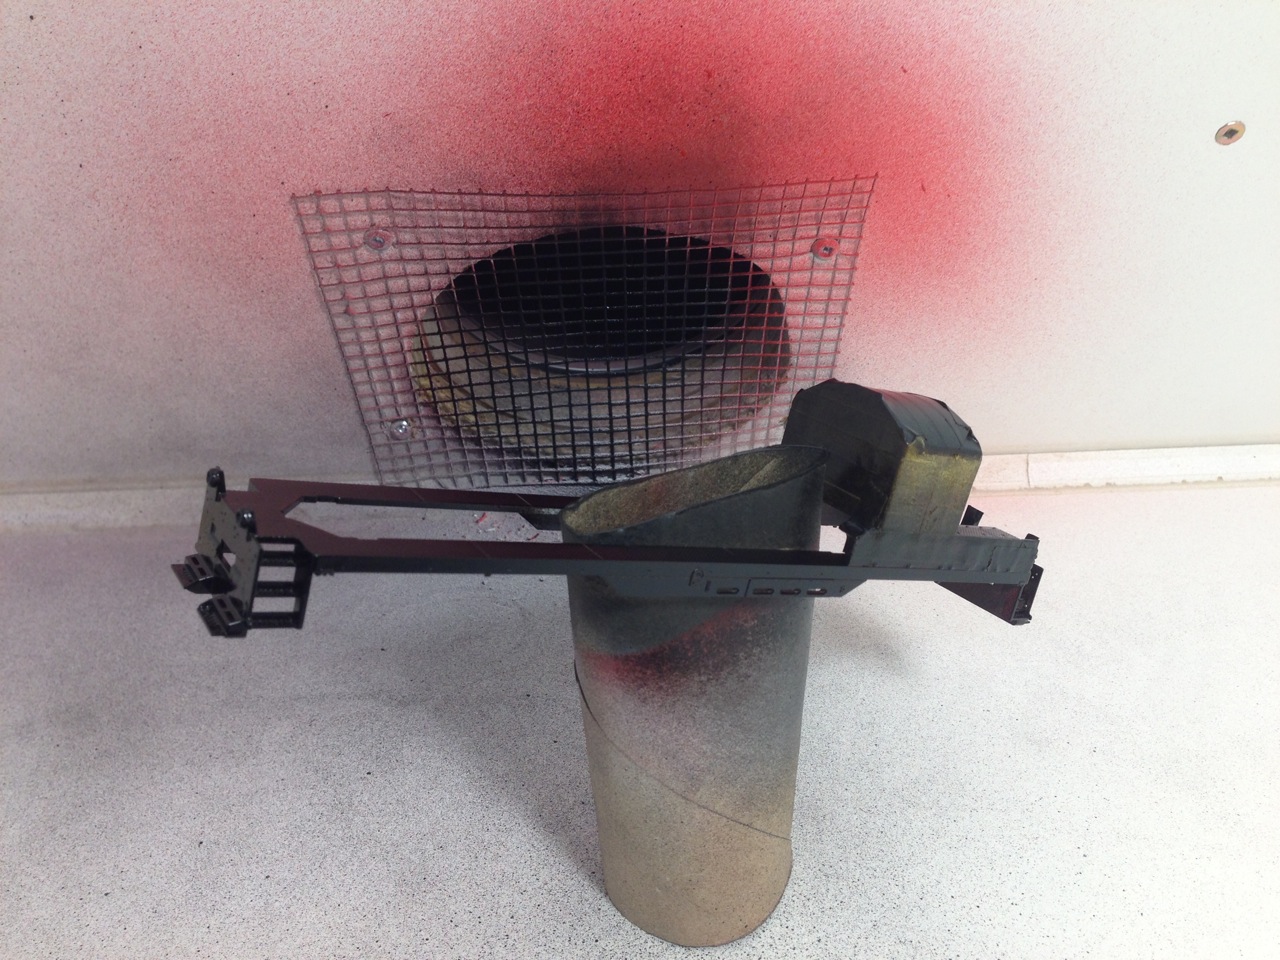
Toilet Paper Tubes make for good handles and stands for painting
Toilet Paper Tubes make for good handles and stands for painting
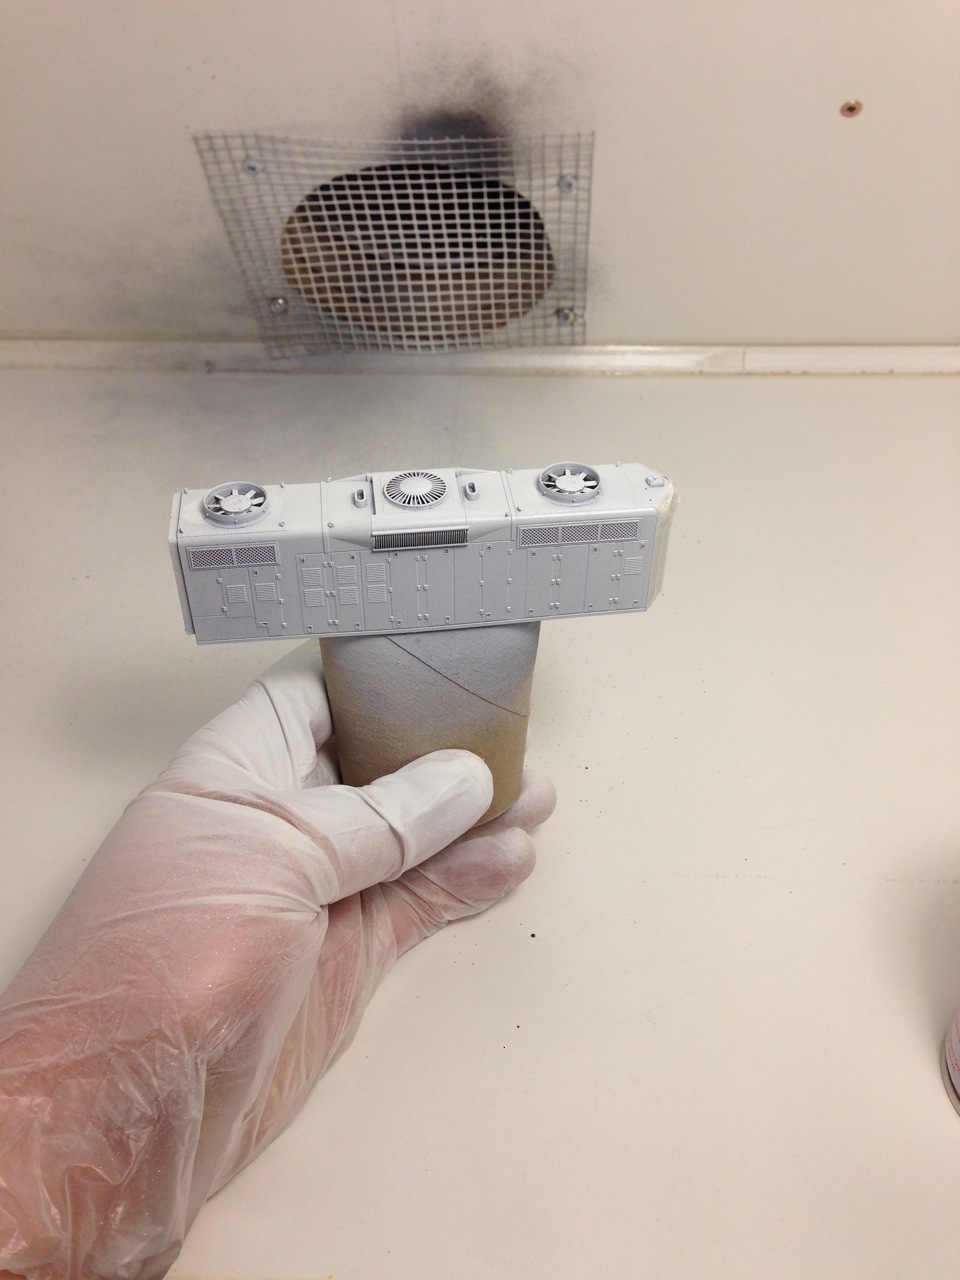
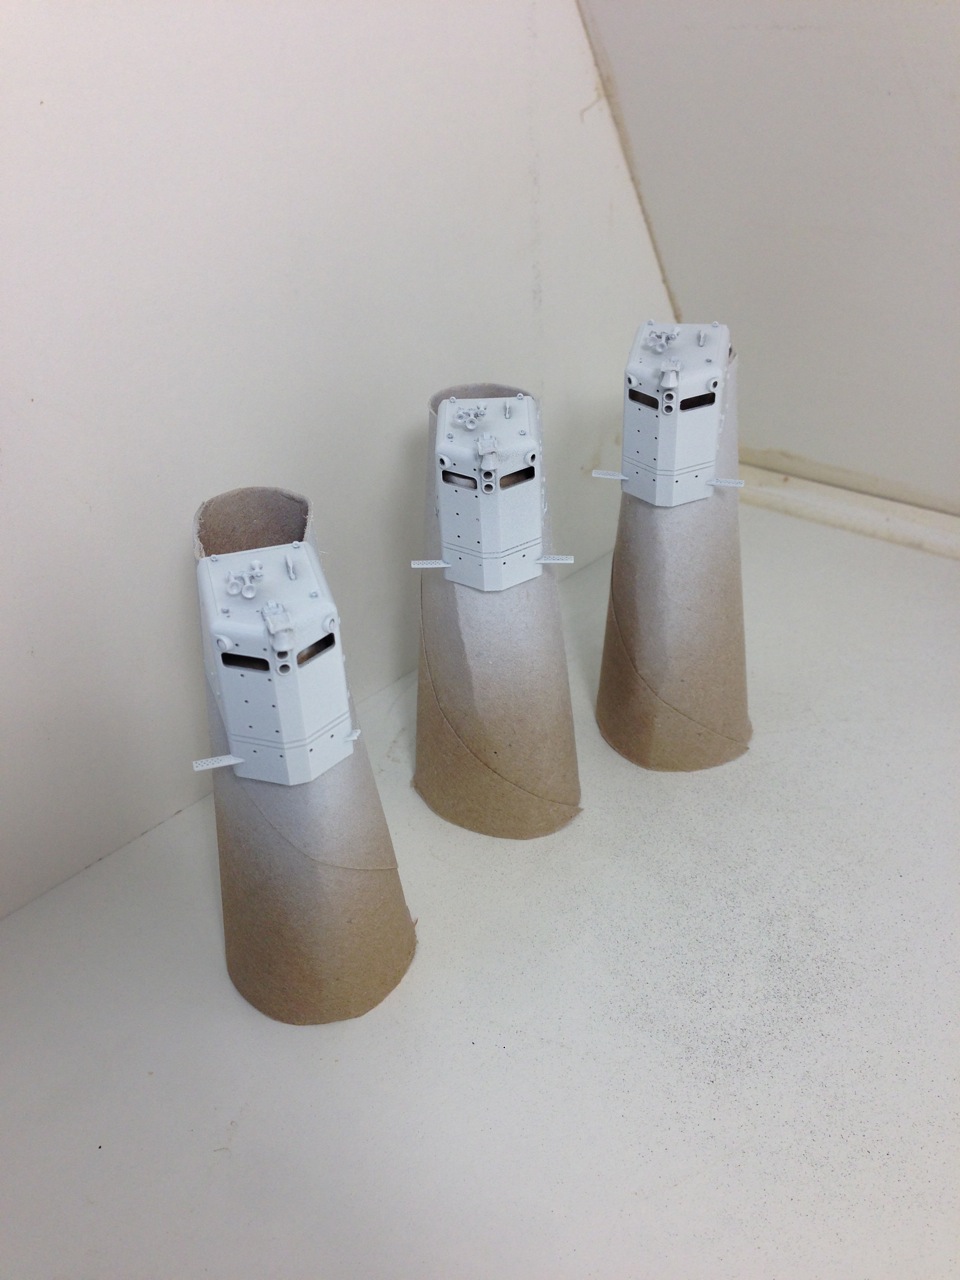
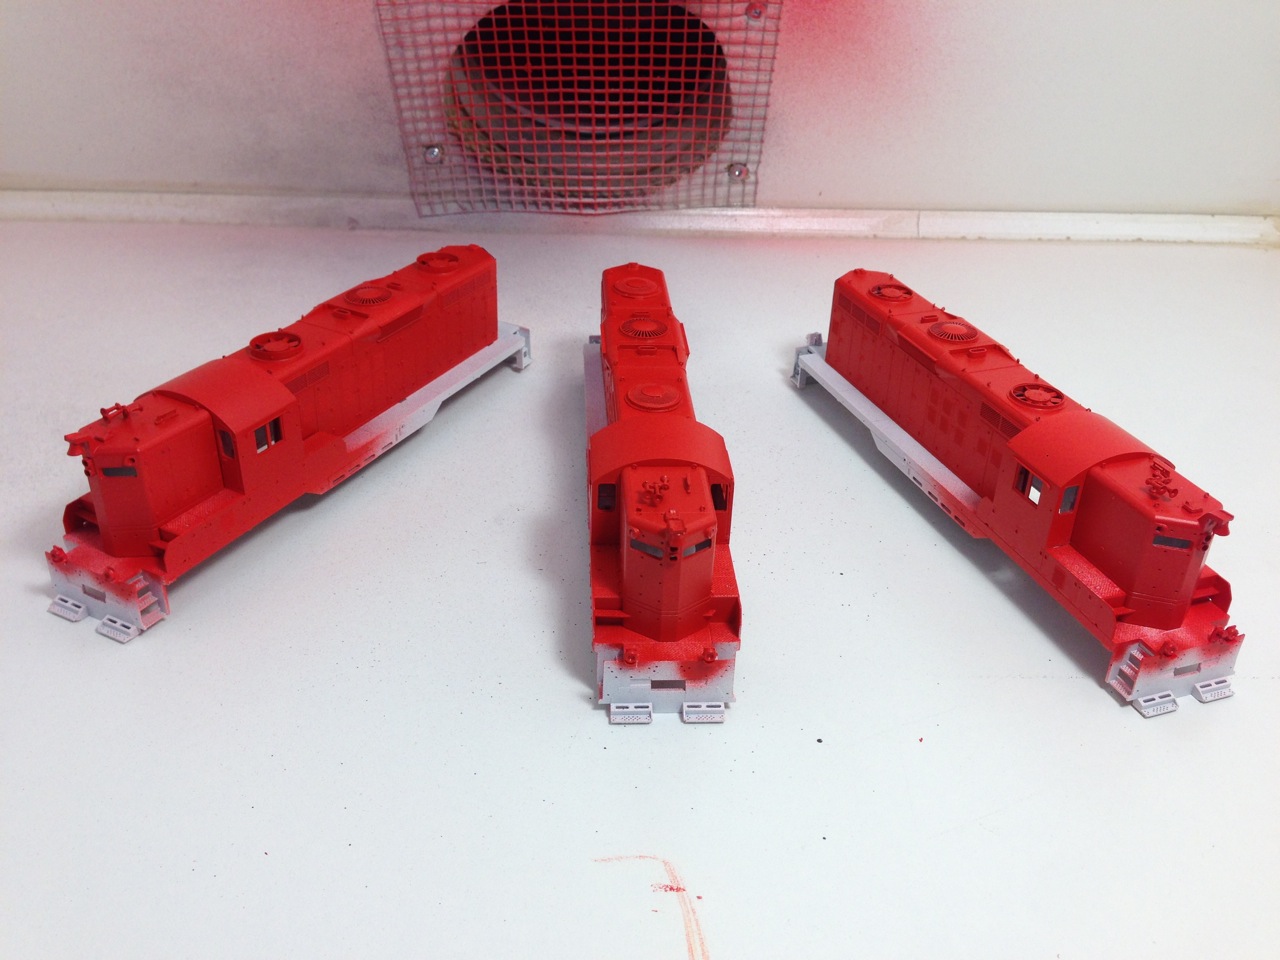
Next up was priming the short hoods and the Cab/Frame assemblies. This was done with Tamiya Fine Surface Primer White. After numerous light passes, that was complete. Attention turned to masking off the black paint so I could prime the long hoods. What an eye opener that process is! Obviously one wants to ensure the masking is done cleanly and properly to avoid any paint from bleeding underneath, and this takes time. Spent nearly three times longer masking it than I did painting them…
Once masked, the white went onto the long hoods. Lunch called at that point and afterwards, got the airbrush hooked up and mixed up a couple drops of Vallejo Retarder Medium into the paint cup 2/3rds full of True Line Trains Action Red paint. Sadly, this paint has been discontinued owing to Testors (manufacturers of the True Line Trains paints) getting out of a lot of paint lines, so I’m quite glad that this paint goes on so nicely. After painting 3000 and 3004, plus the three units today, I’ve used up maybe 2/3’rds of a single bottle. I have two more full bottles and think that I’m pretty set in case I want to redo other units…
Following that process, and letting the red cure quite well, on went the masking tape on the cab/frame assemblies to protect the red which was sticking around. Sprayed the black onto the rest of it, pulled the tape off and after scraping off the (thankfully very few) spots of black which managed to make its way under the tape, have some very sharp looking units.
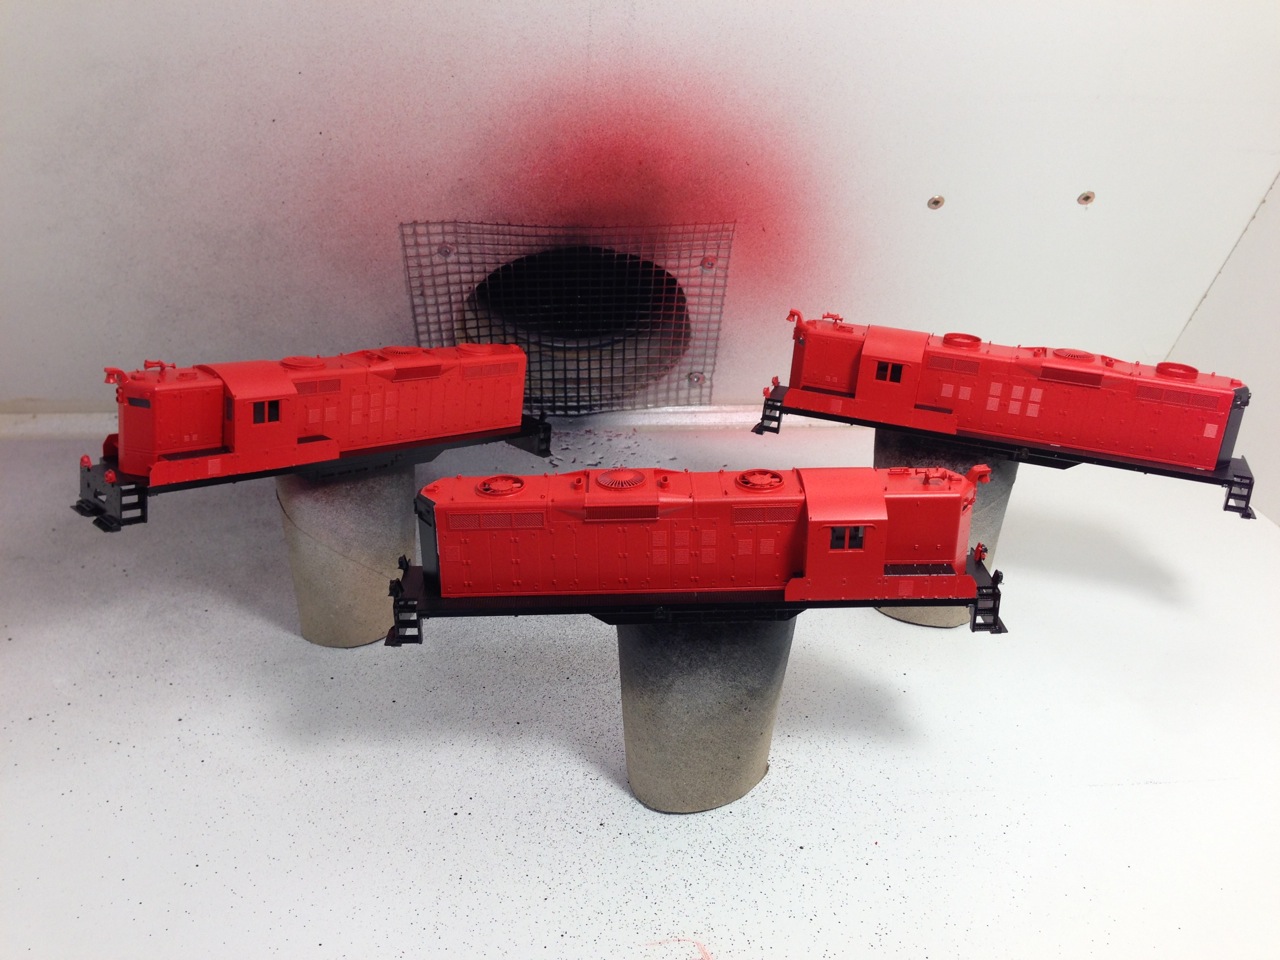
Onward to glosscote (very light coats according to Dave), then application of decals, and the installation of decoders onto the chassis…Which reminds me. I should get to it!
Another omnibus update
So it’s again been a while since I’ve posted an update. Seems to be a common theme around here… And admittedly, I’m going from memory here so please excuse me if I forget anything. (Cam, this is your opportunity to comment on anything I’ve forgotten!)
I was quite busy in the lead-up to SUPERTRAIN, ensuring things with the show were taken care of, but also with the layout at home since I knew a few people coming to town for the show would also appreciate an ops session. (Yet another common theme here…) so track cleaning, ensuring the Port Alberni staging yard is operational, motive power is good and that I’ve got rolling stock ready. Also worked on getting the dispatcher’s office somewhat cleaned up so I could use it. The chair was rather dusty!
The ops session went reasonably well, but with some operators being unfamiliar with the layout and the work extra running dead on hours left a few things to be desired. Namely, need to get a car control system in place and while I was thinking of a computerized switch list generator, I’m thinking of going to car cards after discussing things with Grant Eastmam and Cam following the session. Still doesn’t negate the fact I need to renumber a LOT of rolling stock.
Here’s a hint to the manufacturers: more road numbers! Or even better, include a small decal sheet with numbers we can use to renumber the cars with!
Also, need to have operators more familiar with where everything is, and the dispatcher needs to write up clearances before everyone shows up. More preparation in advance of the people showing up is usually a very good thing. And of course, I wish I had a couple more passing sidings, which don’t exist on the prototype because the trains were spaced out a lot more than what they are in an ops session…
Since the ops session, I’ve been working on rolling stock and motive power, including getting a whole ton of GP9’s ready for CP paint. But that will have to wait for another post…my train ride is almost done. See ya!
April 5, 2014
With the trackwork finished for the moment, attention turned to getting the trackage actually wired up properly. As the train actually managed to make it all the way to the main yard track, we knew the continuity of the trackage was good, but without being able to do anything within the yard, it was kinda pointless to carry on with the situation we had.
So out came the drills, 20ga stranded wire in green, red and black, and the soldering station, and wiring was done. I even got the bus completed all the way down to the end of (temporary) track. Cam and I worked in our own districts – for me, I worked on completing the wiring to the West Siding Switch of storage track Arrowsmith, Cam worked down the hill and then while I was finishing the bottom of the hill and a portion of the yard, he finished the other part of it. Progress was made and we had a fully wired layout again.
Much cleaning was done and playtime began. Well, some say we were testing the layout…yeah… yeah, that’s it.
We certainly found more than few switches which had activation pins which needed grinding. All were fixed, and then began the massive task of trying to ready enough rolling stock for the ops session…
March 29 and 30, 2014
With my second ops session planned for just after SUPERTRAIN (good grief, what was I thinking?!?), I was thinking I should get something done for the layout. Not that Cam didn’t sort of prod me in that direction either, no…. (Insert shifty eyes here)
Anyway, we figured it’s be great to actually get a train all the way into Port Alberni, even if it ended up at a temporary staging yard of sorts, as I haven’t had time to focus on doing up a real, accurate track plan for P.A.
Side note here. Earlier, Cam and I were discussing the track plan and realized that the tight confines of the trackage near the wye in Port Alberni was a guide, but we needed to make sure what was planned was actually doable. As such, I’m going to draft up the plan in CadRail and then print it full size so we know exactly where things go. Needless to say, such a plan is going to take a while to fully draft.
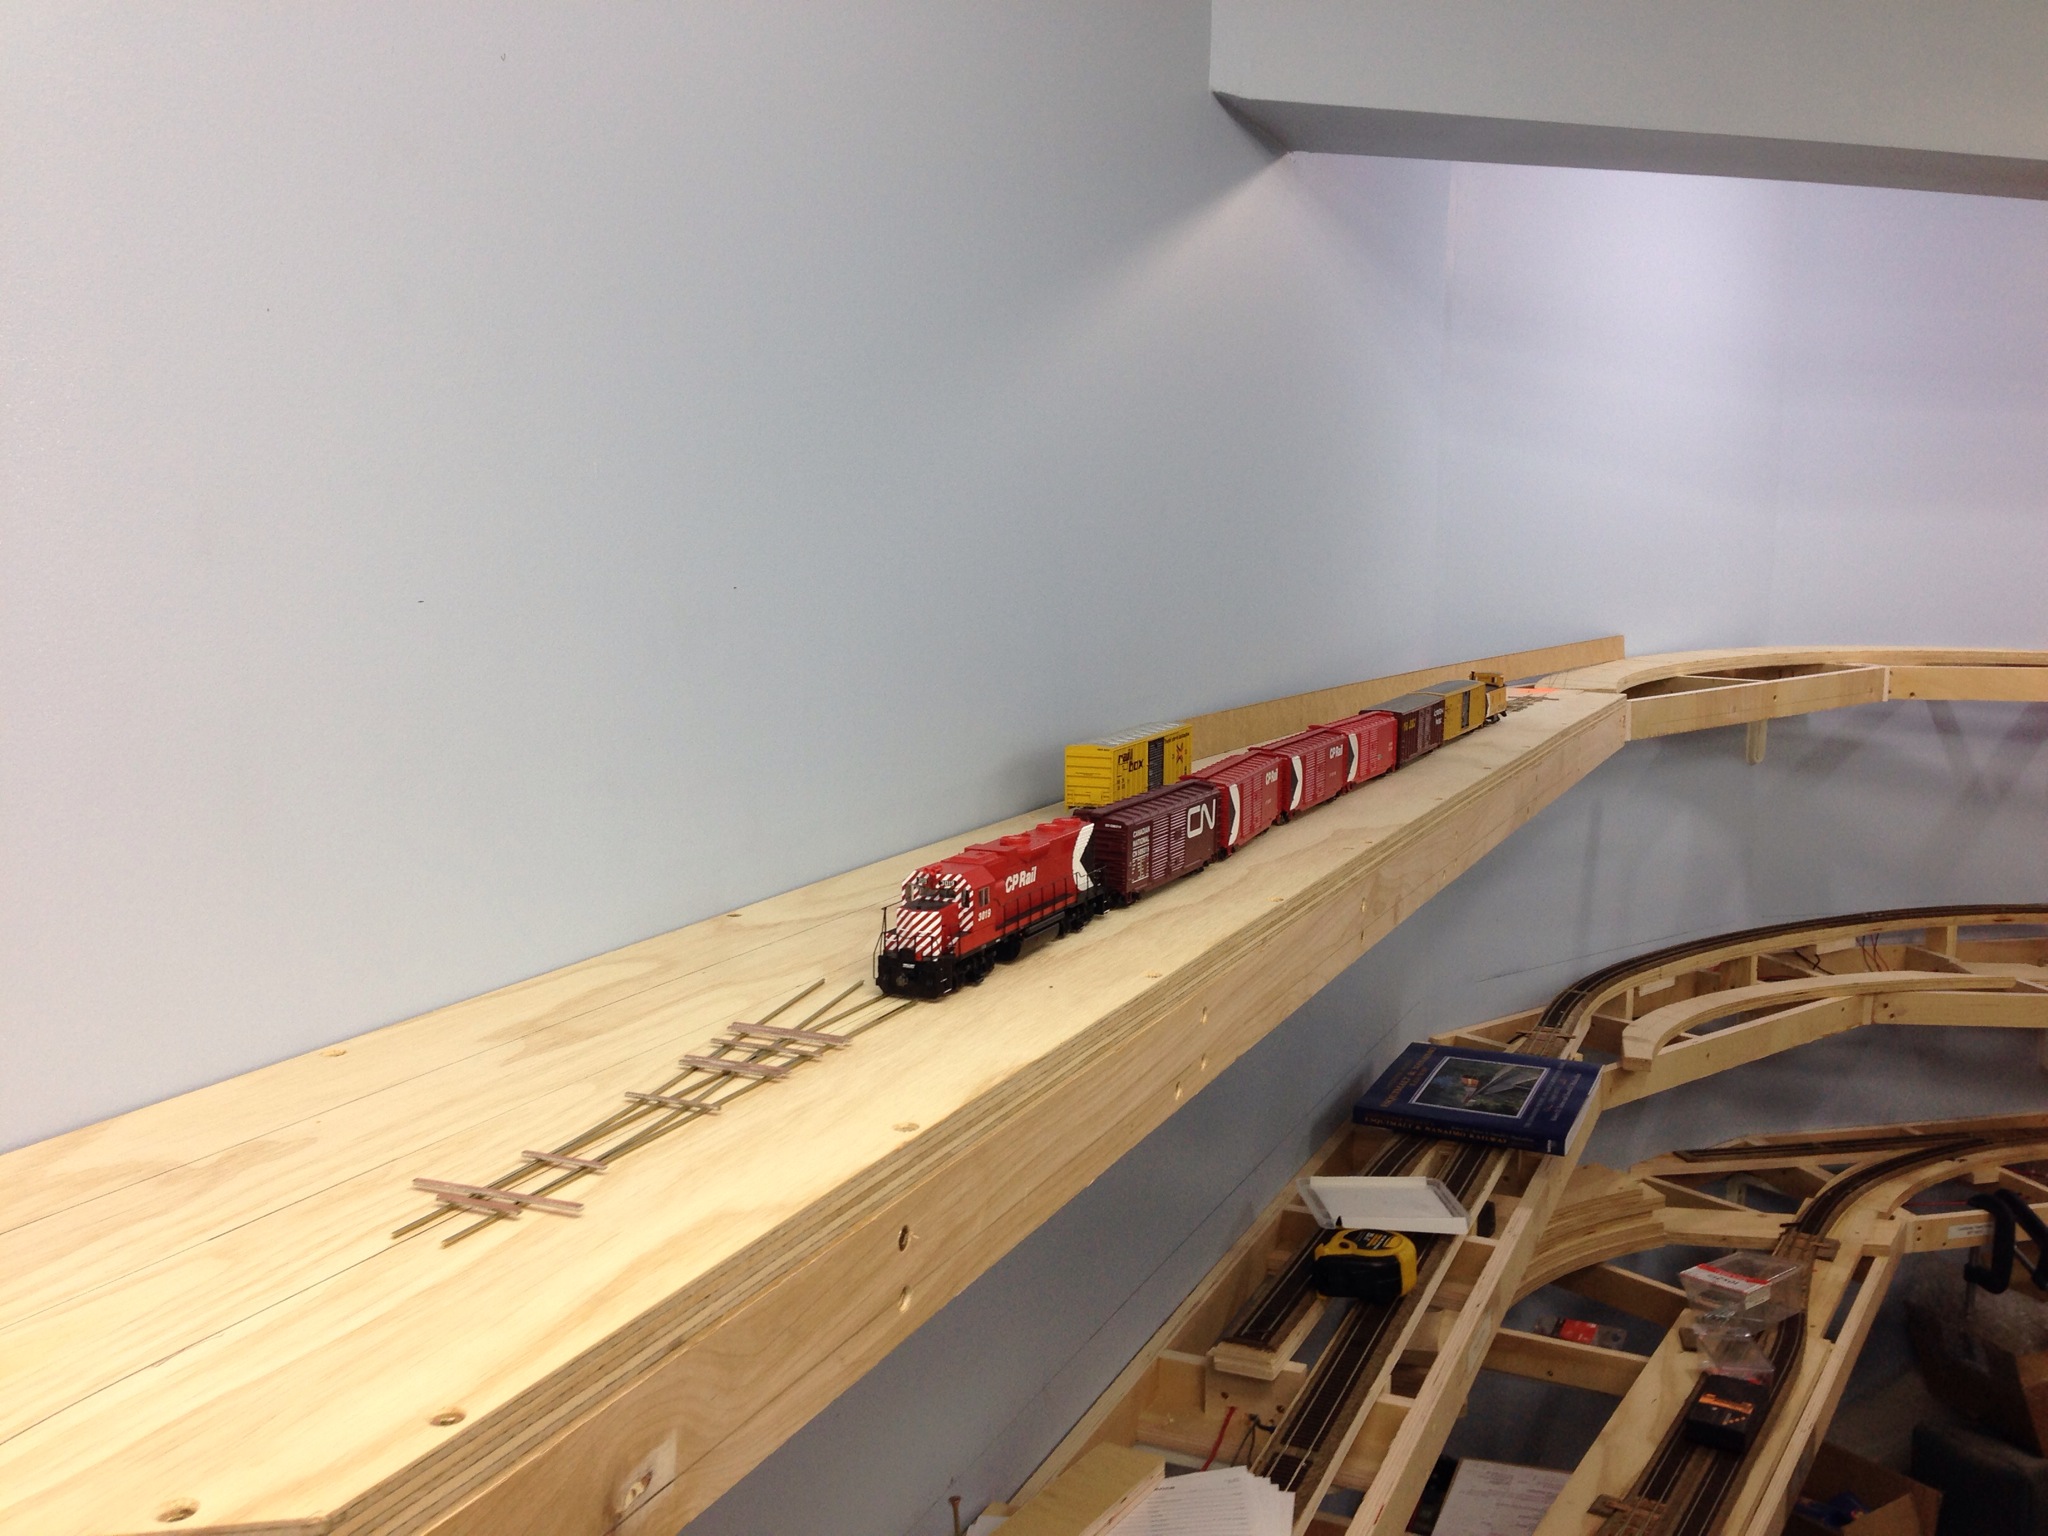
For a very long time, we’ve had the sub benchwork down the hill started… But not quite complete. This past Saturday, Cam and I worked on fixing that, and getting that little bit of track board finished and secured. After a bit of a meal, we got the contact cement out and laid the cork from where we left off just prior to the MP25 trestle, all the way down the hill. As we weren’t going to put cork in P.A. until we had a plan, we used a long cedar shim to ramp the track from the cork to the plywood.
After dinner, track laying down the hill began in earnest, and that was complete that evening. Of note, we actually slightly superelevated the curves on the way down the hill, for some aesthetics, but more for keeping runaway rolling stock from wanting to jump the rails on the way down.
Sunday, Cam arrived and we got the temporary staging yard built. A three track, double-ended affair with commercial #6 turnouts, it’s not great looking, but will hold two full port freight trains… One to arrive and the power can switch the caboose off and put it on the other train and come back to Wellcox with a different train.
We cleaned up the layout after the trackage was complete, powered up the layout and ran a couple GP’s (3000 and 3004) up to Port to see how far we’d get.
Surprisingly enough, we got all the way to the yard, and into it!
March 23, 2014
A brief update this time around.
Cam was over yesterday with a mutual friend from the Free-mo group named Carl. The primary reason was to show Carl the layout and the progress since he last saw it several years ago.
After Carl left, I figured we could get “something” done on the layout.
We decided on benchwork… And then proceeded to get the trackboard completed down the hill into Port Alberni, which we successfully completed along with a section of the plywood representing the paper plant and the first part of the yard. We’ll hopefully tackle cork and at least some trackage before SUPERTRAIN, as I’m wanting another ops session with some friends visiting from Toronto just after the show. I’d like to be able to run the Port Freight all the way into Port Alberni instead of just to Arrowsmith…
Cheers!
January 11, 2014
Yes, it’s been a little while, again.
Still busy with SUPERTRAIN stuff, but I have been trying to keep progress going forward in the basement. Maybe not really in the trackwork/benchwork realm but in the rolling stock. I now have three skeleton log flats which are nearly ready for decals and a couple 50′ long flat cars suitable for idler flats. More on the five pack later.
Cam has also been really busy over the week getting all the last details added and painted on 3000 and 3004, in preparation for the ‘Homecoming’. Friday night he escaped from work a little early and came with me to Dave’s place to get some last minute touch-ups and details done. All tested and these things are awesome.
The next day (ie: Saturday/today according to my dating scheme here), I was busy doing a ton of cleaning in preparation for the party. Cam arrived around 1pm and we got to work on niggling issues with the layout…specifically the problem turnouts, at Parksville and ICG Nanaimo. The former was needing rails spiked to the ties and some minor adjustments, the latter needed to be shifted and spiked. Will still need some work, so some flags (aka yellow and green pushpins) were setup and and a Daily Bulletin was issued to advise of the slow order through the turnout.
I also did a thorough vacuuming of the track and thought that would be all. Not quite as it turned out.
Guys started showing up just prior to the appointed time and the layout was deemed okay to turn on (oh yeah, forgot to mention… A fair number of frogs in the staging yard needed gapping) and the locos were fired up, assigned and coupled up to the Courtenay turn and Cam had the Honours to be the engineer to run the train containing a lot of his work (3000 and 3004, as well as the skeleton log flats) out to the end of the line and back.
That’s Jeff Simpson in the foreground admiring the train with Cam running in the background.
Jeff was accompanied by Josh Soles and Matt Cummins who gladly accepted a throttle and 6101 to run VIA 198 and 199 out to Courtenay and back. A little quickly mind, but at least most of the crews running freights gave the passenger service minimal delays. Chuck Johnstone, Tyler Federoshyn, Dan Hamilton and Kevin Pyle also made appearances and some of them had opportunities to run trains as well. Kevin has built a few of the Kaslo skeleton log flats and agreed that they’re too light to run empty, but he’s got a good means to produce the poles… I’ll be leaning on him for a drill press and his expertise to make the poles I need for the two industries loading them…
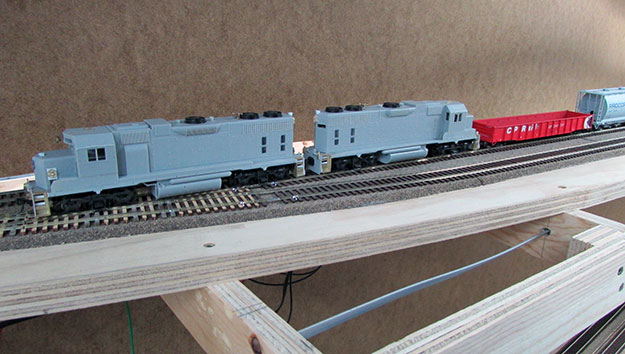
All in all, a good day, summed up in this picture of Josh admiring the two GP38AC’s:
It will be fixed
In some respects, building something gives you knowledge of how something goes together.
It also (hopefully) gives you knowledge of how to repair it.
Due to the cold outside, the non-functioning humidifier on the furnace and the fact the basement is warmer now than in the summer led to another rather nasty kink in a really unfortunate spot: Parksville Junction.
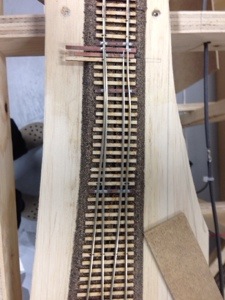
This shot, taken from above, illustrates what happens when things aren’t allowed to breathe.
The last time this happened, at the ballast spur turnout on the lower deck, I cut the rails and they managed to straighten themselves out.
Sadly, this didn’t happen here. After cutting some gaps, the rails did not return to where they should. As a result, some selective repair will now have to take place.
Here’s the progress on the demolition:
Wish me luck!
Modelling…
So the past few weeks have been primarily occupied with getting web pages done up for SUPERTRAIN – not so much for the public, but for the people who will bring their displays and wares to the show.
But that’s not to say I haven’t been doing nothing for the layout. Thanks to Dave Bedard for inviting Cam and I down to his place over a few evenings over the past few occasional weekends to do some modelling. He’s worked on some of his locomotives, a couple of mine (those GP38AC’s you saw in Jason Shron’s pictures? Now painted and decoderized, just getting the final details added like handrails, grab irons, lift rings, etc. I’ll fill you in on those, with pictures, once they’re complete.
Actually, that was more Dave and Cam’s work. I’ve been working on a rather unique car that was rather essential for the layout:
The CP skeleton log flats.
These cars are really spindly things, purpose built for carrying logs and poles. I’ll be loading them with the latter, and there in lies the challenge for modelling such a car: there’s nowhere to put weight when the car runs empty. Kaslo made a resin model but resin isn’t a heavy material, and there’s just a tiny cavity in the centre sill to put weight. To operate my layout, properly, I need to be able to deliver empty cars to the two industries in Courtenay, and the resin cars are simply not able to be made heavy enough to operate properly. Solutions were investigated, including photo-etch brass (filled with liquid gravity), shapeways metal, and borrowing the centre sill from an Atlas Trainman bulkhead flat car.
Until Cam found, quite by accident on Walthers, a kit of the very car I need, made entirely from solid cast pewter (aka, metal), from Custom Finishing. In stock for around $27, an order for four cars was quickly placed and picked up when they arrived at Hobbytech.
The kits were produced back in the late 90’s and thankfully didn’t sell out (either that or the molds still function) so I could get them some 15 years later.
They are as old school as you can imagine. Though the direction sheet indicates these are an easy build, nothing could be farther from the truth. The amount of filing and fiddling with these kits is the most I have ever seen…I would charitably say that between Cam and I, we’ve filed about a half-ounce of pewter from the parts that make up a single car.
But the results I think will be more than worth the effort. Especially when I think of how much time I would’ve spent trying to learn and design the car from photos and crude folio drawings, without any assurance of the resulting parts coming out to my satisfaction.
You tell me: doesn’t this partially finished car look pretty good?
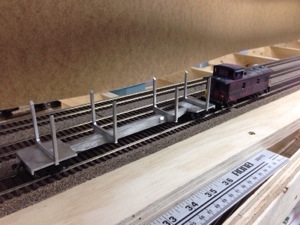
The car is sitting on ExactRail 70 ton trucks (complete with semi-scale 33″ wheels) with Kadee 78 couplers. The kit needs a thorough washing, shimming the two centre bunks and gluing to the sill, but otherwise ready for paint and decals. Two other cars are in process, coming close to the same state, and the fourth hasn’t come out of the bag yet. I’m likely going to leave it like that to get a rough idea what the starting and finishing weights are.
I suppose the caboose deserves mention too. It’s an older Athearn end-cupola steel caboose, factory dipp…err, painted in CP script for international service. That scheme is way old for my layout, so out came the windows, off came the roof walk and cupola. After a good long soak in 99% iso, plus plenty of scrubbing, the car is as you see it now. Cam also plugged the old roof walk holes, and it’ll be seeing a few coats of True Line Trains Action Yellow and decalled for CP Rail. So after that is finished and I have another one arriving from Florida via eBay, I’ll have, I think, enough cabeese to operate the layout. But all of them will be stand-ins.
And that is a bit of a shame. The cupola is wrong, the roof is supposed to be a peaked raised panel roof instead of a curved roof, and the windows are not right. Yes, they’re steel, have the cupola at the end and painted in the right colours. And for now, that will do. There just isn’t a kit (yet) available for the proper caboose, and I’m not going to scratchbuild five of them either. I did have an opportunity to get a proper brass caboose, painted in the right paint scheme, for $300-ish but the wife vetoed that purchase. And in some respect, I’m glad she did. Because what the island had was a consistent fleet of cabeese, and having one correct and several stand-ins would’ve made the correct one stick out like a sore thumb. So until I’m able to do a wholesale replacement, the stand-ins will have to do.
Sorry for the novel on such a tiny aspect of the building, but it’s something to read…
Cheers!
Milestone #(mumble)
With Athearn’s release of the 33,000 gallon tank cars suitable for LPG and Anhydrous Ammonia in the Genesis line, I picked up three of them labelled for Procor.
Shortly after getting home with them, Cam and I took inventory of them for coupler replacements. One thing shocked us both:
I have enough propane cars to fill every facility on the layout, their replacements and a few more to cycle on and off the island.
I’m done buying propane cars!
So with the exception of the skeleton log cars, I’m coming very close to having enough rolling stock to fully operate the layout. I just need to acquire enough metal wheels (hey, buddy, can you spare me some 33″ semi-scale Intermountain wheels?) and couplers to operate them with.
Amazing, eh?
August 27 & 28, 2013
Having cleaned my workbench quite thoroughly on Monday, figured I should get at one last bit of wiring: the tail track of the wye.
Ordinarily, it’s be a reasonably simple thing, just wire in the track to an auto reverser and be done with it. But, no… I have to complicate things by making the tail track a programming track as well as making use of the Digitrax Zephyr as an auto-reversing booster. So not only do I have to wire in a 14ga wire from the other boosters for a common, I also need to wire in loconet, and then gap the rails all over the place, creating an isolated bit of track to ensure the programming leads aren’t subjected to full DCC power and making sure it all works at the end.
So, with a 4PDT switch, it’s all done. Never mind the fact it took me two full evenings to get it wired in…. Pics to come when I finish tying up the wires.
August 25, 2013
Back at it in the basement yesterday, primarily to address some much needed tasks.
Saturday evening, Cam and I had a good amount of playtime with running a port freight (me) and a Courtenay turn (Cam) and found a 3 hour ops session is quite realistic after the length of time we took doing abbreviated runs like those. I also found I really needed to get power into Arrowsmith siding. Dragging equipment into a track takes away a lot of realism when you use 5-DCC (aka the 0-5-0).
So, Sunday morning I started tackling that by gapping the rails just past the summit and installed feeders into Arrowsmith. Cam and Dan showed up shortly after I finished with the initial set of feeders and while I grabbed some lunch, they emptied the railway of rolling stock, parking it all in Wellcox. Of course they had a lot of fun doing that!
After lunch, we got to work on benchwork for Port Alberni. Cam, Dan and I got a fair bit of it done but not really well secured to the shelf brackets due to impending deadlines. So the three of us finished that, and made plans for the rest of it next weekend… We hope! Sooner we finish with the benchwork, the sooner we can keep playing!
August 7, 2013
Went downstairs to do some work last night for the first time since the ops session. Work on some niggling details and generally cool down.
Started with the turnouts in the staging yard and repair one of them at the far end of the yard, as the pin dropped out of the throwbar. Fixed that, though required a second hole in said throwbar. Others had positions tweaked and one repaired point. All working now and I’ve ground the pins down with a dremel tool so they don’t catch locomotives and stop them dead.
Also wired in a couple bullfrogs to power the switches and while I was at it, hooked up the track bus to a UP5 at the south end of Parksville Yard.
My thought with powering the UP5’s was initially to have just the 12V power supplied through the barrel jack on the side, but after hooking up the track bus, figured that would definitely be the way to go for all Ux panels, and that goes for the UR92 and UR91 too. The 12v supply will still be hooked up as a backup power for when the track is shorted, but the readings off a dt400 throttle without a battery show much better power with the track bus than without. Plus I get track indication as well!
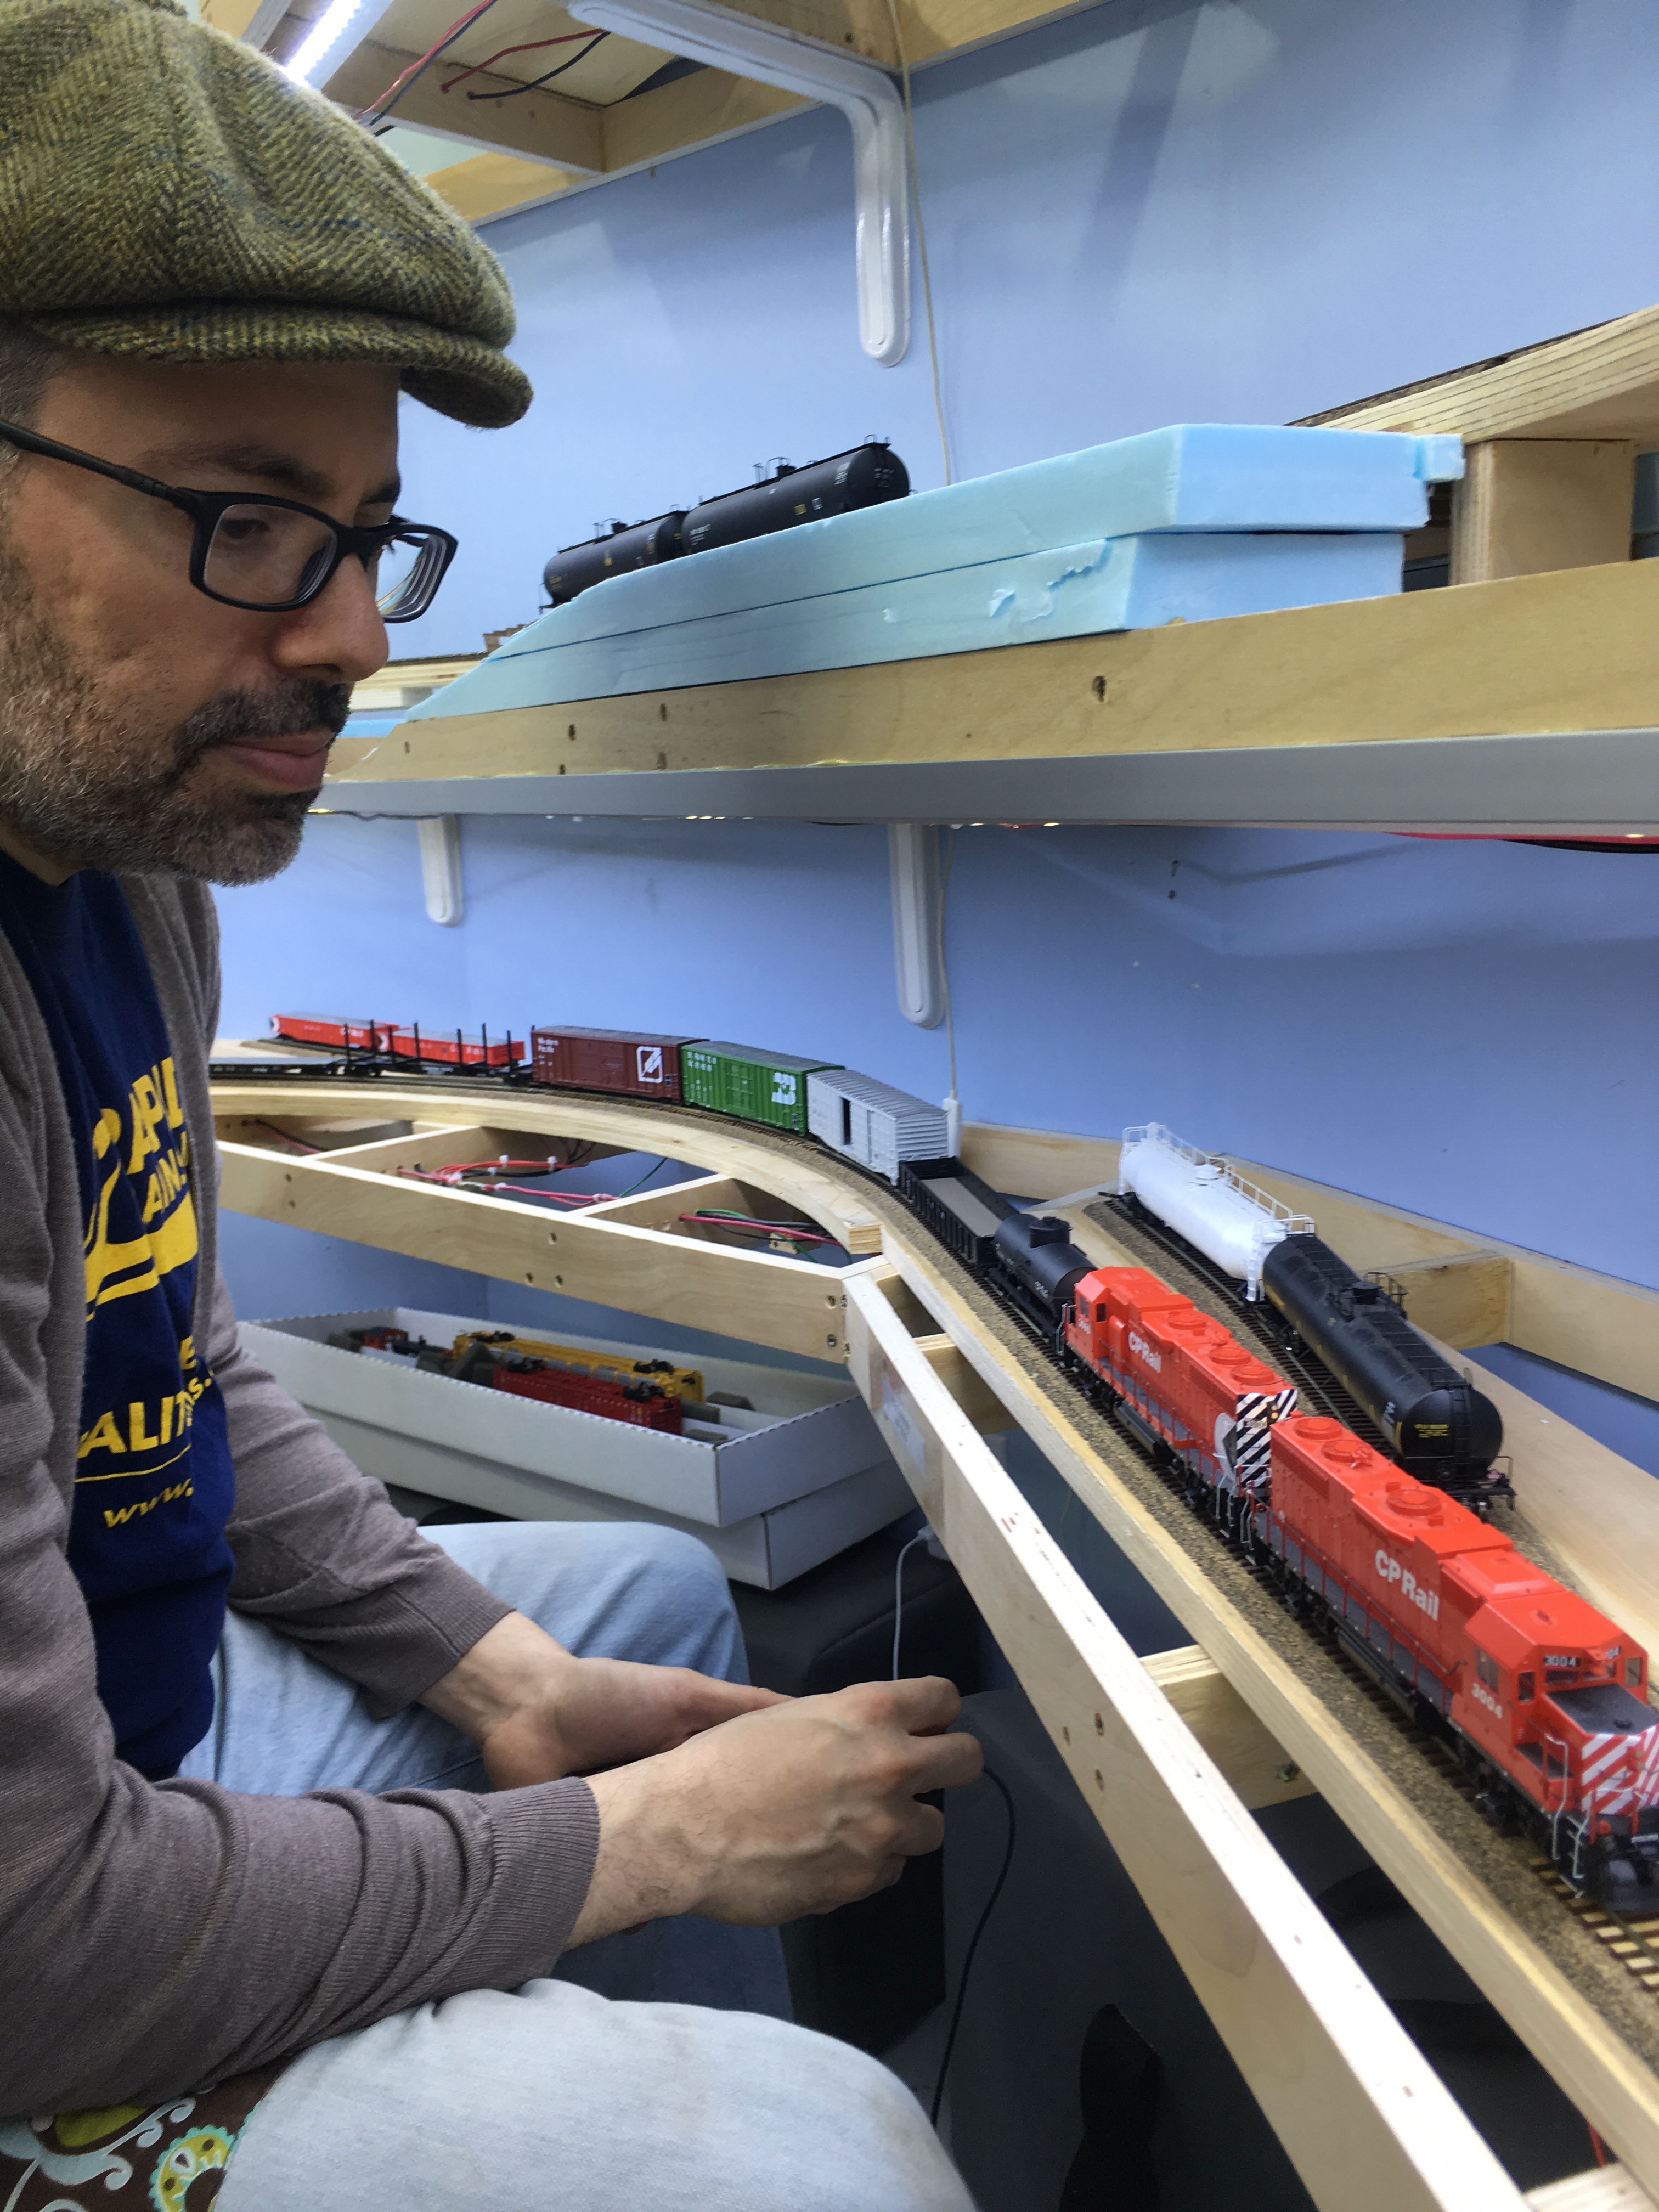
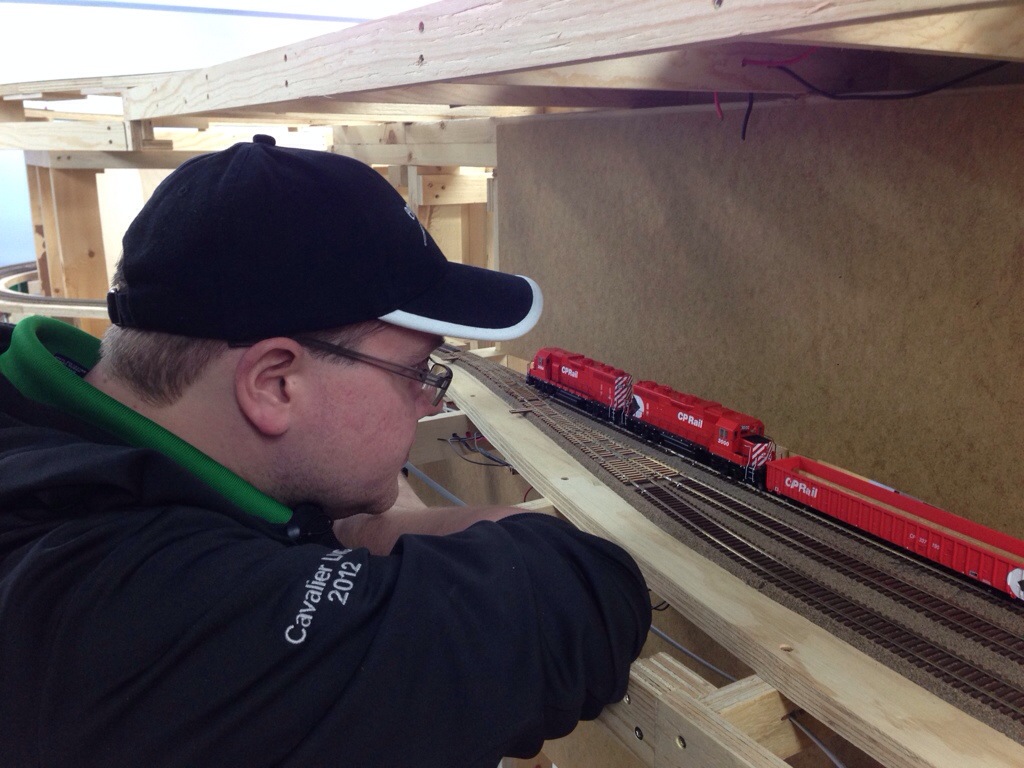
Best photo yet!
I think this photo warrants it’s own post. Cam (left) and I standing beside a few trains (Arrowsmith on top, Parksville – complete with in-progress units 3000 and 3004, and Mud Bay below) and looking quite thrilled at the progress made on the layout.
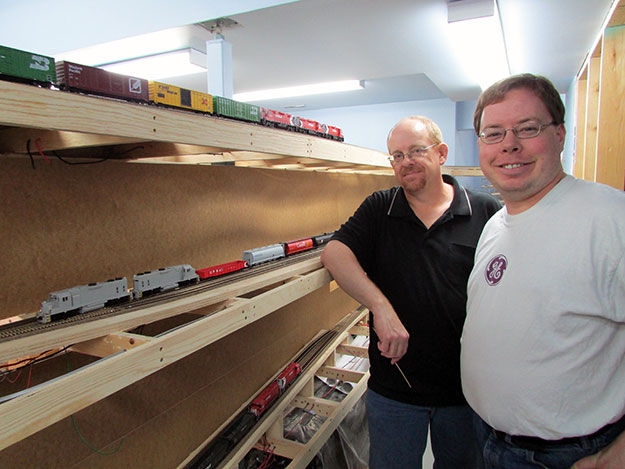
Photo undeniably by Jason Shron, stolen without permission from Rapido Train’s blog.
Inaugural Ops Session!
A long overdue post, primarily because I’ve been waiting for a specific photo… Figured I’d go without it and post it when I get it.
So Jason Shron of Rapido Trains (a model train manufacturer who makes a lot of passenger equipment, save for the one I need on my model railway…yet) arrived in Calgary on the 30th of July and after his first gig at Chinook & Hobby West (North), we went for dinner with Sylvain Duclos at the Five Rivers. A vegetarian restaurant serving Indian fare. Interesting… About all I can say to that as I’m not one typically for curried anything. But the more important stuff for me was when we got home…
That evening was spent showing off the half-covered layout to both Syl and a really tired Jason. James Powell came by on the late side and had a good look around, but despite his offer to help with the cleaning, figured enough rest for his trip back to Vancouver Island was a better idea. All were really impressed, but I wish I had things a little further along to show them the layout without all the sawdust.
Wednesday was spent showing off the GMD-1’s at Eastridge and CMT. Glad to see a few more friends who have been asking when my layout is going to be on the tours for the CMRS. Likely next year folks… Also did a little bit of cleaning downstairs and finished off the wiring…
Close-up of Cam’s work-in-progress on a pair of Atlas GP38AC’s
Photo by Jason Shron
Thursday saw Cam arriving early-ish and we seriously attacked the layout and got it all cleaned up, track polished and all ready to go for Friday. Got most of the Quad-LN’s programmed for basic addresses (the rest will come later) and a few more cars were prepared and the pair of Atlas GP38AC’s were unveiled. Sans paint and handrails but looking really good. 3000 and 3004 will be very special units when they’re complete – thanks Cam!
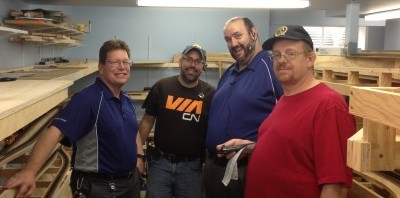
The first ops session crew – from Left to Right: Murray, Jason, Dave, and Cam
And then Friday morning arrived. First ops session and a few great friends made it for the big day. (Thanks Murray, Dave, Cam and Jason!)
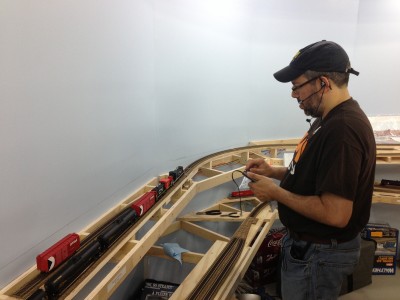
Jason expertly pilots CN GMD-1’s 1011 and 1021 past the Fletcher’s Furniture spur.
On account of a lack of working motive power on the island, the superintendent of the E&N made some phone calls to CN and acquired the use of GMD-1’s 1011 and 1012. These locos were dispatched to service the Nanaimo Switch Job. I…err, make that the E&N Superintendent didn’t send them anywhere else on account of the larger trucks.
Joking aside, things went quite well considering the first ops session is supposed to discover all the bad things and after all was said and done (and Jason on his way back to Edmonton), there weren’t that many things discussed which were horribly wrong. Most issues could be chalked up to not having enough time prior to set things up. Yes, there’s still more programming of the Quad-LN’s to do, operations stuff to setup in JMRI (to generate the switch lists), and rolling stock to prepare. This will no doubt lead to a lot of re-numbering and patching of rolling stock, in addition to more wheelsets and couplers to change out. Memo to rolling stock manufacturers: please no glued on coupler box lids, okay?
All in all, Cam and I are really stoked on how well things went.
We’re still nowhere close to being finished though… But that’s enough for now!
July 27-28, 2013
“All that’s left to do is everything” -Jesse James
Probably the best quote I’ve got from The show ‘Monster Garage’ which aptly describes what we have done, and what’s still needing to be done after he cram sessions over the past couple weeks.
To summarize what has been completed:
Trackage in the staging yard is now complete, spiked down (required a trip to the hobby shop solely for track pins! And then another for more #71 drill bits, both account hard, and unforgiving, birch plywood) and (mostly) fed. I say mostly because there’s probably a dozen feeders still needing to be hooked up to the track bus and about as many needing to feed the microswitches powering the frogs in the staging yard. That aught to be fun…
We have servos installed and running on most turnouts, in fact, all the turnouts which must be electrically controlled, are, though I still have a ton of programming of the Quad-LN’s to do, routes to line, etc. I also changed out the accessory bus power supply with a 6A 12V power supply for the entire layout instead of having two running on the layout. I’ve also got a UP5 connected in the staging area too. To finish that bit off requires finding a spot for the Zephyr to live, wiring it in for the programming track at the end of the wye, and other linked tasks.
And then there’s the cleaning needed. This requires a massive amount of vaccuuming of everything, plenty of testing and generally making the basement hospitable. Did I mention that Jason arrives in a little over 36 hours?
July 17, 2013
Spent an hour and a bit last night hooking up previously dropped feeder wires to the bus.
That is all…
Recent Comments