Despite appearances, I have been working…
I will admit, having no updates since last October some six months ago is not doing many of you any favours. Allow me to bring you up to speed.
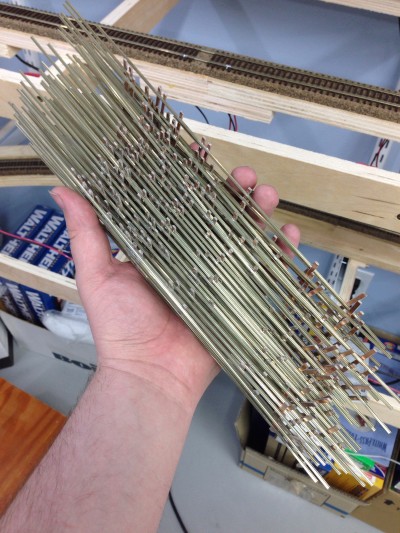
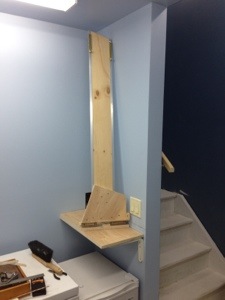
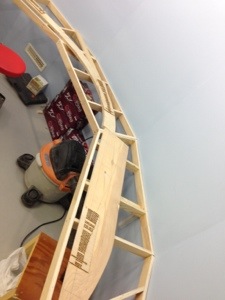
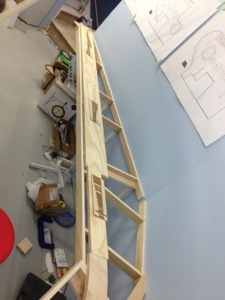
Fast Tracks Skeletons for Port Alberni Yard
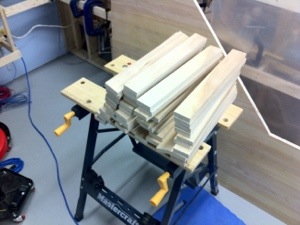
In my hand is the cumulation of some hundreds of hours worth of work. Many evenings and weekend mornings building these at my workbench, plus a few made elsewhere over these past six months and they are all done! Unless anything serious goes wrong, I won’t need to make another turnout for this layout.
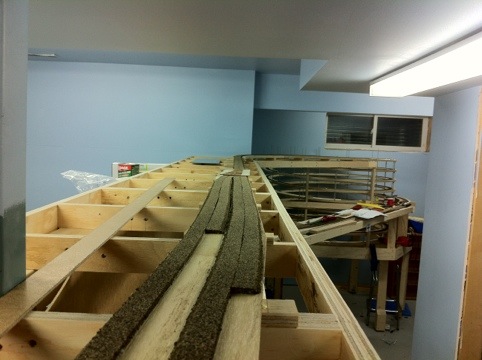
Over two dozen functional turnout skeletons (as well as two more non-functional scenery turnouts, not shown) which need a wash and to be glued and spiked to the quicksticks, and then the Port Alberni yard can be laid in it’s intended trackplan. Speaking of which, the trackplan was finished up on the computer in a program called Empire Express some time ago and printed full size. Cam and I have been trying to figure out how to transfer it to the benchwork, and my ever-so-smart wife said I needed graphite paper. Sure enough, a couple art supply stores in Calgary stock large sheets of the stuff, at exceedingly reasonable prices: $1.80 for a 20×26″ sheet. Works much the same as the carbons of ye olde time. Place it between what you want to copy onto and your pattern, draw over the pattern and the paper leaves marks. Works for me. Except I have a temporary staging yard occupying the benchwork. Well, as of a few nights ago, make that ‘had’ a staging yard. Some judicious use of a soldering iron and a pair of nippers and the yard is gone. Track laying will commence rather soon…
Other updates:
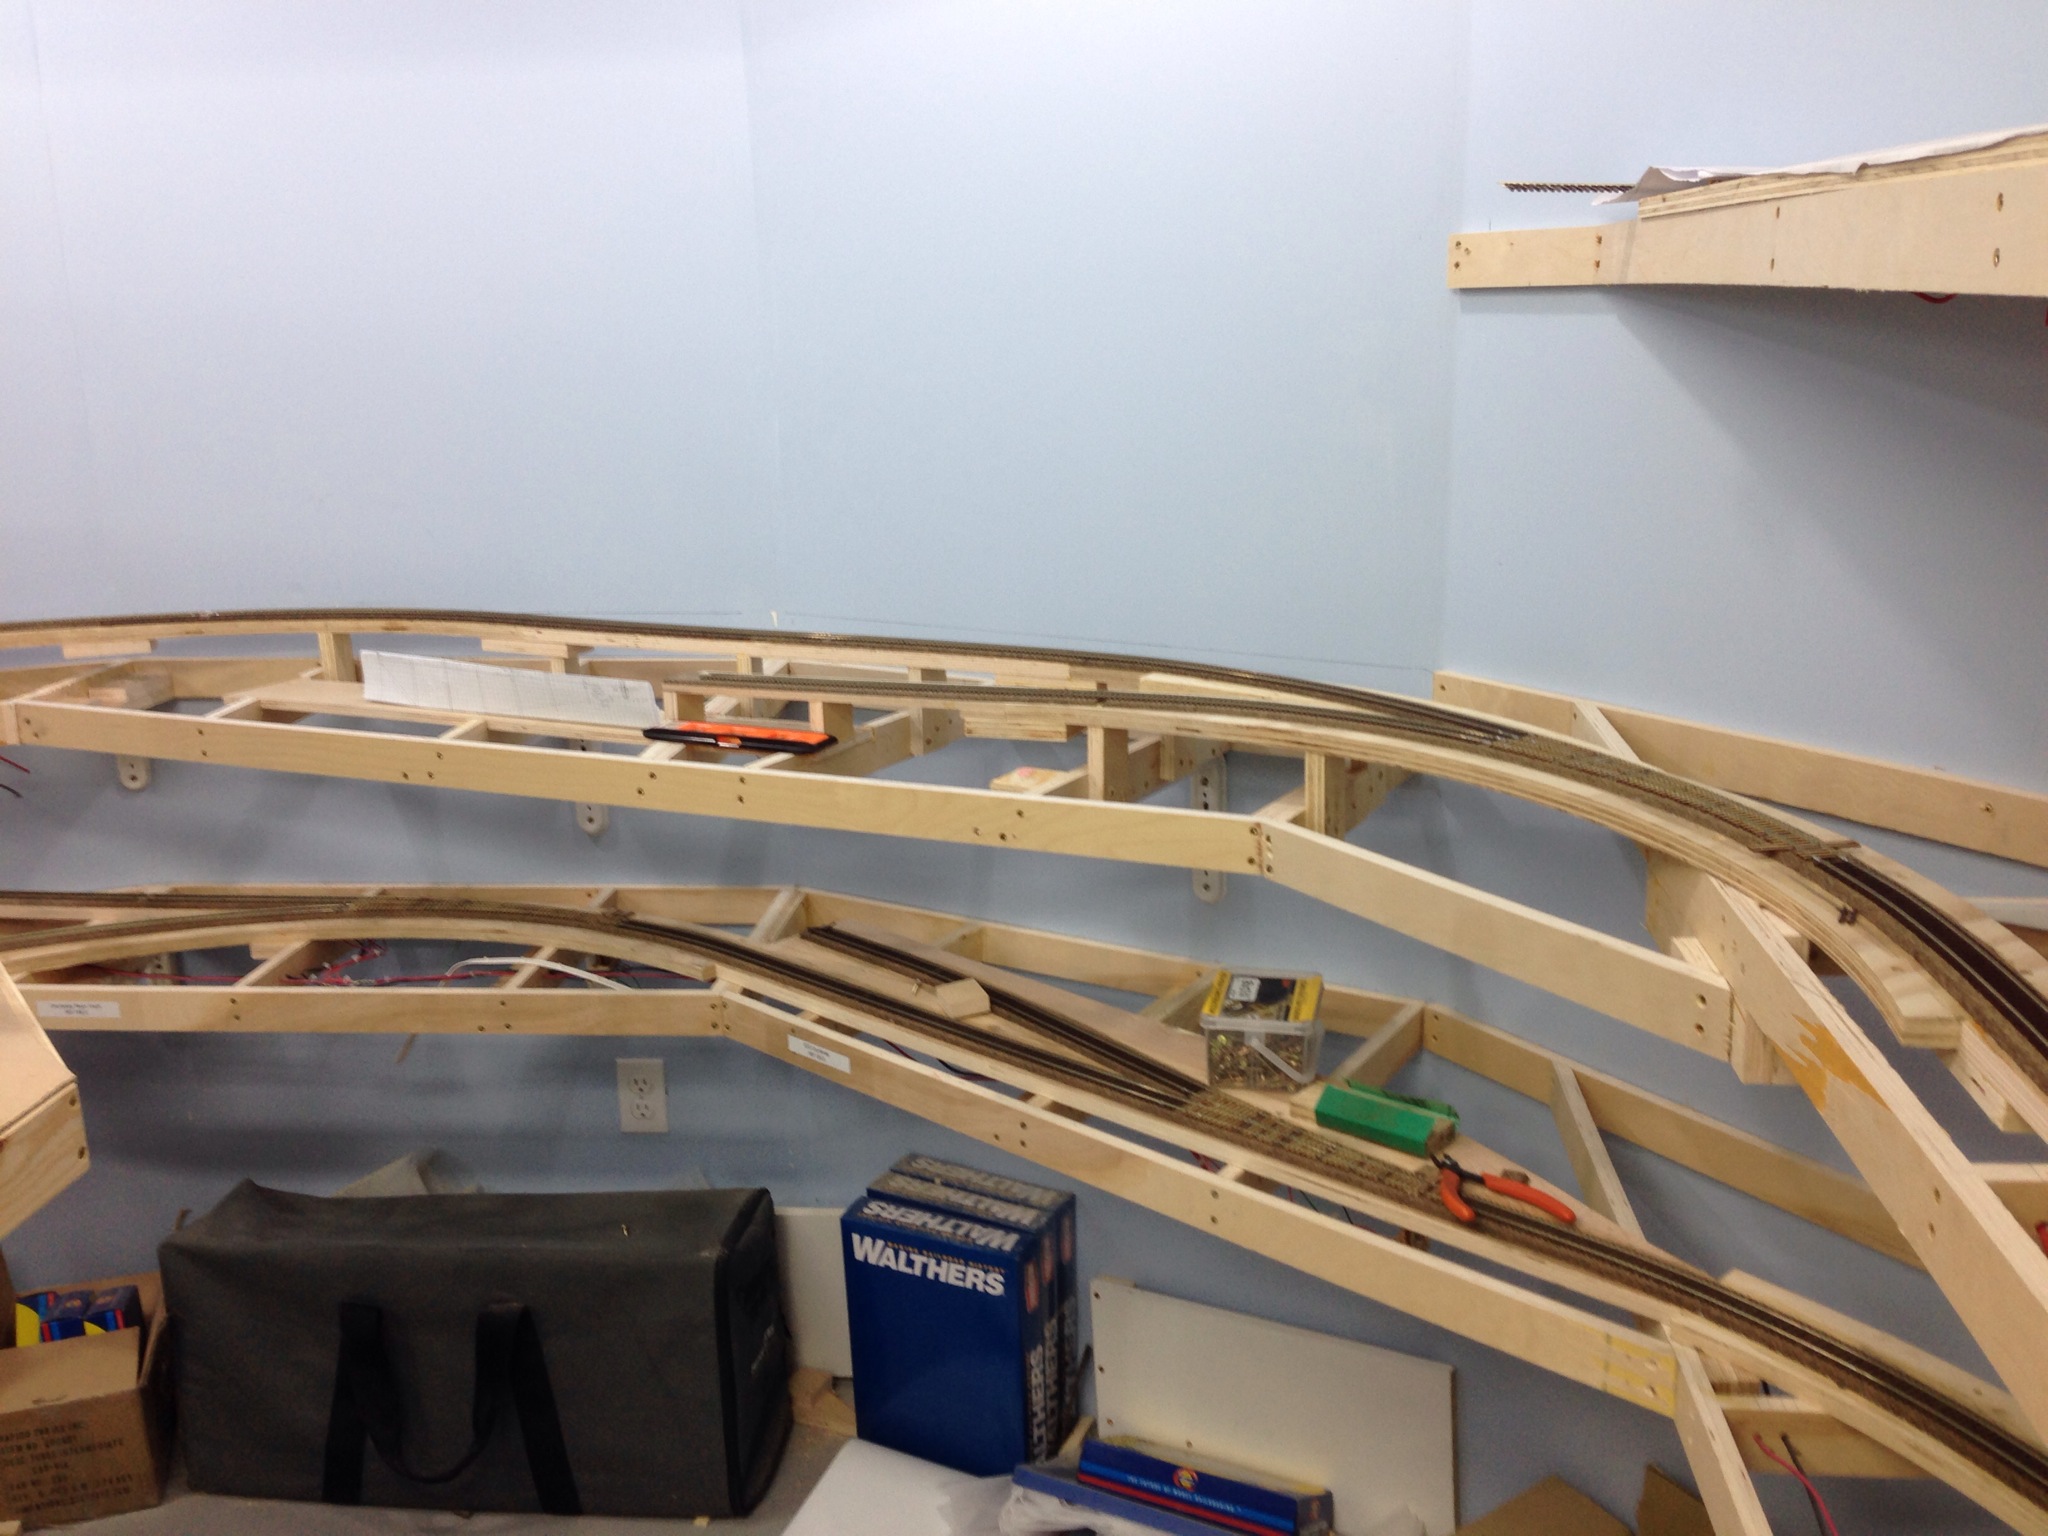
Benchwork Extension into Plywood Division
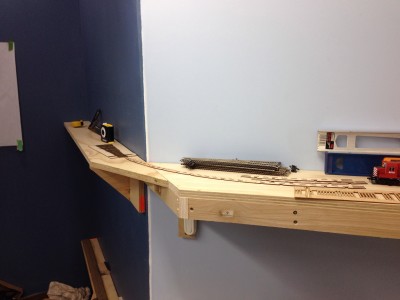
I decided that the track plan for the plywood division wasn’t quite up to snuff and decided to extend the benchwork for it around the corner and into the stairwell. The trackage to the prototype was such that a train would continue out of the south/timetable west end of the yard past the depot, then into a short siding to allow the locos to run around the train, and push the cars into a facing point switch and the two tracks. Those two tracks are in the stairwell, with the runaround track where the staging was going to be. The engineering of the extension had to take the drawbridge into account which thankfully clears with about an inch of space.
Another update is for Courtenay. We weren’t happy with the number of moves needed for turning a Courtenay train and decided to do something. We’ve extended the siding track around the corner and it’s now long enough to account for a standard length train. Unfortunately the spur for the CP Express building at Courtenay is now single-ended as a result, but an acceptable compromise. The tail track is still long enough for a pair of locos, the water car and caboose.
GP9’s
Work continues on these. All shells have paint and most decals applied but still needing more, like frame dots, warning labels, etc. Work on the chassis still needs to happen in addition to decoder/lighting installs.
Pole loads
I’ve spent more than a few hours at Kevin Pyle’s drill press and have made quite a few poles. Sadly, only enough for about half a car’s worth!
And on a last note:
SUPERTRAIN, Canada’s largest model train show, is an event which I assist in organizing, happened a couple weekends ago. This year, the show was held only a few minutes walk away from my house and I took the opportunity to host an open house for a few friends visiting from out of town. Was surprised when they brought a few other friends. I’m rather proud that I had manufacturers (well, at least their reps) galore looking at my layout. Scott from Bowser, Matt from ESU, Jeff from Prairie Shadows, Dan from Rapido Trains, Grant from Southern Alberta Rail, and always, Michaelea from Sign Reflectionz. Cam, Mark Kaluza, Josh Anderchuk and Matt Soknacki were also there and fun was had by all. Next year guys, the trackage will be completed!
Finishing benchwork
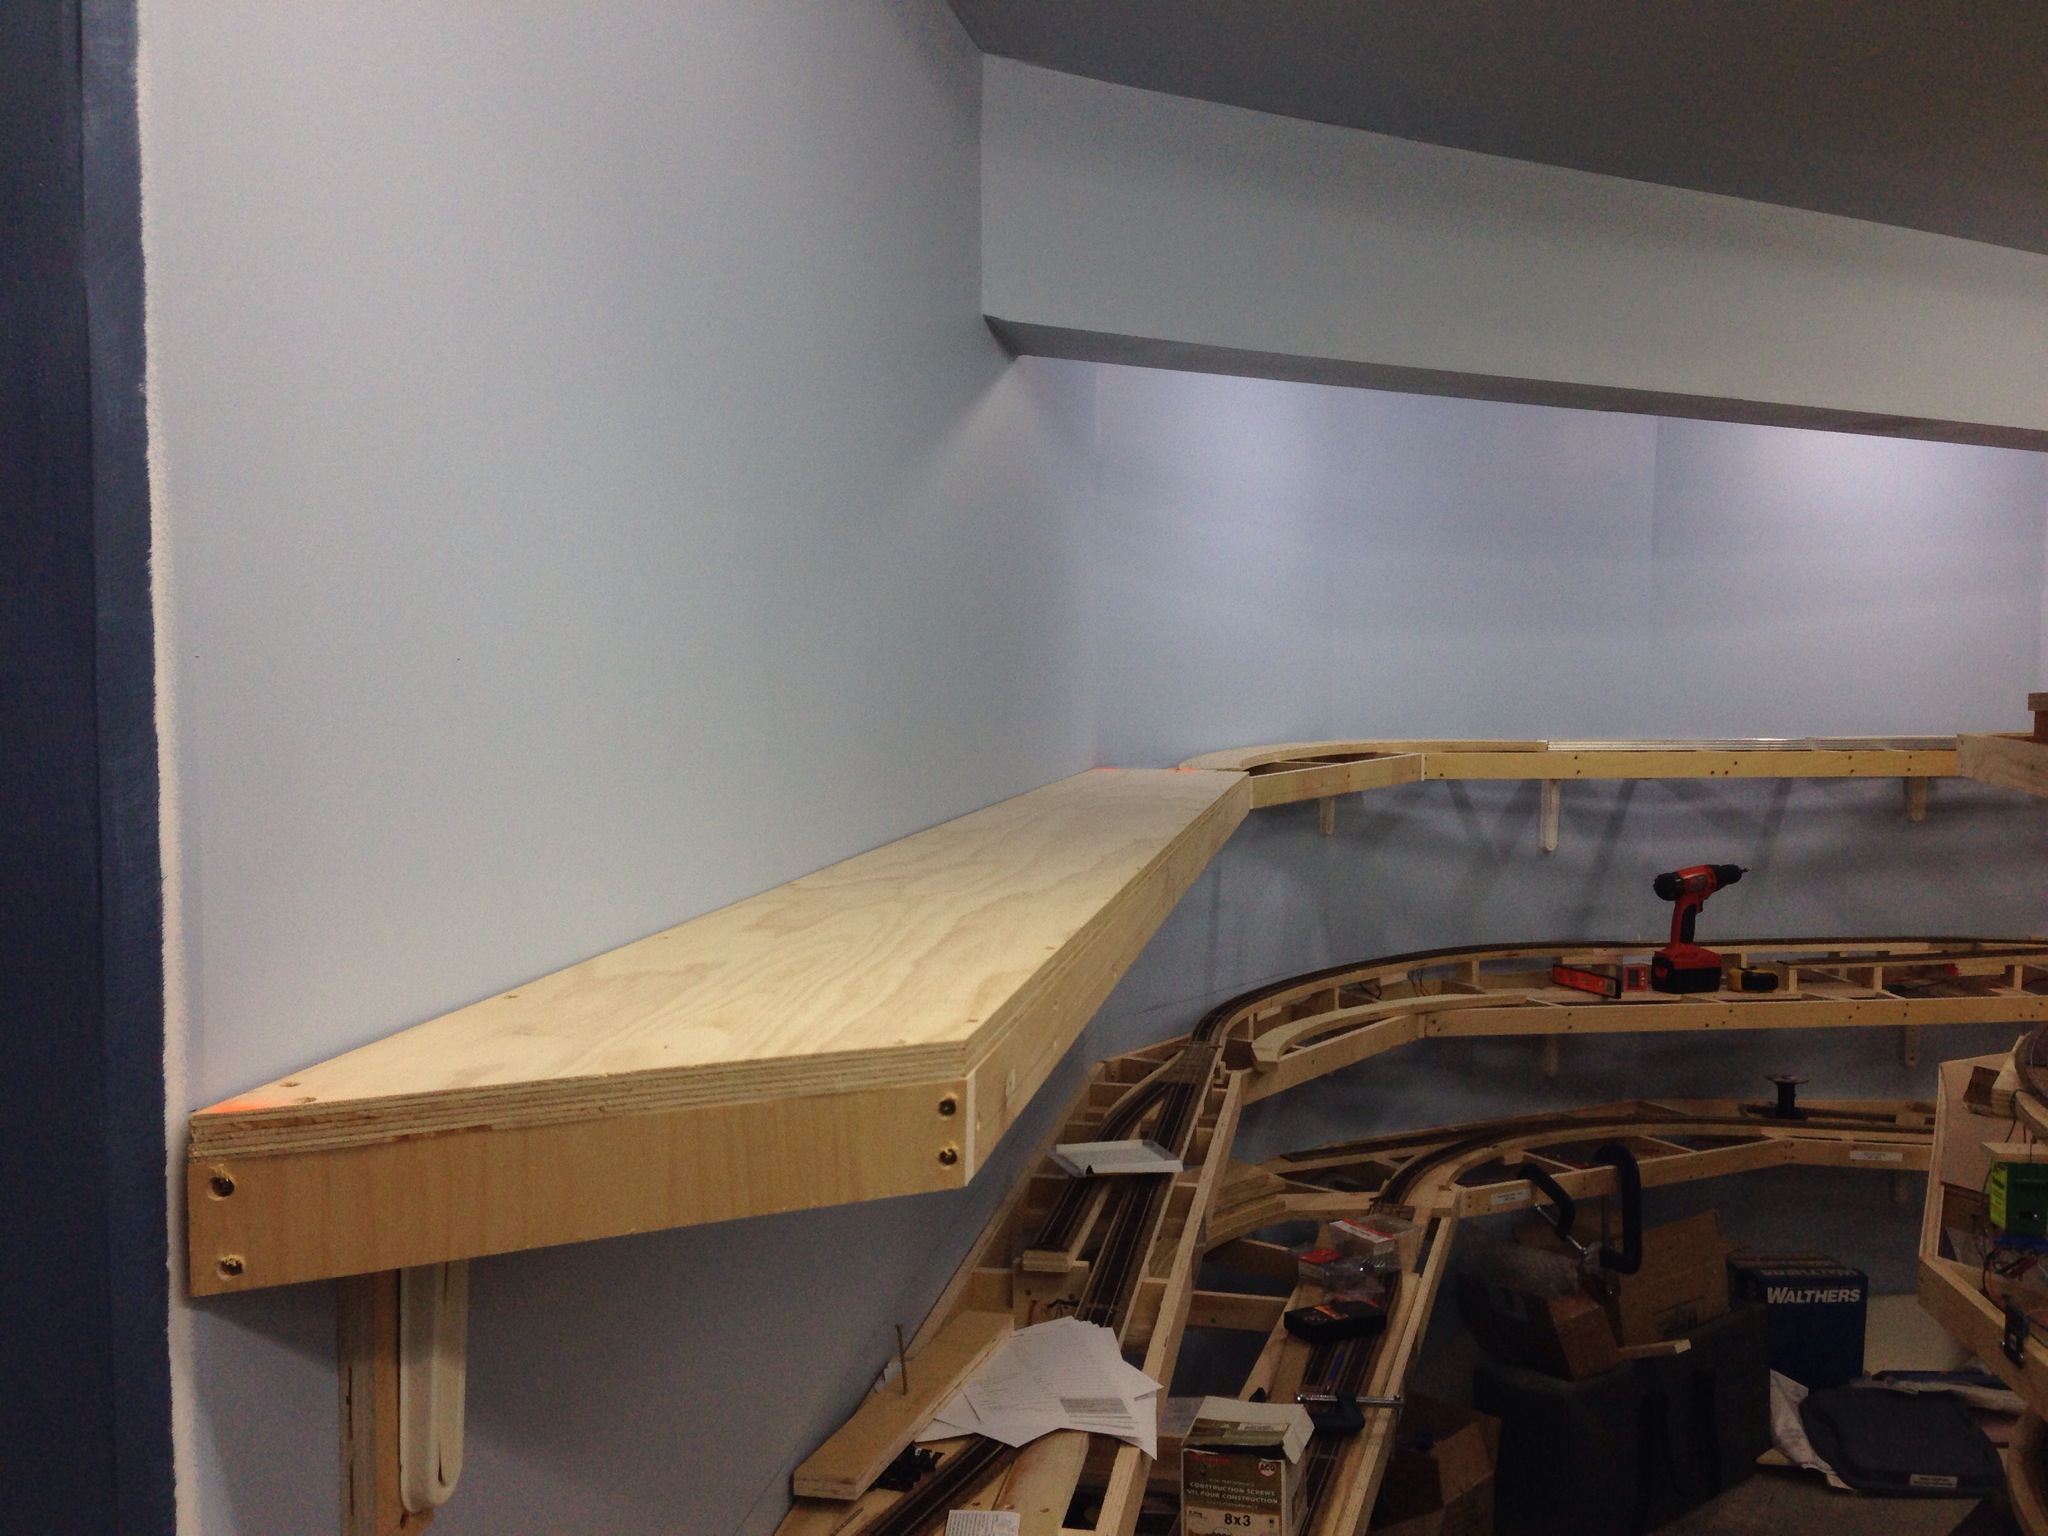
I’m done!
Well, okay, so there’s a lot of work still to be done, but a significant milestone was achieved a little over a week ago when Cam and I secured the last of the benchwork to the wall for the Alberni Pacific Plywood division. That bit of benchwork means that everywhere I want to install trackwork, I have the wood to support it.
Admittedly, it’ll be a fairly lengthy time before I can actually run trains on it due to the fact I’m needing to build all the turnouts for the Port Alberni yard first, and could have worked on them first, but I wanted to get the major amounts of woodwork completed and get the chopsaw out of the basement and make use of the space this tool vacated. As well as having a clean floor too.
Fixing deficiencies
I suppose thanks are due here to a good friend of mine – Grant Eastman. Many times I’ve been to his very impressive N scale layout of the protolanced Southern Alberta Rail, and found substantial sections of benchwork and track completely replaced.
His motivation?
He simply didn’t like how it was previously done and decided to do something about it. For example, he didn’t like how one would have to leave the train and walk around the laundry facilities, furnace and hot water tank. So he relocated, not the track, but the latter three items to allow one to stay with the train. He rebuilt the staging loops and to provide a better track plan, rebuilt the stairway into the basement, changing it’s configuration in the process. He also changed all the code 80 track out with code 55, even in the fully scenicked areas for better appearance. I could go on but you get the idea. Enough about his layout and back to mine.
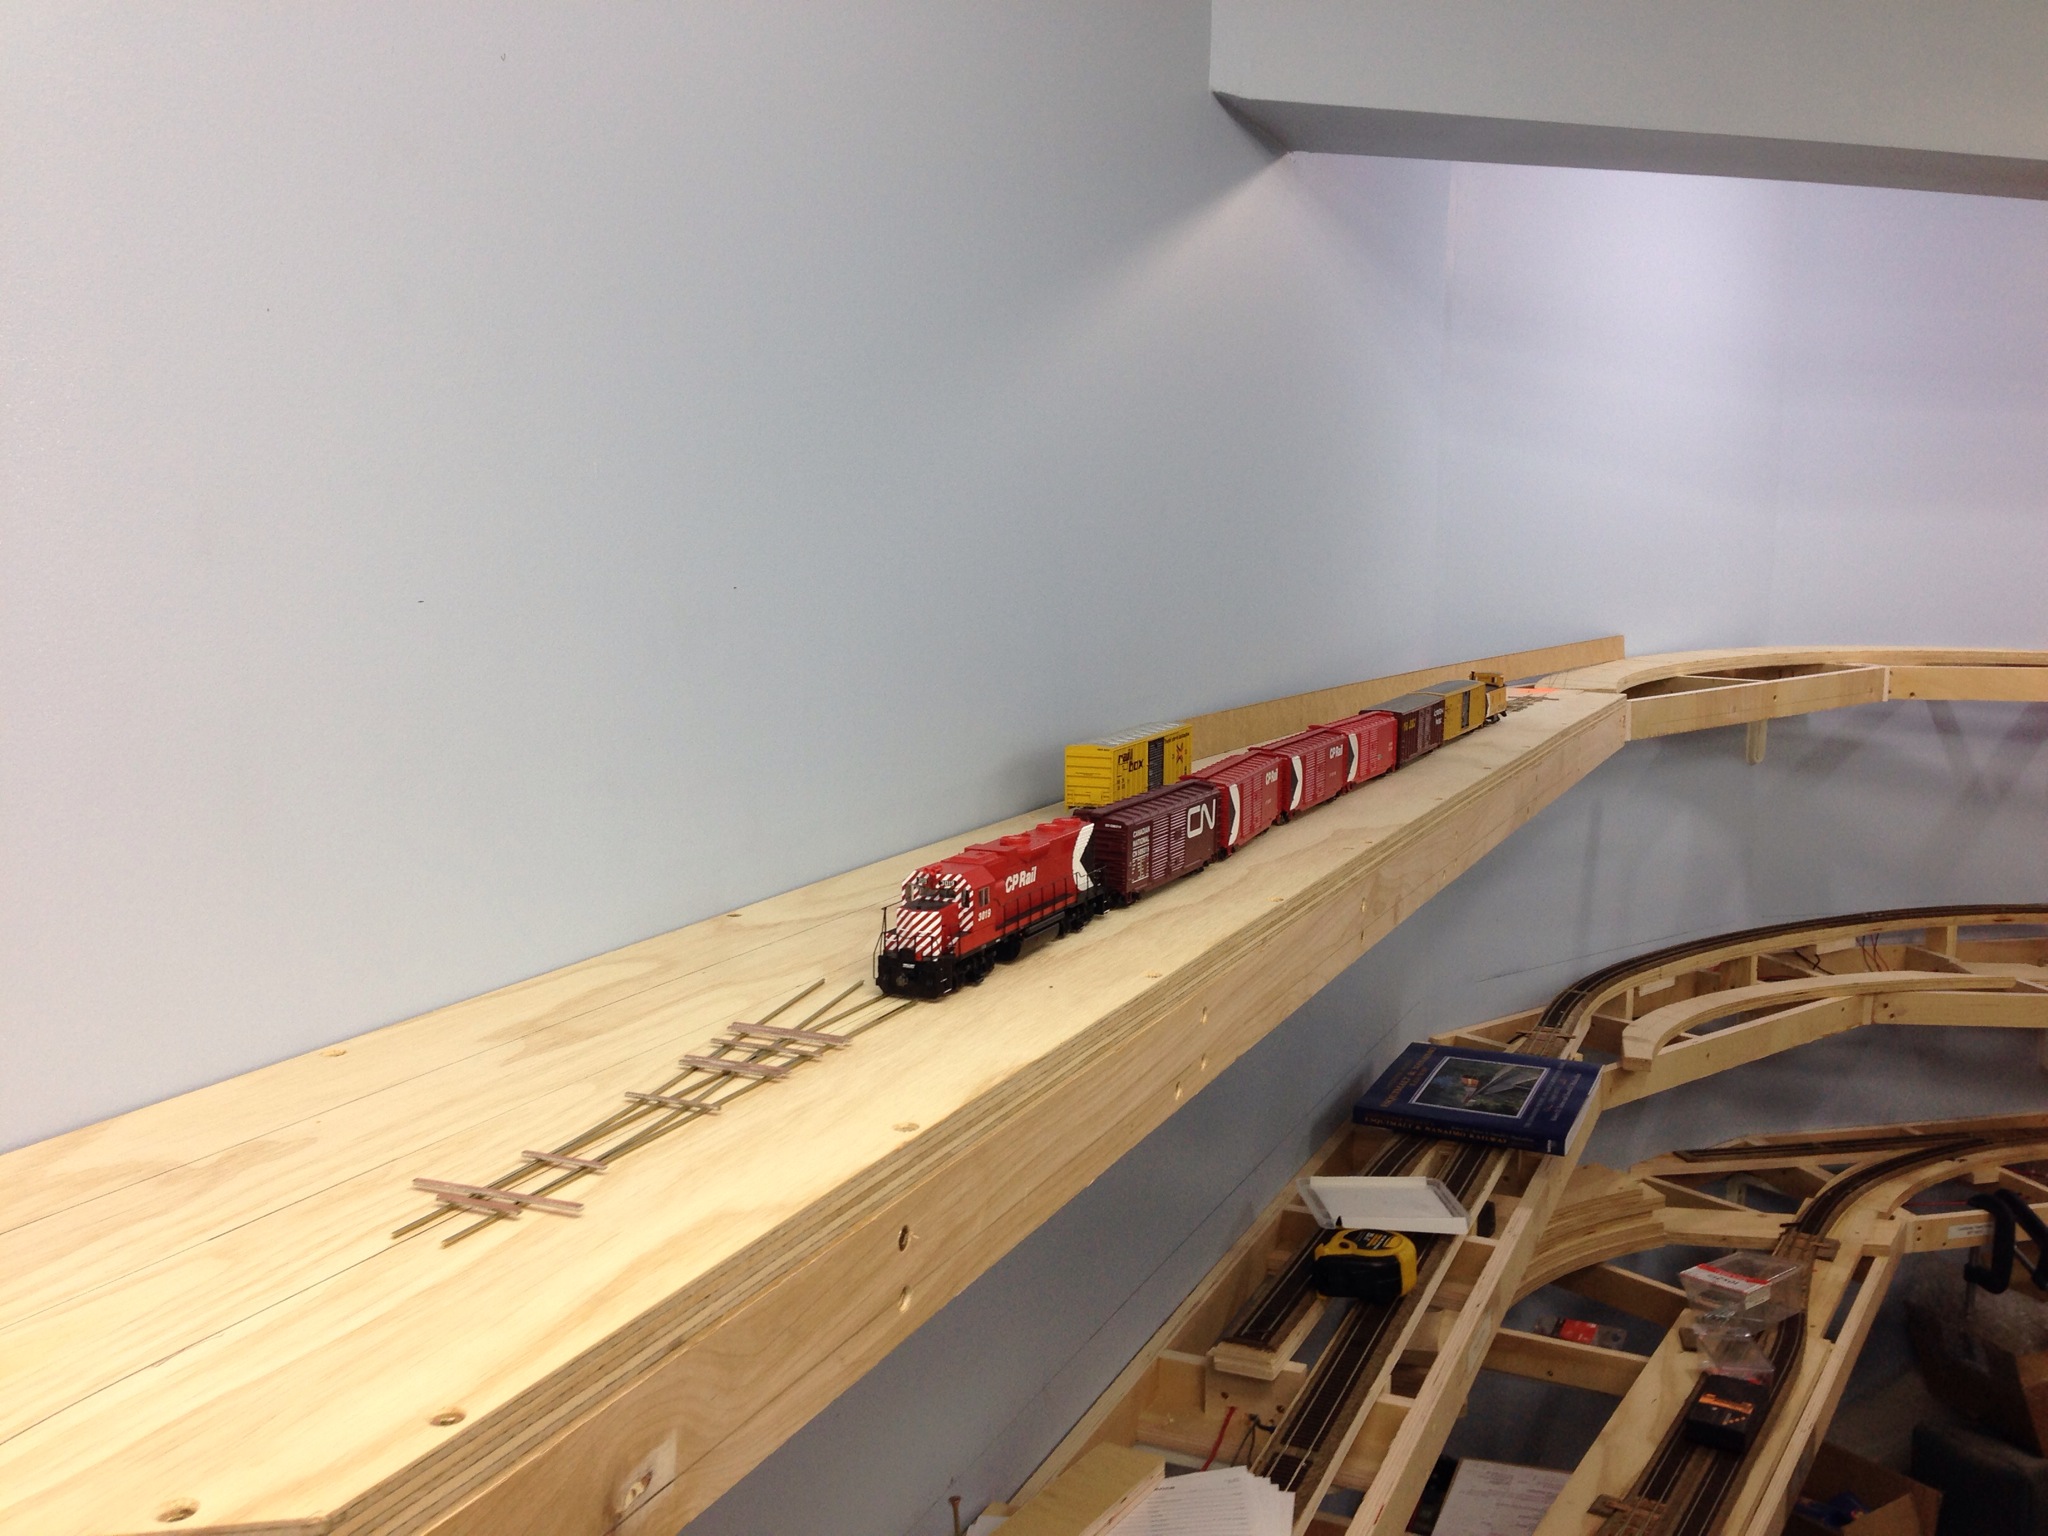
I wanted Vancouver Island Gas to be a signature scene on the layout, but disliked the fact the aisleway around the nose of the basement was tightened up substantially, and that the trestle was right up against said aisleway. Sure, I could protect the future structure and rolling stock with a sheet of lexan (high-grade plexiglas) but it did nothing to reduce the amount of dead space behind the track that would need scenicking.
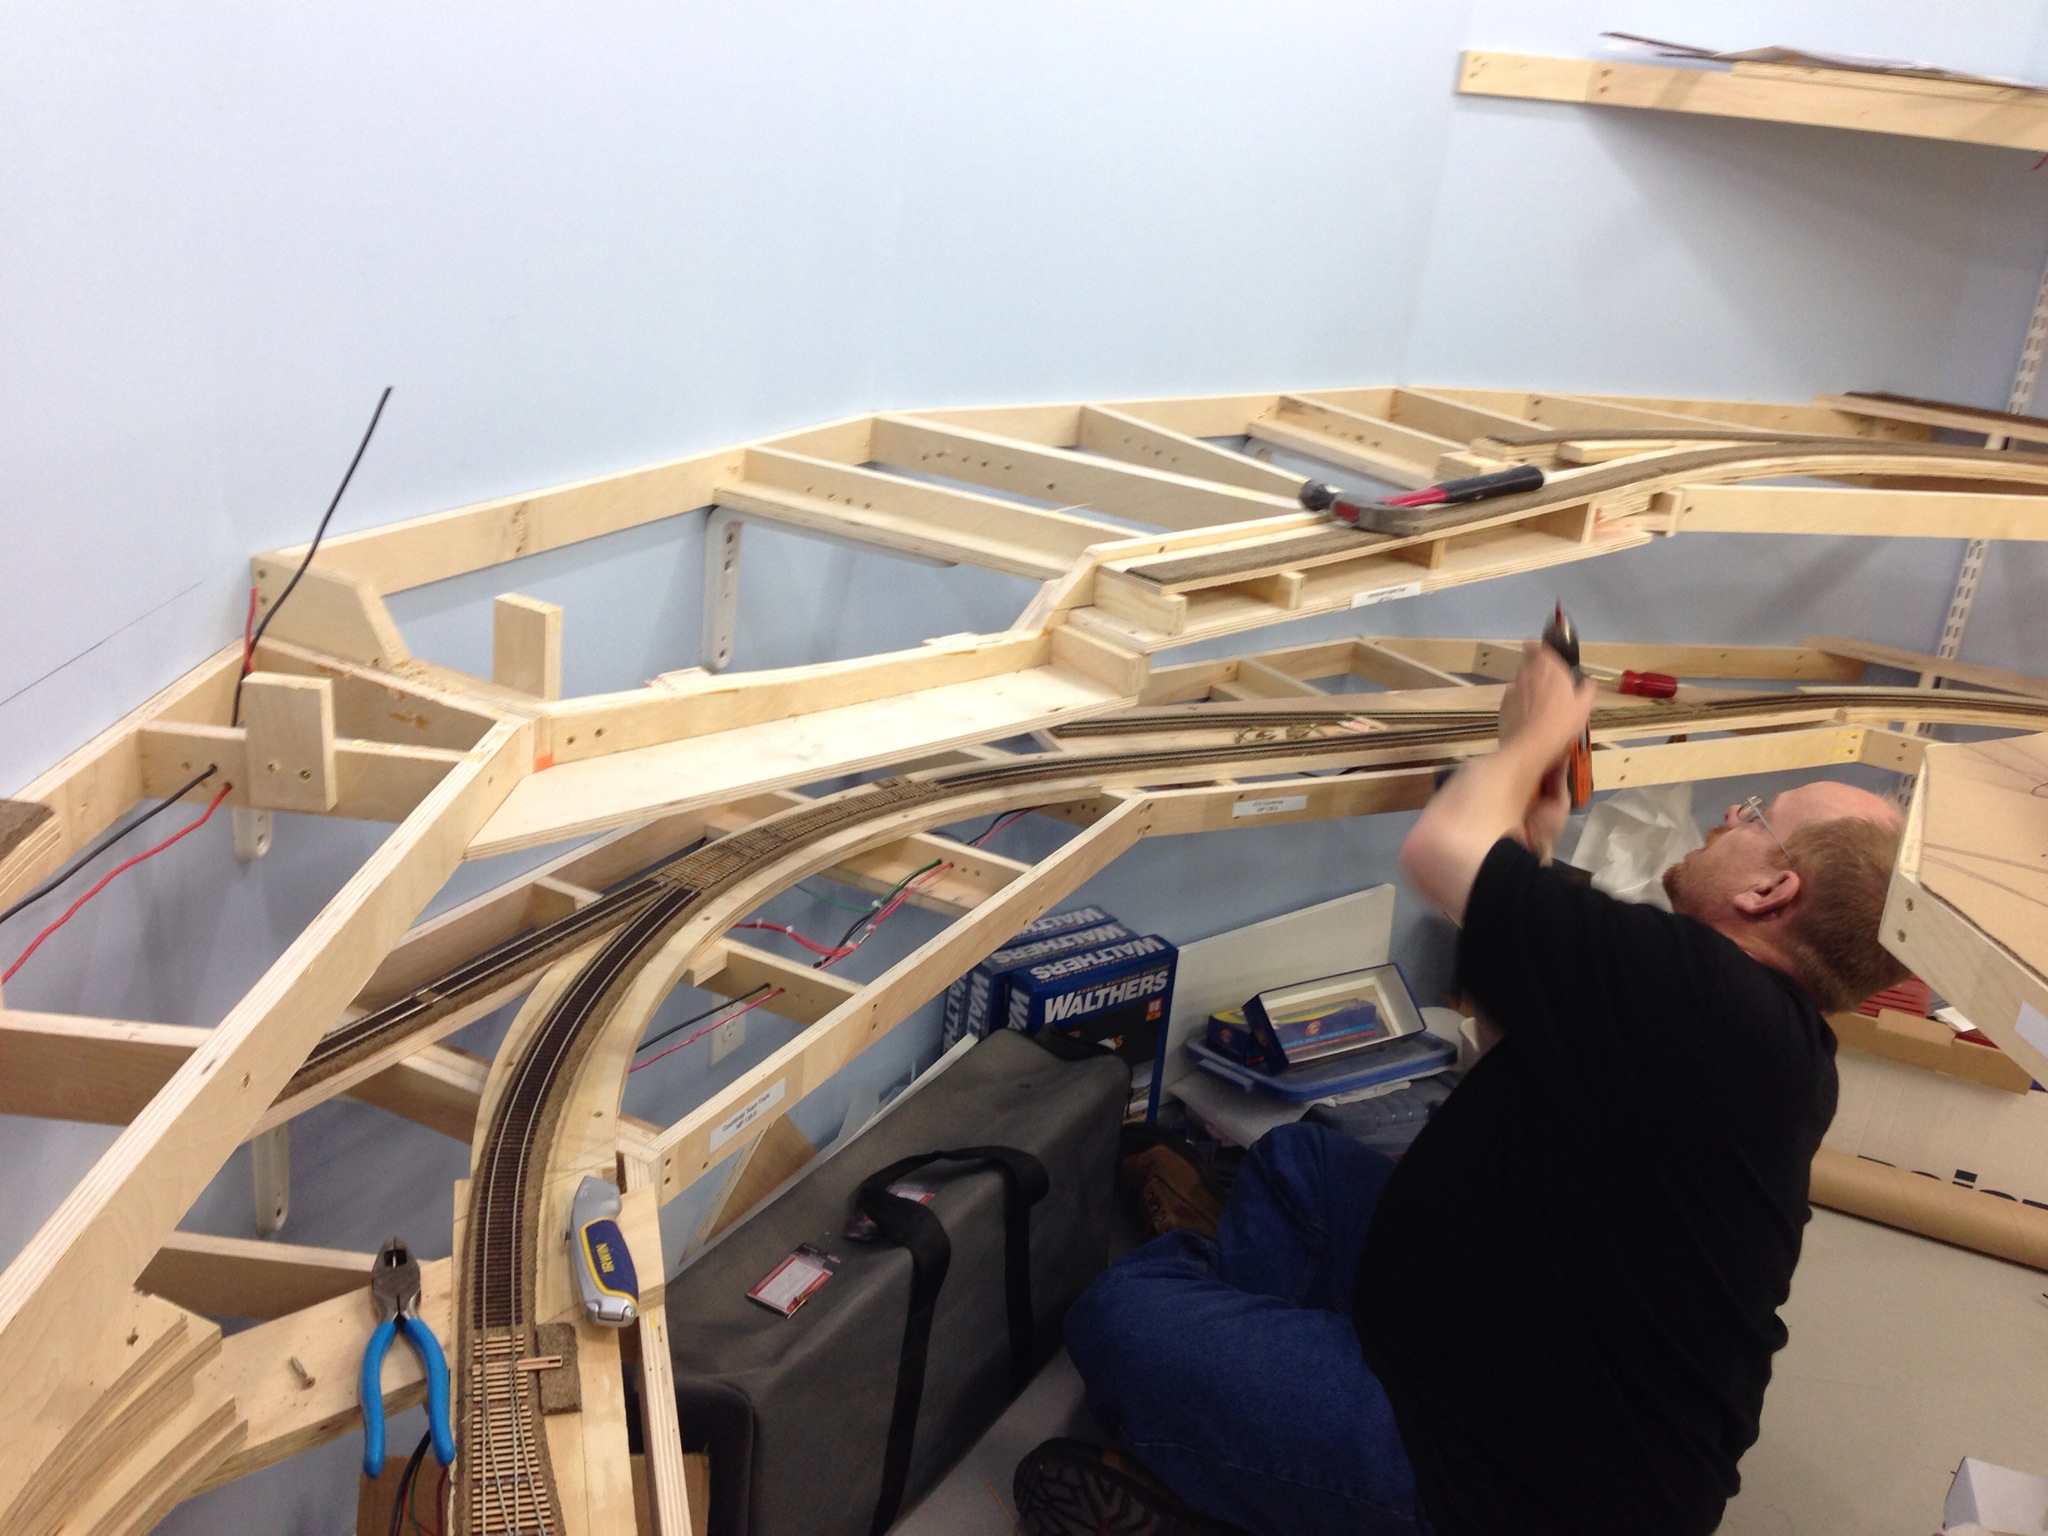
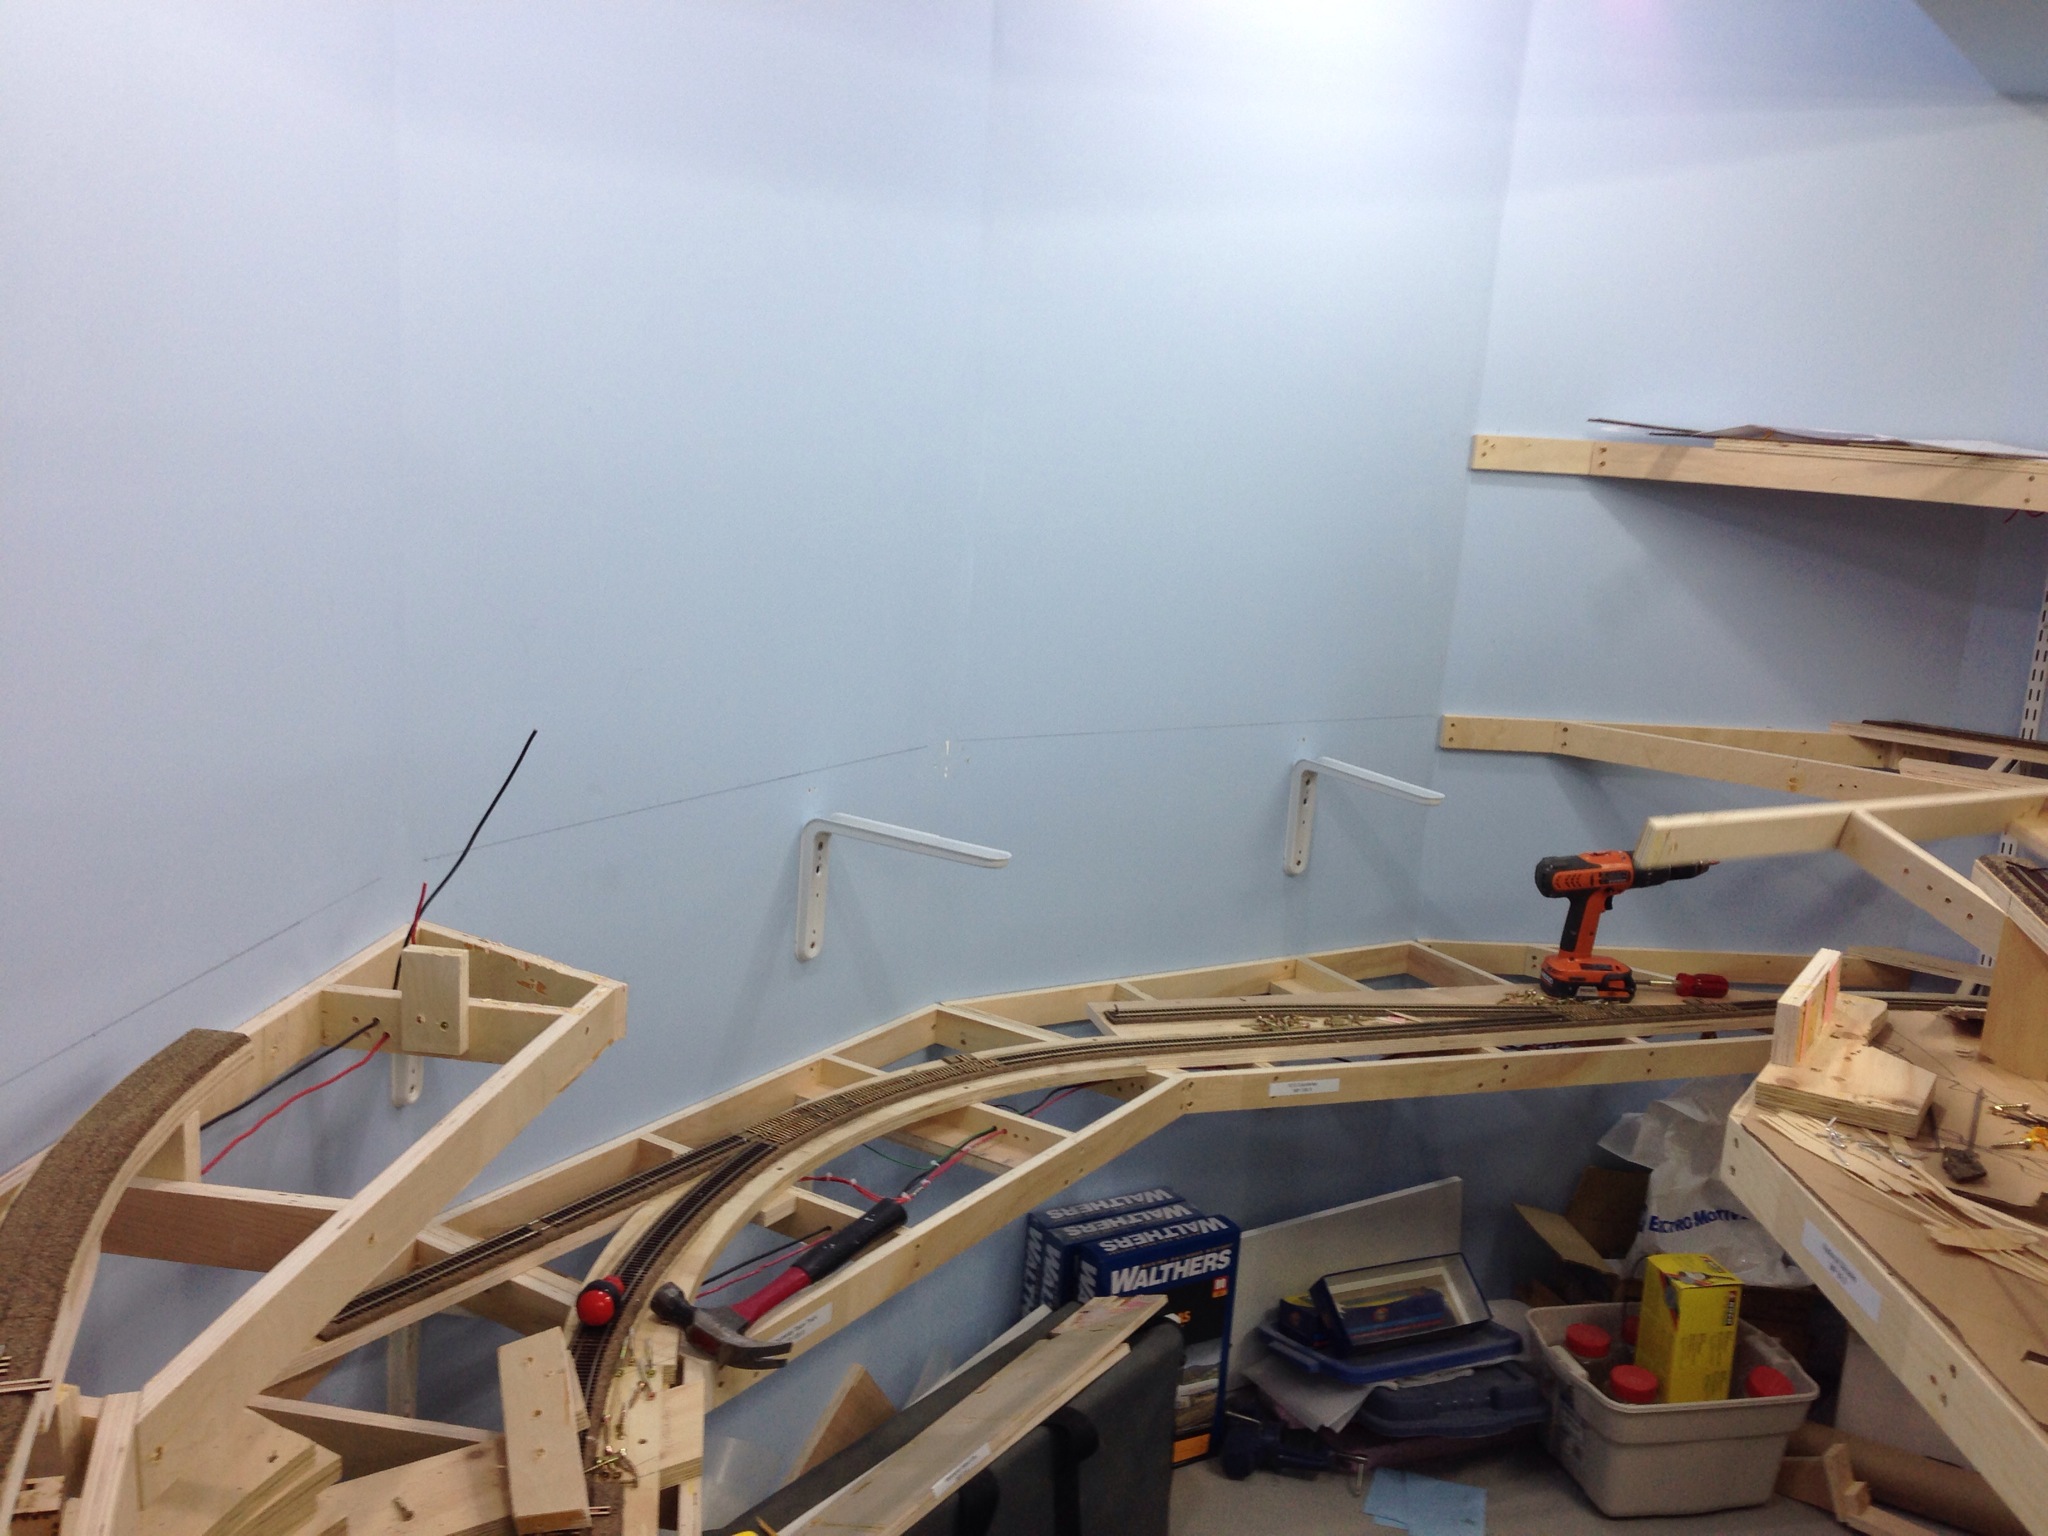
So, after consultation with Cam and Dan, I decided to follow Grant’s lead and do something about it. Track was lifted, feeders cut, bus wiring separated, benchwork pried apart and then removed. Here’s a couple shots of the work in progress. The first shows Cam undoing screws to take off the benchwork and the next after everything save for the brackets have been removed.
Sadly, I neglected to take a ‘before’ picture as we jumped right into the work.
Some people showed considerable concern over the fact I was in demolition mode before the layout was even complete, but after reassuring them with why, they were supportive.
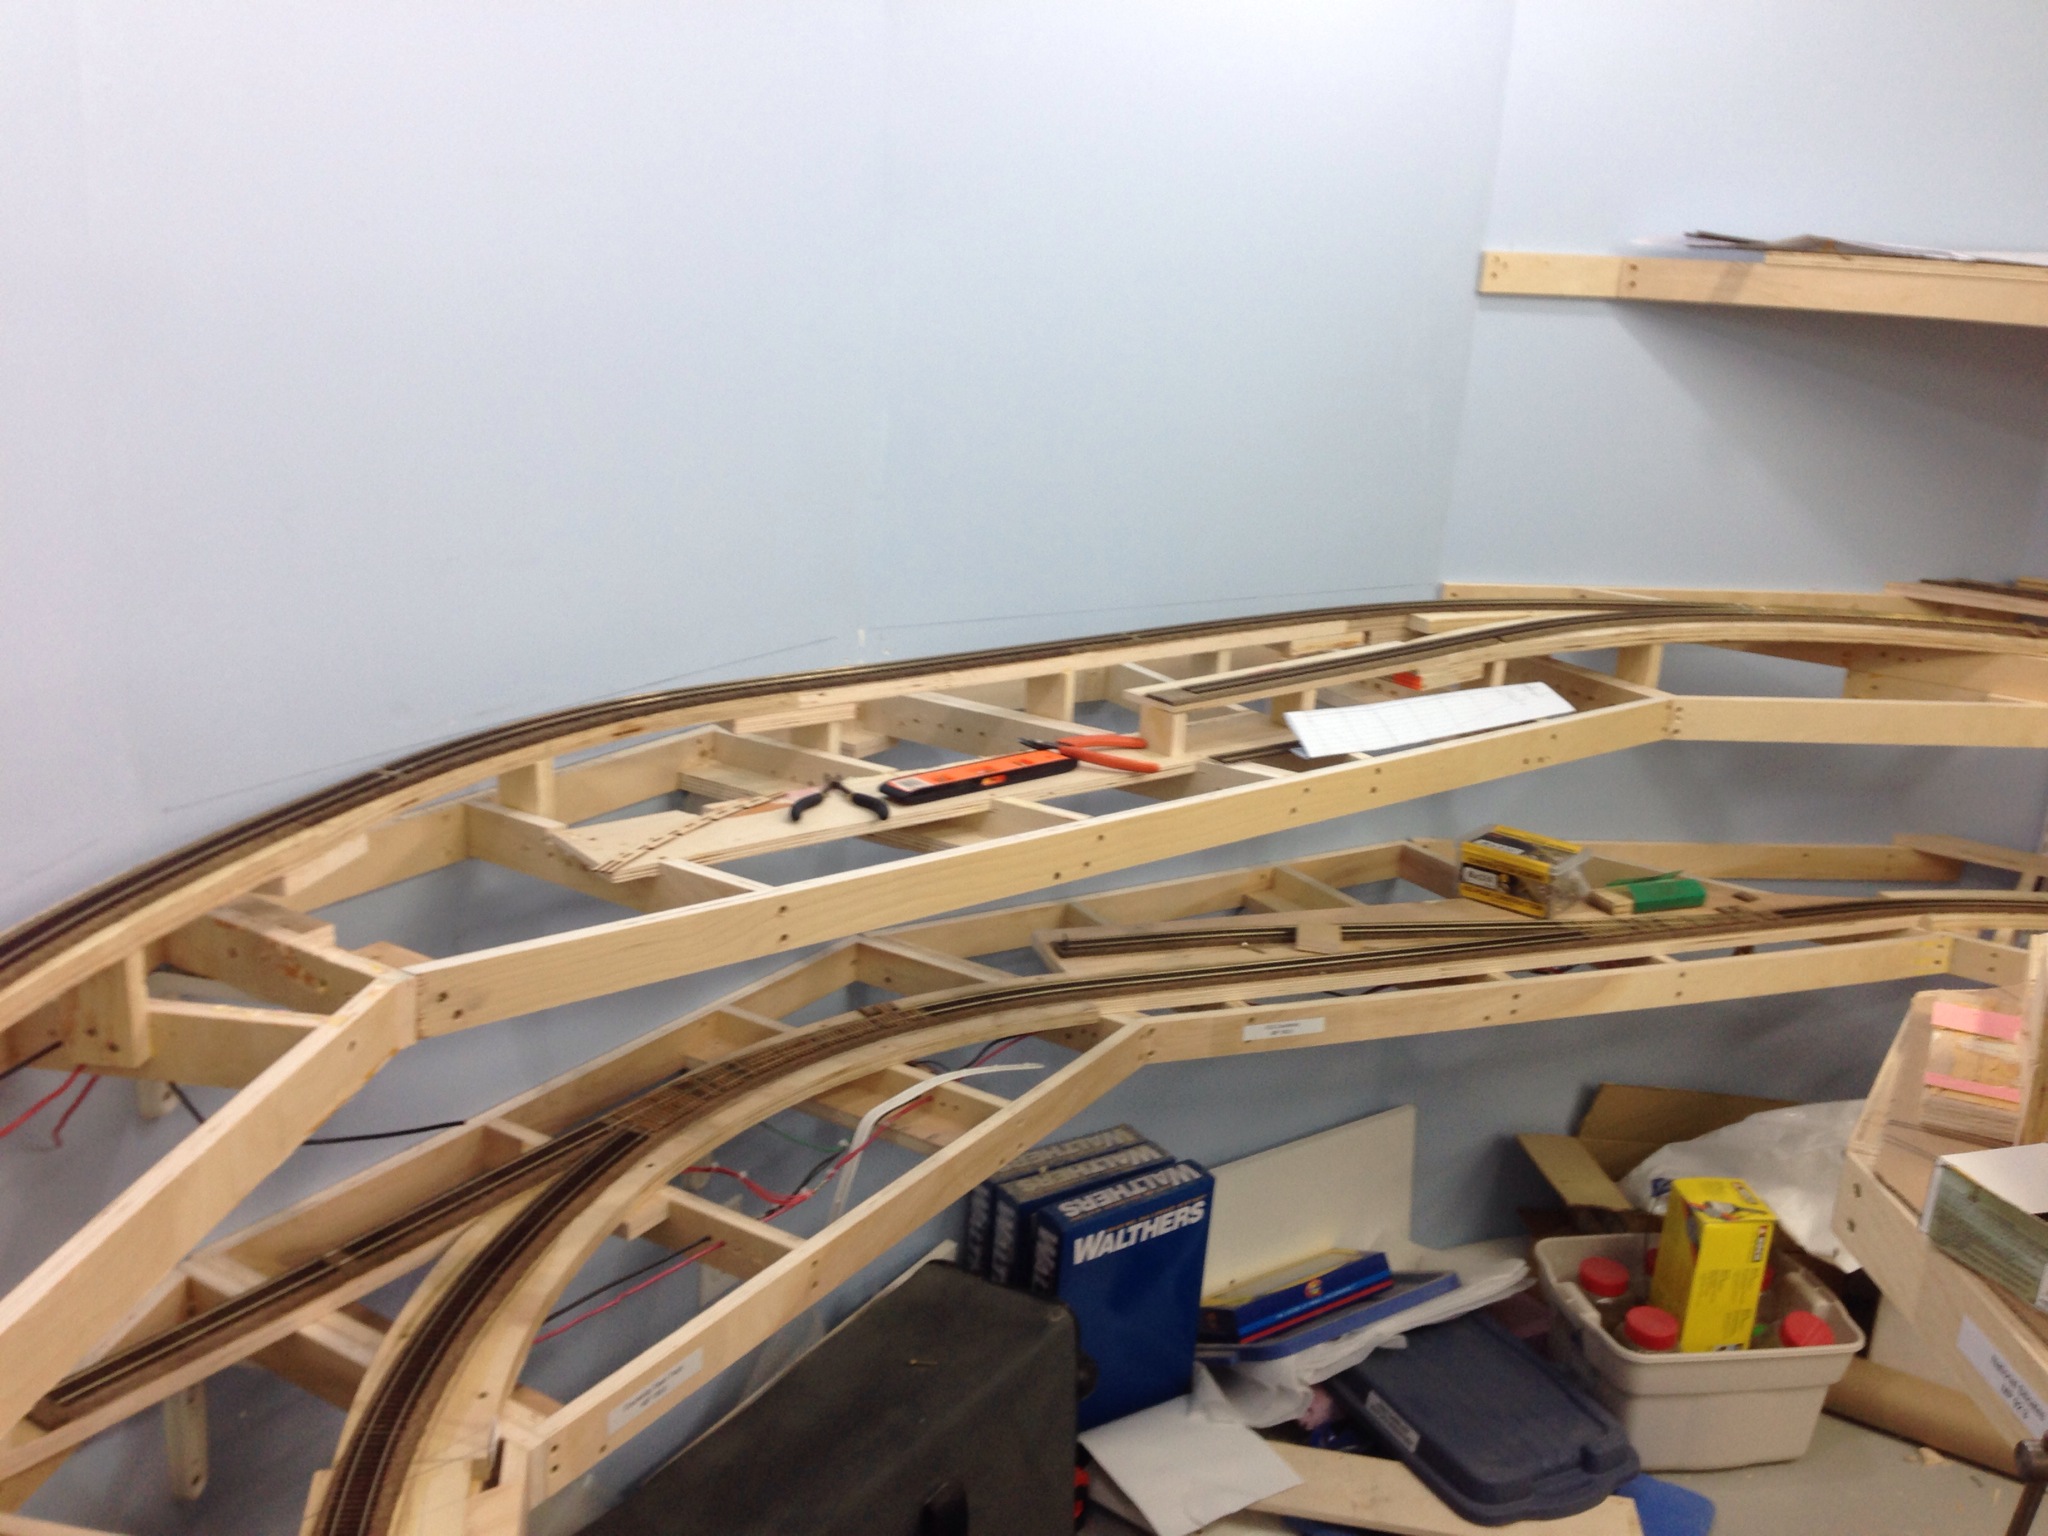
Several weekends later, the benchwork was reinstalled and track relaid and wired in. Thankfully, some pieces were reused, and only a few sections of track needed to be added in. Here’s a couple shots of what it looks like after everything was done:
The aisleway gained enough width (give or take another 7 inches), the space behind the track was substantially reduced and there’s space in front of the spur.
Sadly, one consequence of the work is the loss of the needed height to properly model the trestle. It’ll end up being compressed in both directions, but I couldn’t achieve that height without really impacting the space below. Oh well. I’m still happy I did this.
March 29 and 30, 2014
With my second ops session planned for just after SUPERTRAIN (good grief, what was I thinking?!?), I was thinking I should get something done for the layout. Not that Cam didn’t sort of prod me in that direction either, no…. (Insert shifty eyes here)
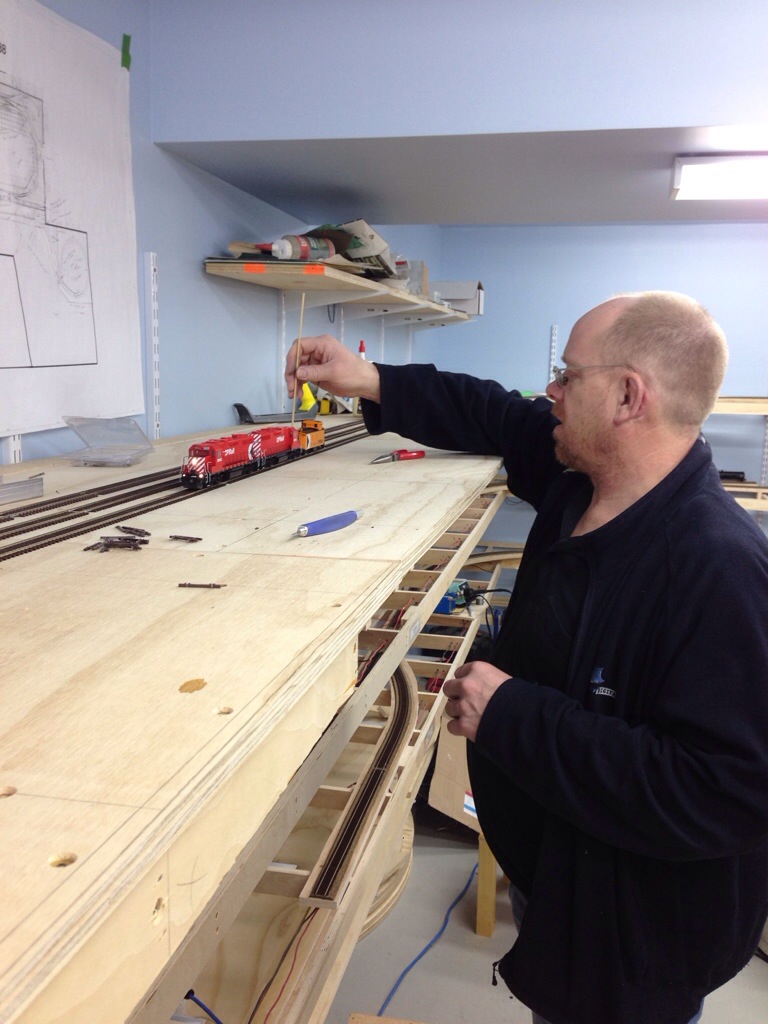
Anyway, we figured it’s be great to actually get a train all the way into Port Alberni, even if it ended up at a temporary staging yard of sorts, as I haven’t had time to focus on doing up a real, accurate track plan for P.A.
Side note here. Earlier, Cam and I were discussing the track plan and realized that the tight confines of the trackage near the wye in Port Alberni was a guide, but we needed to make sure what was planned was actually doable. As such, I’m going to draft up the plan in CadRail and then print it full size so we know exactly where things go. Needless to say, such a plan is going to take a while to fully draft.
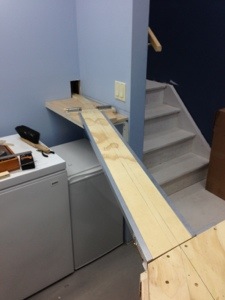
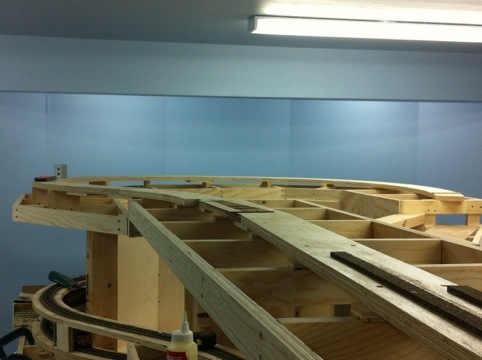
For a very long time, we’ve had the sub benchwork down the hill started… But not quite complete. This past Saturday, Cam and I worked on fixing that, and getting that little bit of track board finished and secured. After a bit of a meal, we got the contact cement out and laid the cork from where we left off just prior to the MP25 trestle, all the way down the hill. As we weren’t going to put cork in P.A. until we had a plan, we used a long cedar shim to ramp the track from the cork to the plywood.
After dinner, track laying down the hill began in earnest, and that was complete that evening. Of note, we actually slightly superelevated the curves on the way down the hill, for some aesthetics, but more for keeping runaway rolling stock from wanting to jump the rails on the way down.
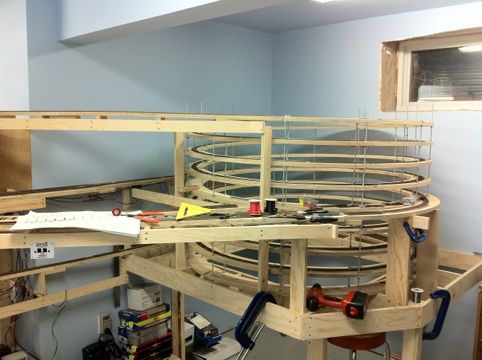
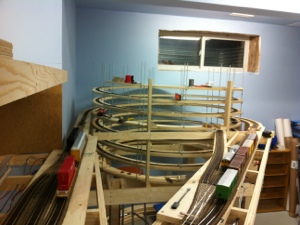
Sunday, Cam arrived and we got the temporary staging yard built. A three track, double-ended affair with commercial #6 turnouts, it’s not great looking, but will hold two full port freight trains… One to arrive and the power can switch the caboose off and put it on the other train and come back to Wellcox with a different train.
We cleaned up the layout after the trackage was complete, powered up the layout and ran a couple GP’s (3000 and 3004) up to Port to see how far we’d get.
Surprisingly enough, we got all the way to the yard, and into it!
August 25, 2013
Back at it in the basement yesterday, primarily to address some much needed tasks.
Saturday evening, Cam and I had a good amount of playtime with running a port freight (me) and a Courtenay turn (Cam) and found a 3 hour ops session is quite realistic after the length of time we took doing abbreviated runs like those. I also found I really needed to get power into Arrowsmith siding. Dragging equipment into a track takes away a lot of realism when you use 5-DCC (aka the 0-5-0).
So, Sunday morning I started tackling that by gapping the rails just past the summit and installed feeders into Arrowsmith. Cam and Dan showed up shortly after I finished with the initial set of feeders and while I grabbed some lunch, they emptied the railway of rolling stock, parking it all in Wellcox. Of course they had a lot of fun doing that!
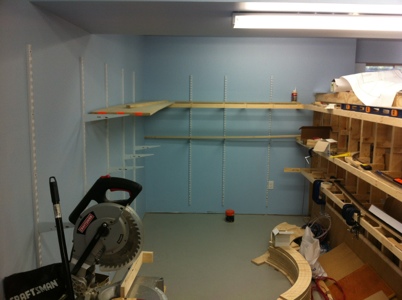
After lunch, we got to work on benchwork for Port Alberni. Cam, Dan and I got a fair bit of it done but not really well secured to the shelf brackets due to impending deadlines. So the three of us finished that, and made plans for the rest of it next weekend… We hope! Sooner we finish with the benchwork, the sooner we can keep playing!
June 8-9, 2013
Despite appearances to the former, I have been working on the railway over the past while. Just haven’t had much time to actually write about it.
Where to begin:
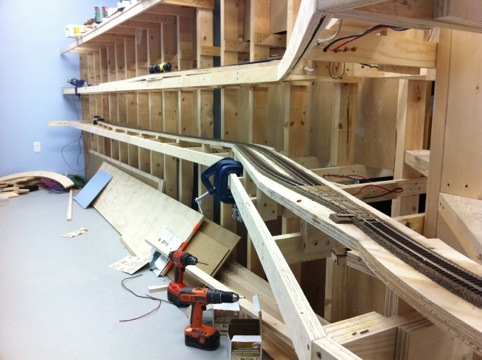
The track plan for the staging yard has been (almost) finalized. A couple weekends ago, Cam and I were working on the plan for the benchwork and we got to discussing the end of the staging yard. Specifically, how to terminate it. Owing to a lack of feedback from a much earlier post of mine, we decided on a curved turnout ladder and bending the track towards the main helix. The reasons to take this route as opposed to a sector plate or a transfer table, despite their much lower costs and space requirements, are a longer track for the Port Alberni Freight, a longer tail track, and as we discovered, longer storage tracks and a possibility for a couple loco storage tracks.
So with that plan in place, we’ve been building benchwork to make that happen and I’m pleased to say we’re done the benchwork for the staging yard.
Cam said it might be a good idea to just continue making a mess and finish the benchwork for the entire layout while we have the opportunity, and get it done and over with. Can’t disagree with that, so we’re now working on the benchwork for Port Alberni… Another weekend and we should be done!
Also of importance in this work is how I’m going to be powering turnouts in the staging yard. David Bedard has been a fan of using RC Servos for turnout control and showed me a lot of benefits for using them. Prime among them is the cost. These things are very inexpensive compared to the cost of just the tortoises themselves, let alone the time involved in hooking them up… These things are small, plug and play (literally, no soldering required!), and robust. After all, these servos go into model airplanes which means if they fail, it usually ends up with said airplane corkscrewing into the ground with really, REALLY disappointing results!
As a result of the decision to switch to servos, I’ve got a pair of DS64’s for sale. Make me an offer…
And lastly for this update. Jason Shron (of Rapido Trains fame) will be visiting my layout again at the end of July. He’s expressed interest in participating in an ops session or two while he’s here. After hearing of the progress on my layout (which has been really substantial since he last saw it) he managed to convince me to have one.
I agreed to the idea of a partial ops session (not involving any switching in Port Alberni) and then realized how much work is involved… I suppose nothing lights a fire under one’s ass like a deadline like that! Better get to work!
Tricky benchwork
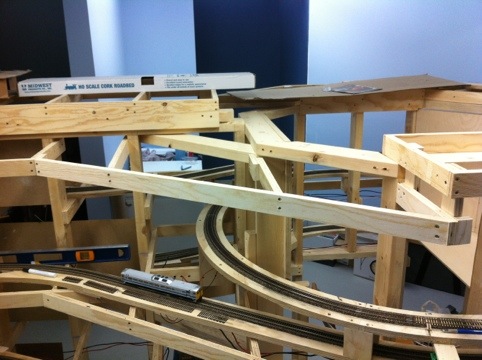
Spent a fair bit of time with Cam and Dan this past weekend. Saturday was primarily spent measuring, checking with levels, and a whole lot of cardboard being drawn on.
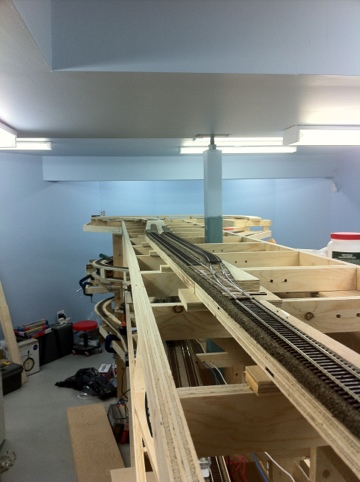
Now that the bridge is in, the work of getting to the staging yard is now underway. The big challenge is that there’s a wye into my future programming track and the main route to the staging yard itself happens to be in rather tight quarters. Specifically underneath the stairs to the basement and clearances in spots are tight as hell. Thus, the planning needs to be quite good because we don’t have ability to lay track on said benchwork after it’s installed. This also includes turnouts and their switch machines.
So the need to get it all bang on the first time is quite important.
Sunday had Dan and Cam over to start making lots of sawdust (and I just vacuumed it all!) in constructing the bits. Well, most of them. We’re still working on the one leg of the wye, but we ran out of time on that. More to come in weeks ahead.
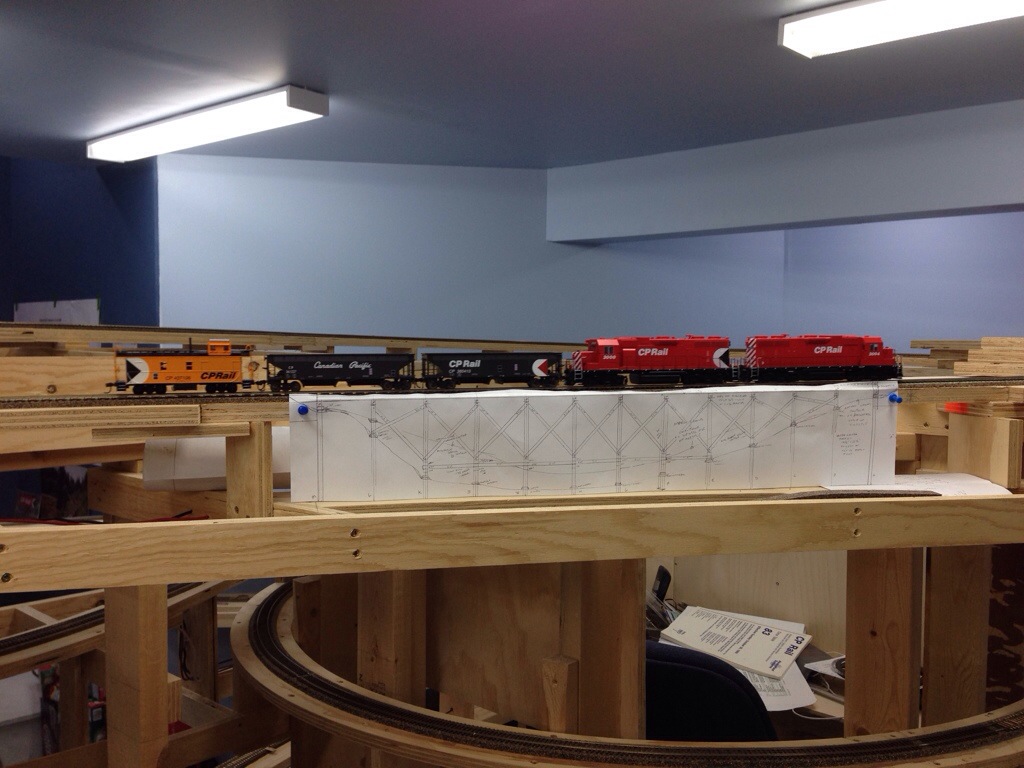
April 6, 2013 – The Bridge is in!
Really wanted to get some really meaningful progress done on the layout this weekend and made it happen. This past Wednesday, went down to Murray’s place and borrowed his router (and bits), and lined up assistance from Cam and Dan for Saturday.
We tore apart (again) the area around the Vancouver Island Gas spur, to allow for better scenery work, then built the trackboard down to the depot.
And then we built a bridge!
A fair bit of thought (and purchases) went into engineering and building this movable bit of benchwork, primarily because I vowed after hitting my head on a duckunder at CMT, that I would never have to bend over to get into the basement. Though there is a major crawl to get into the dispatcher’s desk, the rest of the operating session crew should never have to bend over to access any of the trackage. Anyhow, after much deliberation, we decided on a lift-up bridge rather than a swing bridge as originally intended for the access to points south of the Nanaimo depot. Lots of measuring, cutting, routing and then plenty of glue (of two types – the regular yellow carpenter’s glue and a polyurethane glue) were used to bond the wood and metal together. Here’s the bridge in the closed position:
And in the open position:
Yes, I know I need to install a doorstop or some such device to prevent the drywall from getting dinged too badly, but the hinges do assist in ensuring the bridge won’t fall down unattended, and provides some assistance in lifting it. It’s still very much a manual process to open or close, but it’s nowhere near as much work as it would be if there was no spring in the hinges.
I’m still needing something in the way of an alignment pin to keep a lateral alignment certainty but the brass latches on the underside make sure the vertical transition stays as it should.
We also need to get cork and track laid, but it’ll likely be after SUPERTRAIN before that happens owing to the time needed to build two curved #8 turnouts, two #7 straights and two #6’s for the trackage needed up to the bridge.
I should also really get the wiring finished for the lower helix and the rest of Courtenay yard too… Lots to do for sure before the next major bit of benchwork: the Staging Yard!
Cheers!
The past few weekends, and a Good (progress) Friday!
So I’ve been busy, and to be honest, not terribly inspired to write about the progress made on the layout.
But progress has definitely been made! A few weeks ago, I did a fair bit more wiring work to the Courtenay site, and we can (in theory) run trains all the way to the depot in Courtenay…. Which is good for the dayliner, but not for the Courtenay turn which needs access to all trackage in the town to do what it needs to do. That will come in time.
But more importantly…
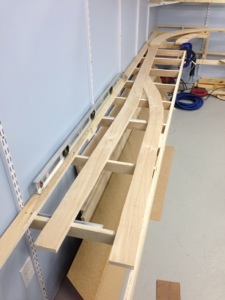
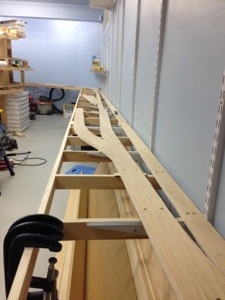
We have benchwork into Nanaimo! Cam, Dan and I worked over the past couple weekends to get benchwork built and this past (Good) Friday, Cam and I got track boards installed south to Vancouver Island Gas. This spur is rather interesting because of … Well, here’s a picture that explains it all:
Cam and I have also worked out a solution for the bridge across the aisle to the staging yard. Instead of being a lift-out or a swing bridge, we decided on something more resembling a bascule bridge. It’ll swing up to vertical over the fridge, and the best part, we’re using self-closing hinges. The weight of the bridge will keep the pressure light when the bridge is down, but assist in raising it and will also ensure it stays open when it’s up. Of course, given the fact we need to incorporate a grade along the line to the VI Gas spur means we’ll need to incorporate some mechanism to keep rolling stock from going to the great abyss if it’s not connected to a locomotive!
That we’ll figure out over the next while…
Till then,
Cheers!
December (mumble), 2013
As much as I dislike Omnibus type things, I’m afraid I need to use it here…
I’ve been down to the basement quite a bit over the last few weeks and haven’t been doing any updates to the blog so my apologies to James and my other lurker readers for not doing these more frequently.
After getting the track boards cut, they spent a bit of time being left alone but they did get secured not long ago. Shortly afterwards, Cam and I cut a board and attached to the wall right at the bottom of the stairs. This will form the tail track and the northernmost trackage in Courtenay. This will come in handy for the crews working the Courtenay turn as they’ll likely need to do some shuffling of cars to switch on their way back to Nanaimo, as the vast majority of the turnouts are south facing.
I’ve also been busy building turnouts, mostly #6’s, but also a #8 curved turnout as well. Much as Cam would like Courtenay and the trackage into it to be arrow straight like it is in the prototype, my basement just won’t allow it, and I’d rather not give up a couple important industries (BC Pole and Dominion Tar) to accommodate that wish, so the turnout to the Courtenay team track will be situated on curved trackage. As far as we can tell, all industries in Courtenay in 1988 are present and able to be switched. I’m looking forward to operating it!
As we hosted a Christmas Brunch for a few important family members, I wanted to get the basement into some semblance of order and also do massive cleaning to make it presentable, I spent about three evenings getting a lot of cleaning/organizing/purging/etc. done. The results are fantastic. Family loved it, trains ran (though admittedly some dirty track in the helix caused some angst, more on that later) and all was good. I even spent the better part of a couple hours tonight doing the same to my workbench.
Couple days ago, spent a few hours in the morning to finish painting the stairs into the basement. Just plain white primer for now.
As I eluded to earlier, some dirty track has been bothering me. More due to all the dust in the basement, something rather unavoidable with all the construction happening, I decided to take advantage of the Boxing Day sale at PM Hobbycraft and looked at an Atlas track cleaning car. To the best of my knowledge, it’s the only vacuum equipped car, so picked it up and then proceeded to install a DCC decoder into it. I ended up removing all the wiring inside, hardwired the decoder in and after a bit of programming, am now able to control the speed of the fan. Ran it successfully through both helicies in front of a couple GP38’s. the results were promising. After a couple runs, the hopper was showing a few bits and the screen was covered in fine dust. The unit could definitely use a capacitor to assist the vacuum motor, and a couple other tweaks, but I’m satisfied with it. I’d post some pictures, but they’re too dirty. 🙂
Yesterday, spent a couple hours and laid some cork down through BC Pole and Dominion Tar as well as the mainline approaching both. Should have the rest of the cork laid tomorrow and probably some track soon as well.Had a real SOB of a time trying to get the lid unscrewed off the full 1.5L jar of contact cement though. I now own a couple strap wrenches…
Also received my order of track yesterday too. 10 bundles of code 70 flex, totaling 180′ of track, so should be good for a while. The three existing bundles weren’t going to make it to Courtenay. While we were out shopping, also picked up some 14ga stranded wire from MRO in red and black for bus wiring needs. My PSX-3’s finally arrived a week or two ago and I can get them installed.
Can’t think of anything else to mention. Thanks for reading this far!
December 2-5, 2012
So I’m finding the workflow with the registrar duties for SUPERTRAIN to be a little less hectic, and Cam found himself with a little extra time, so we got some additional work done downstairs. We’re now in the final stretches of getting all of the benchwork into Courtenay done. All the track boards, minus tail track well north of the Courtenay depot) are cut (including one spur I cut solo on Monday) and ready for installation!
We also checked the lengths and ensured we could fit at least a three-car pole set into both Dominion Tar and BC pole. And in fact, we could actually fit a five car set into the Dominion spur!
And over the past few evenings, I’ve been building turnouts again. I’m needing them and figured track installation is imminent… Two #6 turnouts are now built for the pole yards. Next up is the ICG spur in Courtenay, and then a curved 30/40 turnout for the Courtenay team track. Of course, the track into Courtenay is pretty much arrow straight, this making a curved turnout unwanted, but the layout dictated it to keep the number of separate curves down.
I’m also debating another open house this year after Christmas to show off the progress, but haven’t come to a decision as of yet. If you’re interested, drop me a line – either via email or a comment to the post.
November 13, 2012
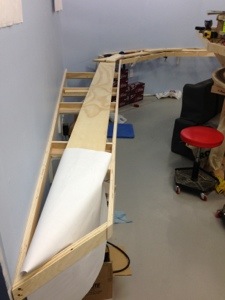
Made a lot of sawdust tonight on just five jigsaw cuts. Admittedly most of those cuts were in excess of four feet long each. And this is what I made:

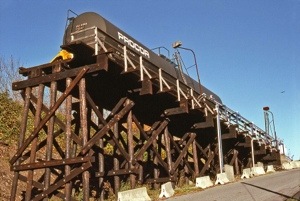
No, it’s not a wooden saguaro cactus silhouette (like the ones used in the night time scenes of Silver Streak) but rather the trackboard for Dominion Tar & Chemical. The spur on the right is where poles were loaded into three and five car sets for shipment all over the continent to be used for power poles.
It’s not much, but it’s still progress.
November 10, 2012
With my wife out of town on a two week holiday to Hawaii for scrapbooking, I finally took some time to get to work on the layout. Of course, also good that Dan and Cam were willing to help.
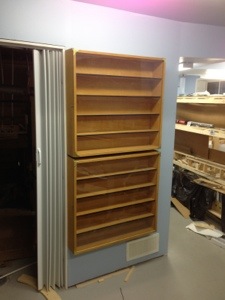
Some time ago, I acquired a couple display cabinets from another model railroader who was moving and downsizing. After sitting in the basement since spring, I finally have them installed on one of the unclaimed walls.
And then we got some work done on the trackboard into Dominion Tar & Chemical, drawing out where the main and the spur are going to go. Room for a 3 car spot plus a little more. BC Pole was also factored in and then since I could do some of that stuff on my own at a later time, figured on getting more of the benchwork done which does require a few more hands. And with that, we installed benchwork around the “nose” of the basement (south end) for the lower deck, and we now have the basic shape for Courtenay. We also found better spots for ICG in Courtenay, along with the team track across Cumberland Street from the station.
We ran out of usable 2″ wide plywood, so we’re not quite done with Courtenay’s benchwork, plus I’m needing to install a narrow shelf into the stairway for the escape track out the extreme north end of Courtenay’s diminutive yard. Next weekend, I should be able to acquire more plywood in the correct dimensions and carry on with the task!
Of note, it would appear Layout Tours for the CMRS have been moved up into March… If I’m going to have the Victoria Sub portion of the layout operational by then, I should get a move on!
August 7-8, 2012
Since the weather is rather warm in Calgary, decided to head downstairs to the basement and cool off, admire the work done thus far, dream a little bit, and just generally cool down.
While I was sitting there at the location soon to be occupied by the team track of Courtenay and Vancouver Island Gas, I looked at the standards holding up those far-from-level brackets and realized a rather important fact:
The standards are not necessarily plumb.
There are some curves in the standards, either from a rather zealous drive from the drill securing the screws, the taping and mudding on the wall not leaving a rather flat wall, or likely, a combination of both. So with the curve in the standard, the shelving brackets, especially the long 19″ ones, are pointing up. Thankfully I discovered this before much work was done and the fix for this is reasonably easy to implement. We’ll pull the brackets, pull the screws and shim the standards so they are straight and secure. That should fix the levelness of the brackets.
I also realized that if I’m going to get the windows finished, I should do so fairly soon, lest the work become a hell of a lot more difficult owing to the fact that the layout in front of the window at Port Alberni will be very deep… Cam agreed on this fact and told me to get the drywall prepped (ie: flush to the window frame) and on Saturday afternoon, we’ll acquire the casing and boards and get the windows finished. So, over that evenings and Wednesday, I’ve been getting reacquainted with the drywall saw, utility knife, rasp and most importantly, vacuum cleaner and getting that task taken care of on both windows. I’ll probably need to replace the vapour barrier on both of them owing to the fact that it doesn’t take well to long-term exposure to UV and my punctures with the saw.
Cheers!
August 6, 2012
What a day of progress!
Cam came over in the morning and we got to work on getting benchwork built for the lower deck. But before we did that, I wanted to get that chopsaw stand that Murray brought over on the 21st into action. Turns out that shelf I was going to use (the top off the table my brother made eons ago) was the perfect size for the base of the chopsaw, and shortly after, the chopsaw was secured using bits of ready-rod, spare nuts and washers from the now-complete helix construction, and we can finally use it as intended. I even have the ability to do much of the work solo now that I don’t have to have someone hold up a long piece of wood.
Once done, we got to work on the lower deck benchwork, as well as the middle deck too, in some respects given that the deck depths were going to be the same. Stop blocks were installed on the saw and we chopped up a lot of the 2″ wide strips into dozens of fingers.
Holes were drilled through all of them for bus and accessory wires and voila. Half the job done…well, not quite. Lots of other things needed doing, like drilling holes through the shelf brackets for securing the wood to the metal brackets, cutting the pieces to good lengths, splicing them together, and then getting the works secured to the shelf brackets and to the wall at the south end.
That chewed up a very good portion of the day and then we started mocking up how the rest of the decks would play out, and it turns out, quite well…Well, almost. I was hoping we could simply screw from underneath the brackets into the 3/4″ plywood for the upper deck, but initial appearances showed that many of the brackets were pretty far from level, and no idea why. We’ll investigate later as to potential solutions.
Cheers!
August 4, 2012
Murray and Cam came over early in the morning to put some time in on the layout and we managed to accomplish the installation of a fair number of the shelf standards (thanks to Murray for bringing his 6′ long level), and now we have standards on two complete walls with a plan on how to start into the nose of the basement.
We also discussed aspects of copying this system over to Murray’s new layout, and discovered I needed a few things. One was an additional 4′ long standard to help close the a rather sizable gap (give or take 30-35″), Another was a full sheet of 3/4″ plywood which would become the prime bit of benchwork for portions of Port Alberni, and lastly, I wanted to put 110V AC power into the peninsula wall, and needed some bits for that to happen. Murray has a pickup truck, Cam and I do not, so we figured it would be worthwhile to take advantage of the transportation opportunity.
After returning to the house, we met up with a friend of mine, Matt Buchanan, came over while he was in Calgary to take a look at progress on the layout. He’s planning on a little switching layout with a portion of Vancouver’s downtown. While the four of us were there, we got that 4×8′ sheet cut into two pieces, one representing the eastern end of Port Alberni and the other the area around the ICG spur and the Port Alberni enginehouse. After that was done and Matt had left, we decided a hobbyshop crawl was in order. Michaelea and I left for Lee Valley to pick up the stuff there that we didn’t pick up in the morning, Murray and Cam left for an errand Murray had to take care of and we met at Trains and Such and then went around the south end of the city to a few shops and ended up at Kelsey’s for dinner.
The rest of the evening was spent playing down at Murray’s layout. More would come on Monday!
Cheers!
July 28, 2012
Went out on Saturday to make some additional acquisitions. Another few hundred dollars later, I have some more plywood (3/4″ Birch, G2S, at Windsor Plywood for all of $30 per sheet), additional shelf standards and Brackets (found them much less expensive at Lee Valley, and they’re interchangeable with the existing stuff I bought at Home Depot) and a box of cork.
Cam and I got back to the house and after hauling it all downstairs (actually, it was brought in through the side window in the basement) and proceeded to pull up existing roadbed and track. Yes… You read that correctly. We did some checks, measurements and found we needed a little more length for the Trent River Bridge and I didn’t necessarily like having to go with partially visible 26″ radius curves… So we did what we did up one deck and curved the train behind the backdrop to hide it for a little bit and compress more mileage into hidden track. Needed to pull up one string of flex and also the roadbed underneath to make the corner.
And that’s about where we ended up finishing for the day. More work to come next weekend!
July 22,2012
Cam came over early this afternoon to help on some more progress on the benchwork for the layout. Primarily woodwork surrounding the shelf brackets on the end-wall where ICG in Nanaimo, the Trent river bridge, and the entry into Port Alberni.
And with that work, I’m now pretty much out of my 2″ strips of 3/4″ plywood. Now I really am needing virtually everything!
July 21, 2012
So I’ve been stuck for quite a while in the benchwork department, and today, we’ve made pretty decent progress!
After checking out the offerings from Rona, Lowes and Home Depot, Cam and I settled on 70″ tall white Rubbermaid dual track standards, bought 8 of them, and a couple boxes of 11.5″ brackets (32).
After a spot of lunch, Dan came over to help with the fun of installing the standards with Cam and I. Numerous screws secured the standards into the wall and we now have the ability to carry track boards half way to Courtenay, well into the Nanaimo switching zone and halfway into the Port Alberni Yard. Now I just need more of virtually everything. 🙂
February 19 & 20, 2012
I have an 8″ wide by 8′ sheet of 3/4″ plywood which unexpectedly got designated as a ‘holder of stuff’… Glue, contact cement, foam brushes, and various tools that never quite seem to make it back into the toolbox, but yet rarely used. It first started out on the benchwork that initially became Bryn, and when Bryn’s track was laid, we moved that sheet down. And then we moved it up when we laid track to Union Bay.
Well, this weekend we needed to move the shelf once again…This time to where we can keep it until scenery starts!
Cam came over on Saturday and Sunday and we finished off the trackwork out of the helix (yay! All helicies are done for trackwork!) and laid track to Arrowsmith siding. I hastily built a couple turnouts for the siding and then we got to benchwork. And did we ever go far!
Wrapped all the way around the end of the peninsula, and down the hill towards Port Alberni. Of particular interest is the fact it’s all supposed to be on a 1.7% grade from just past Arrowsmith all the way down to Port Alberni. I fully expect the port freight to really work but it’s going to be able to do the job without doubling the hill on account of the helix being a much heavier (and curvier) grade than the run up to the summit.
You’ll note I said “supposed to be”… Well, with what tools we possess, a digital angle indicator from Micromark, a really good vernier caliper and several levels and a pair of programs called “RiserCalc” and “GradeCalc”, we tried as best we can to make sure the risers are all at the correct height, cross-level and we still didn’t quite nail it. Some spots are a little steeper, and some less so. In the end, the digital level was discarded and the math made the grade. Looks pretty good.
When it came time to plan for how we’re going to incorporate Rogers Creek siding, we found a few things that didn’t quite work. Specifically, how to get a wider track spacing on the pieces of 4″ wide curved plywood… It would’ve required a sharper mainline radius, or purchasing another sheet of plywood and making poor use of it. In the end, we’re going to delete the siding from the plan on that plus the fact it would all be on a grade. Much as I’d like to have working handbrakes on my rolling stock, I just don’t see it in the cards, and I’m not one for sticking a pin up into the axles of cars to keep them on the grade in the siding.
At some point I’m going to need to get some dough and get going on the shelf standards and shelf brackets… I’m running out of benchwork I can build on!
Cheers!
February 12, 2012
A wonderful day!
Cam came over shortly after noon and we got started on working the track further up the helix. I had prepped the last few pieces of the benchwork earlier but Cam did the final adjustments before securing the track down.
After a bit of lunch, Dan joined us and we started working on the benchwork out of the helix towards Arrowsmith. After prepping a little more cork than necessary, we pressed on with the benchwork fully into Arrowsmith siding (admittedly, it was more of a storage track than an actual siding in 1988.) to be able to use up the cork.
I also cut off the top of a few ready rods close to where the track exits out of the helix.
A great day of progress!
January 28, 2012
And more helix! The port sub helix is now a couple turns taller after a good afternoon of Cam and I working away at the benchwork, track and wiring. One more full rotation for the track and we’ll be exiting the helix and towards the summit. And it all goes downhill from there!
January 21, 2012
In some respects, building a helix requires quite a few things to be done nearly all at the same time.
Such was the case when Cam came over to get some stuff done on the layout. Since we’ve pretty much done everything on the lower and middle decks, we started in on the upper helix to carry the track up towards the summit of the Port Alberni subdivision. We managed within the space of about two hours to wrap the benchwork around a revolution and a half, and a little over a half turn on the track.
And on a completely different topic…
I downloaded Google’s SketchUp, with the intent of learning how to model the stations along the line digitally in the effort of having the pieces laser cut, making the assembly effort to be better and hopefully produce a better finished piece.
We’ll see how things go…
January 2, 2012
Today saw the finishing of the turnout for Buckley Bay, the laying of track up to Union Bay, and the building and install of the bullfrog controlling the Buckley Bay turnout.
Of note with the track between Buckley Bay and union bay is the loose bit of track. No spikes, no soldering of the rail joiners. Possibly no feeders either.
It’s in preparation of the install of the bridge over Hindoo Creek, a short 15-tie long bridge, where we have some room to install bridges.
For the most part, the benchwork doesn’t allow for many bridges, owing to the lack of vertical clearance. Such was the fate for the Englishman River Bridge, but being on the lower deck, space below allows for these scenic features.
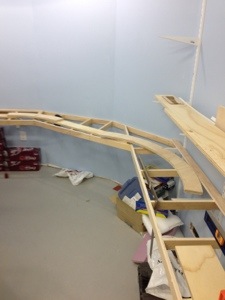
Also of some importance to the list of things done yesterday, and while we’re on the topic of bridges, is the install of the final bit of benchwork between the end of the peninsula and the straight stretch of grade into Port Alberni. Cam and I left this for a while trying to figure out how to handle the several inch drop from the benchwork around the top of the peninsula to the bit that was installed at the same height as Port Alberni itself. The benchwork was installed to be level with the port alberni height and one giant leap up to the next level. The extra clearance will allow for the install of the trestle around mile 25 of the Port sub. Here’s a picture of said benchwork. The high spot is on the right.
With the near completion of the trackage on the lower two levels of the peninsula, efforts will now start towards the completion of the main helix and trackage towards Port Alberni. About time we started paying attention to the Port Sub, beyond the little bit around the Parksville area…
Cheers!
Recent Comments