Turnouts complete, trackwork not far behind!
It’s extremely gratifying to finally report a completion of a few things, since a lot of progress has taken place with the layout since I’ve written last:
Firstly, I’m done with turnout building and placement! This weekend I finished spiking down the switch just outside the Port Alberni enginehouse. This was the last turnout to be laid.
I still need to hook up a lot of servos, connect them to the Tam Valley Depot Octopus III controllers and figure out how they will be thrown. Dave Bedard favours toggle switches, I like momentary push buttons. It would be awesome if I could get Signalogic Systems SCP controls to work; I have them running the few tortoise-powered turnouts on the layout, and to have just one interface would be great. It’s bad enough to have bullfrog knobs and another means, to introduce a third might make things confusing for the operators.
On other “almost completed” items, I’m less than five pieces of track being spiked down from the milestone of being done laying all trackage. Two bits of track into the enginehouse (will it be a structure or just the foundation? I’m trying to determine -without a lot of success- whether the current enginehouse was built prior to 1988 or not. If you have any info on this, please drop me a line!), the Vancouver Island Gas spur needs its trestle constructed and then two lengths of flex track near the Port Alberni depot need to be spiked down.
Wiring has been done for the majority of the yard in Port; the southern quarter of the yard plus the remaining trackage towards the plywood division still needs feeder wires hooked up. Some bus wires will also need to be strung too.
Will have to update this post with pictures later, along with updates on a few other bits – the GP9 fleet, the freight car fleet and more. Stay tuned!
Fixing deficiencies
I suppose thanks are due here to a good friend of mine – Grant Eastman. Many times I’ve been to his very impressive N scale layout of the protolanced Southern Alberta Rail, and found substantial sections of benchwork and track completely replaced.
His motivation?
He simply didn’t like how it was previously done and decided to do something about it. For example, he didn’t like how one would have to leave the train and walk around the laundry facilities, furnace and hot water tank. So he relocated, not the track, but the latter three items to allow one to stay with the train. He rebuilt the staging loops and to provide a better track plan, rebuilt the stairway into the basement, changing it’s configuration in the process. He also changed all the code 80 track out with code 55, even in the fully scenicked areas for better appearance. I could go on but you get the idea. Enough about his layout and back to mine.
I wanted Vancouver Island Gas to be a signature scene on the layout, but disliked the fact the aisleway around the nose of the basement was tightened up substantially, and that the trestle was right up against said aisleway. Sure, I could protect the future structure and rolling stock with a sheet of lexan (high-grade plexiglas) but it did nothing to reduce the amount of dead space behind the track that would need scenicking.
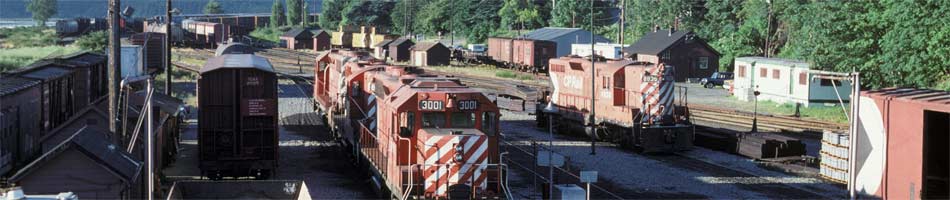
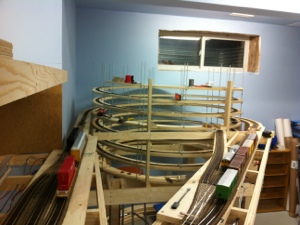
So, after consultation with Cam and Dan, I decided to follow Grant’s lead and do something about it. Track was lifted, feeders cut, bus wiring separated, benchwork pried apart and then removed. Here’s a couple shots of the work in progress. The first shows Cam undoing screws to take off the benchwork and the next after everything save for the brackets have been removed.
Sadly, I neglected to take a ‘before’ picture as we jumped right into the work.
Some people showed considerable concern over the fact I was in demolition mode before the layout was even complete, but after reassuring them with why, they were supportive.
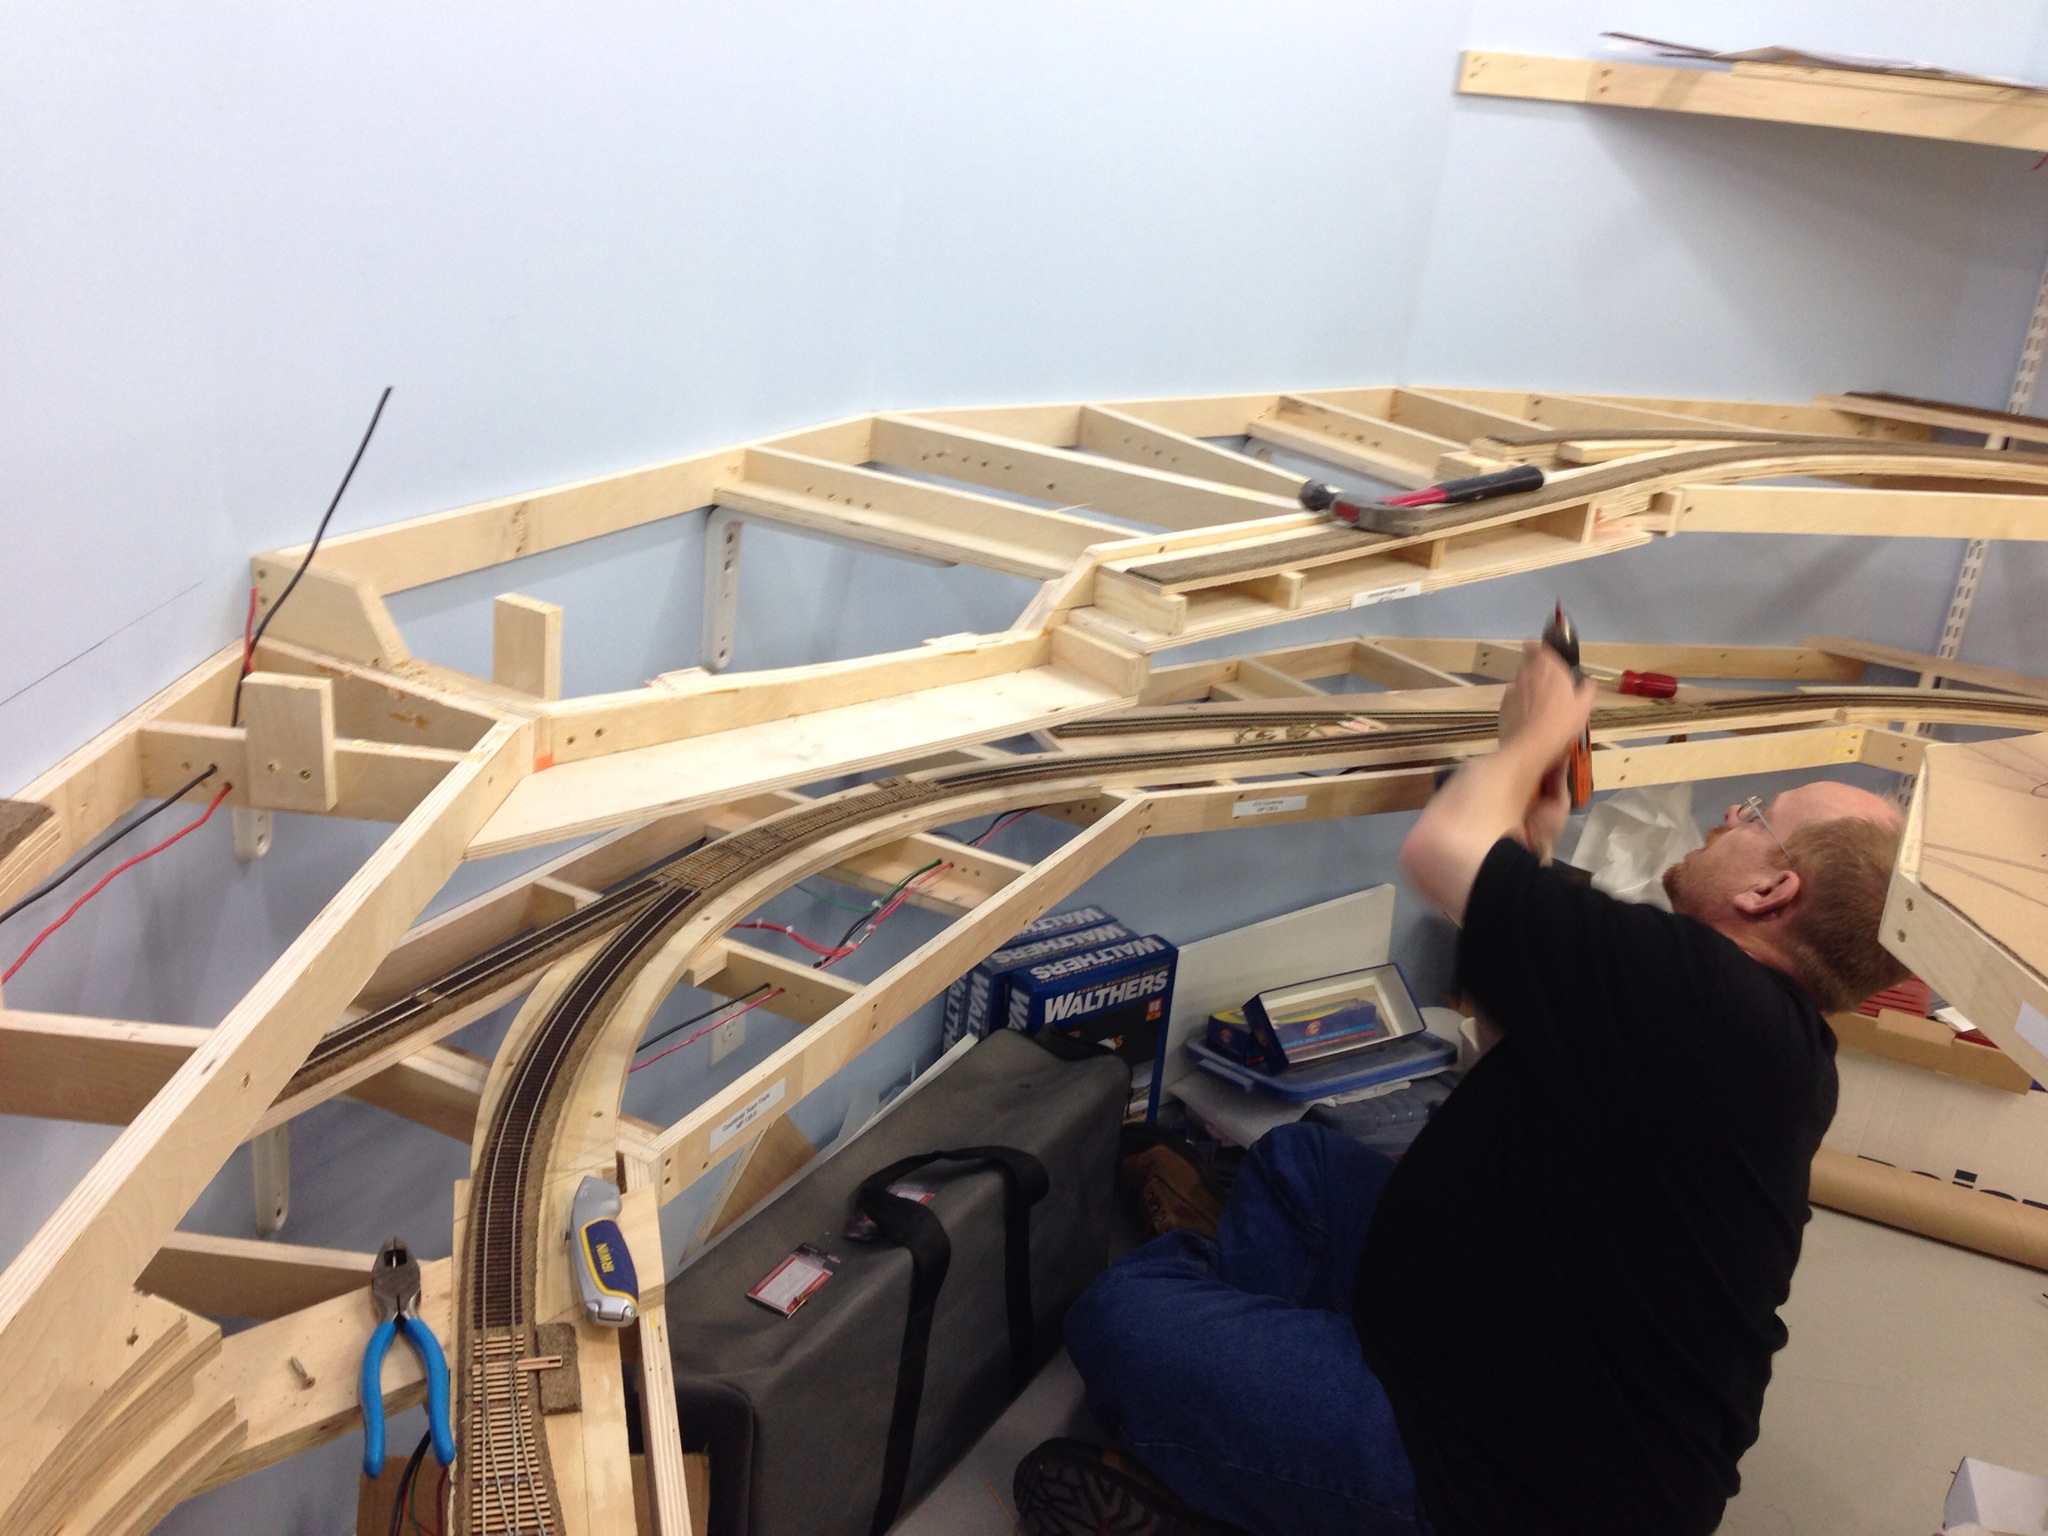
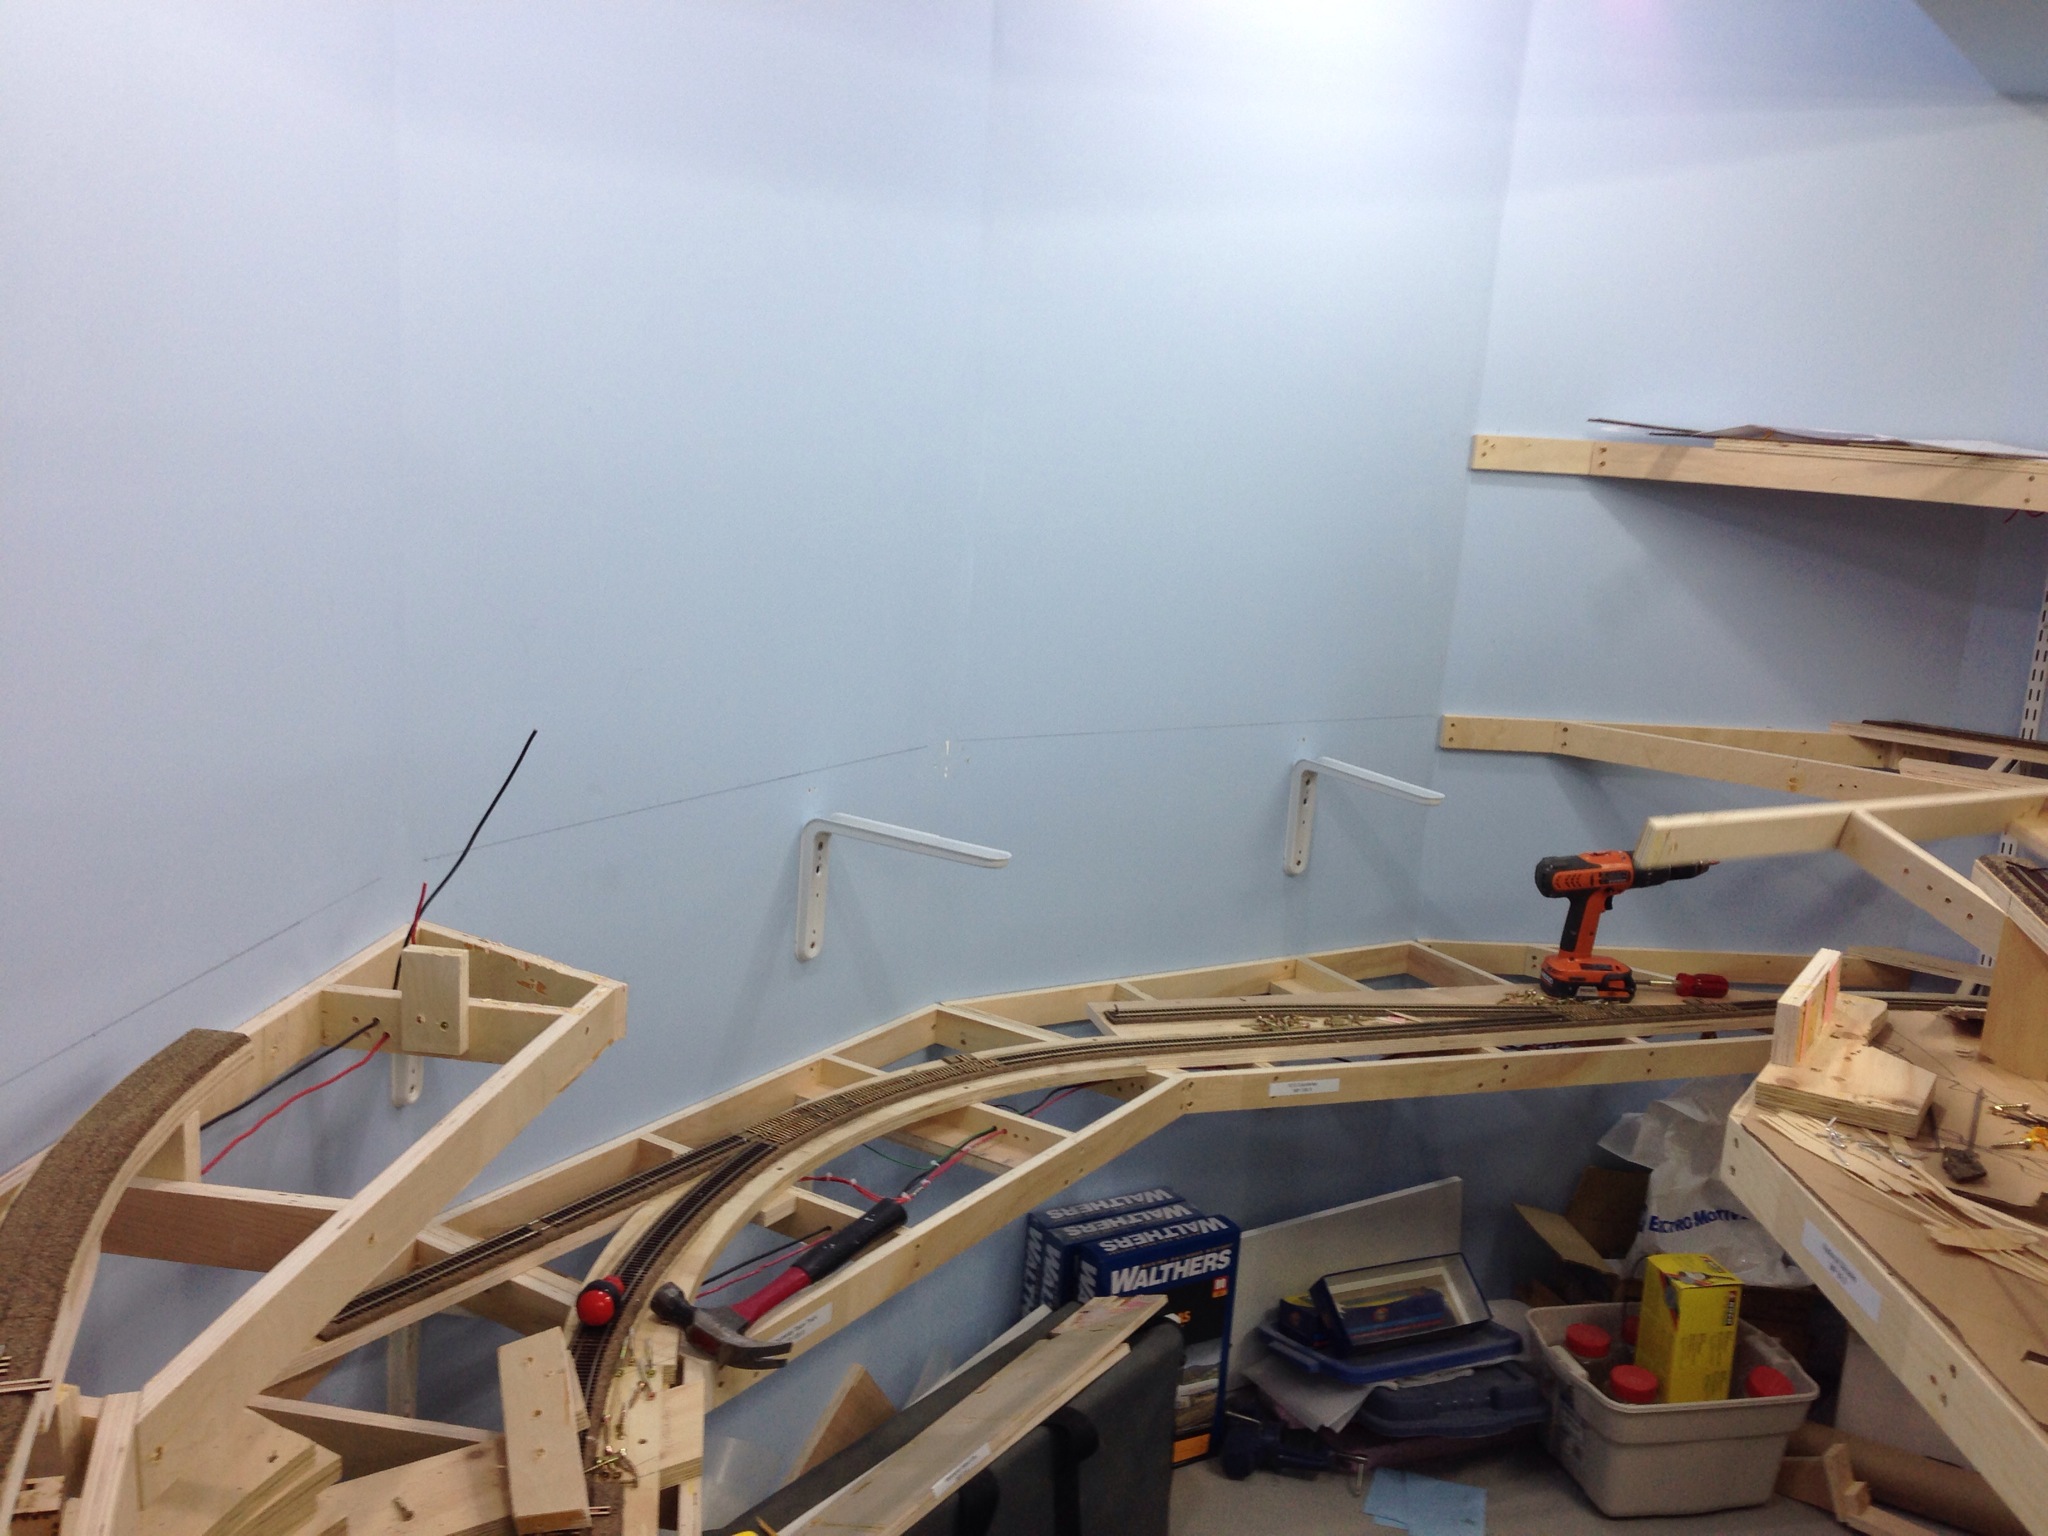
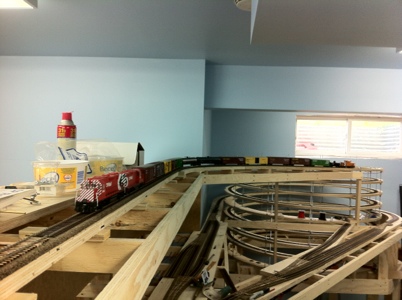
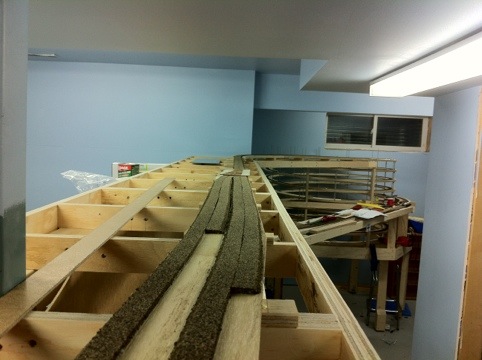
Several weekends later, the benchwork was reinstalled and track relaid and wired in. Thankfully, some pieces were reused, and only a few sections of track needed to be added in. Here’s a couple shots of what it looks like after everything was done:
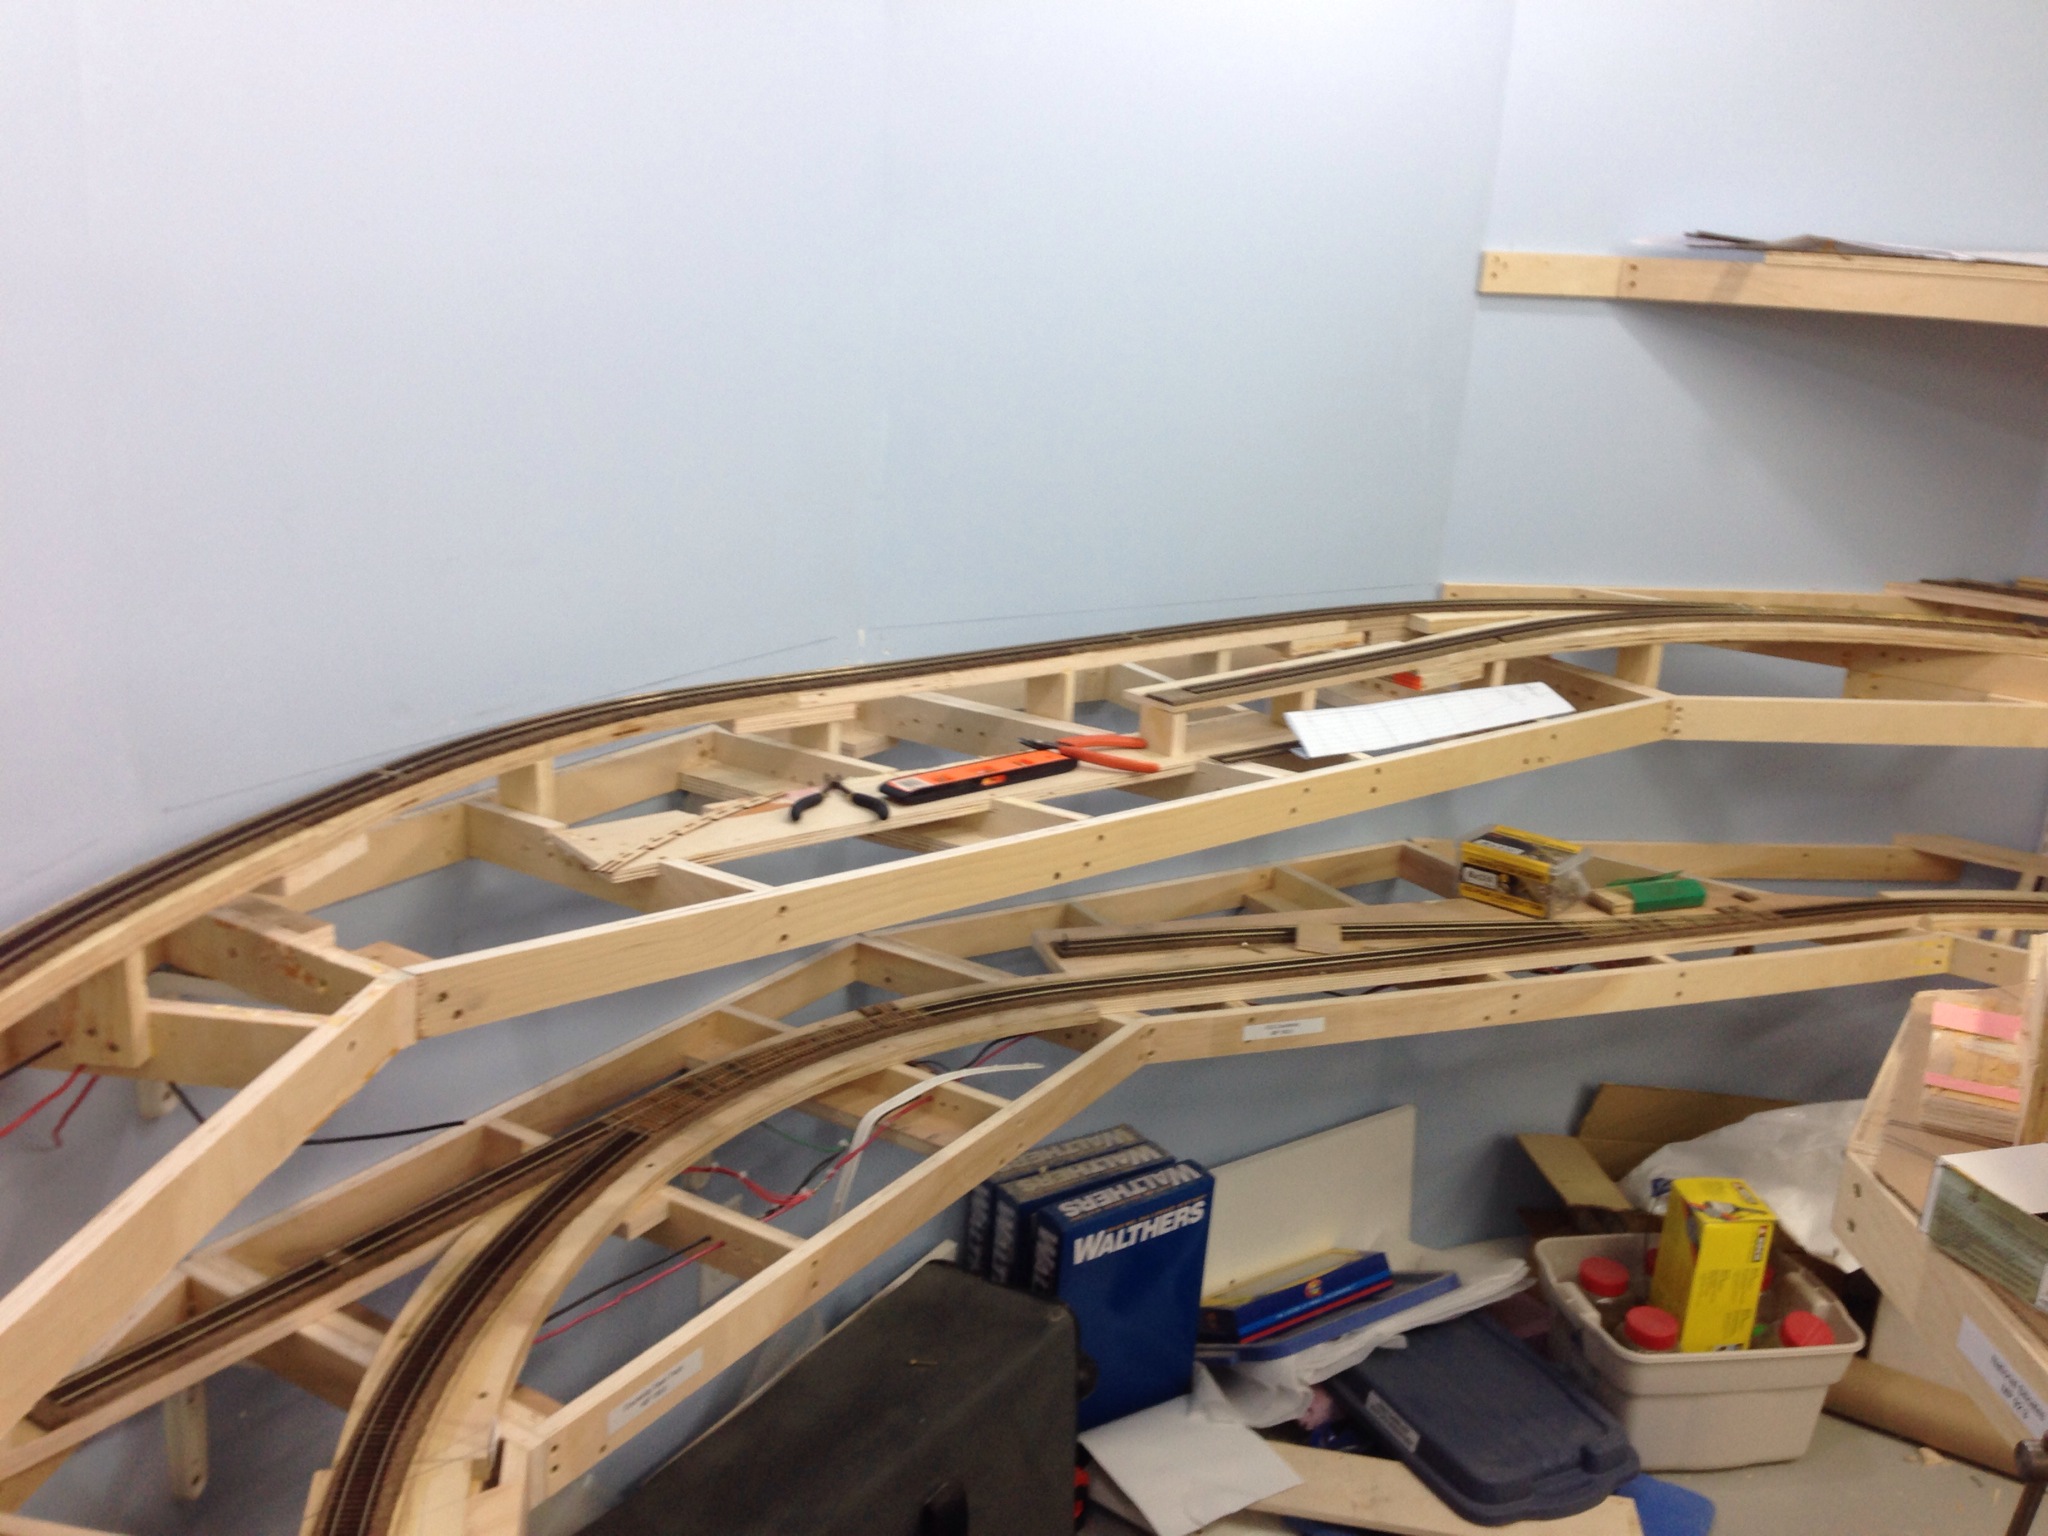
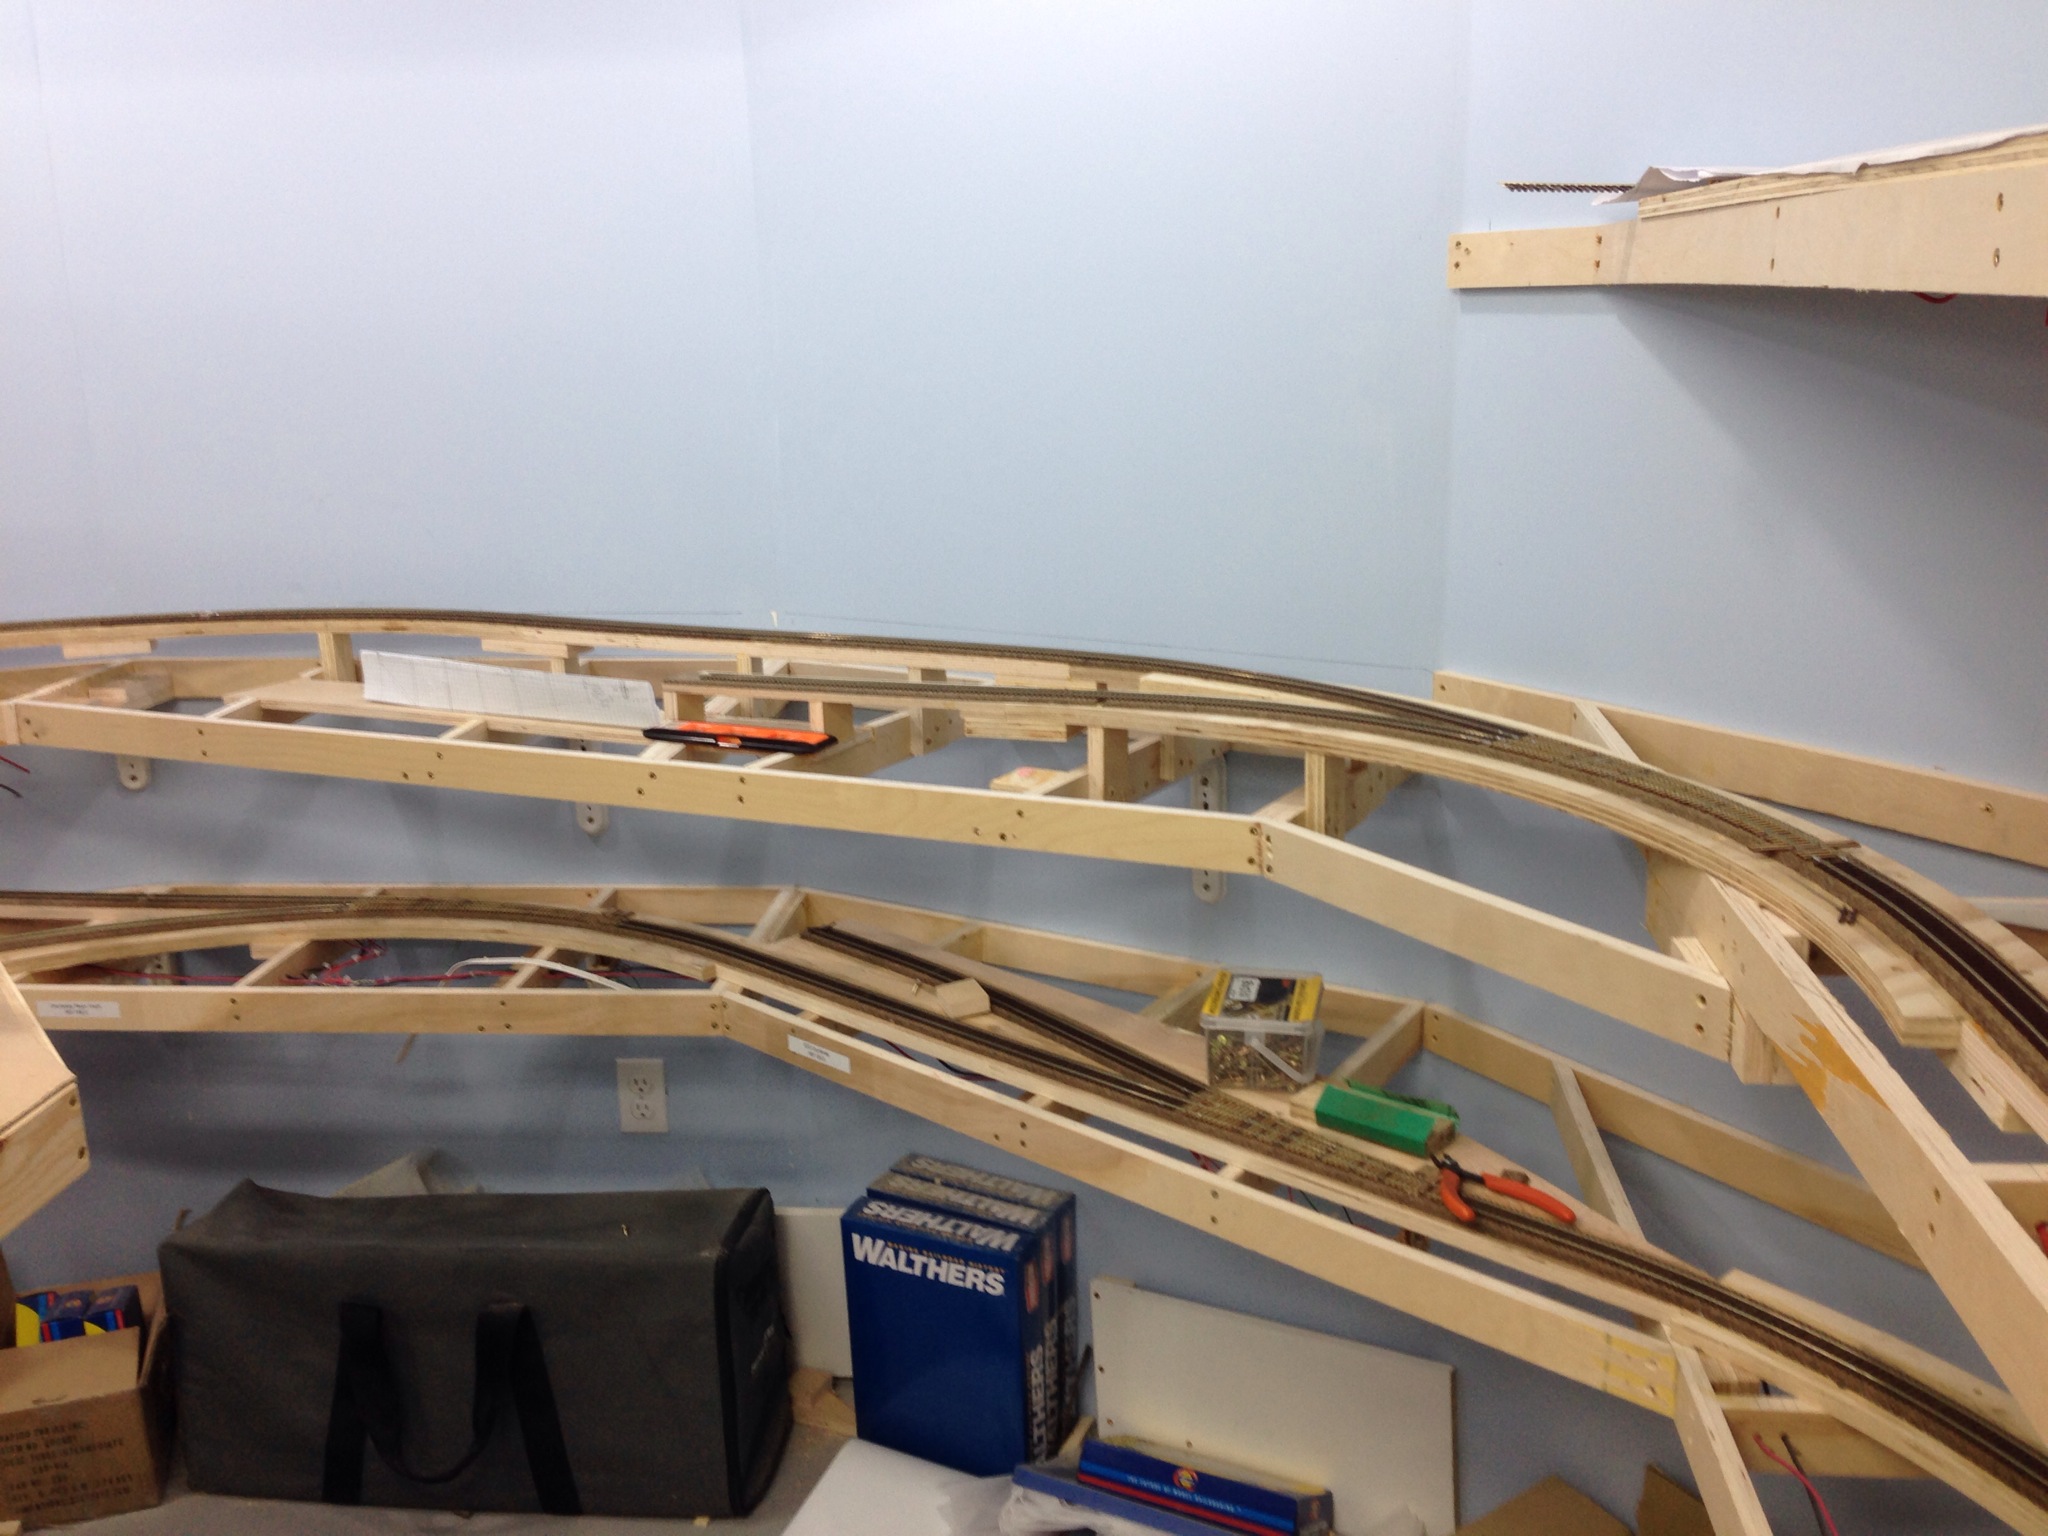
The aisleway gained enough width (give or take another 7 inches), the space behind the track was substantially reduced and there’s space in front of the spur.
Sadly, one consequence of the work is the loss of the needed height to properly model the trestle. It’ll end up being compressed in both directions, but I couldn’t achieve that height without really impacting the space below. Oh well. I’m still happy I did this.
April 5, 2014
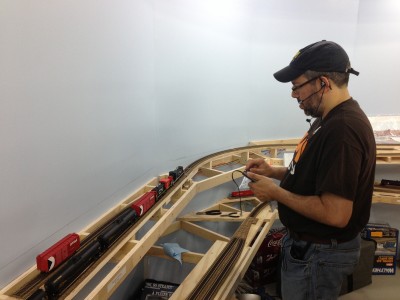
With the trackwork finished for the moment, attention turned to getting the trackage actually wired up properly. As the train actually managed to make it all the way to the main yard track, we knew the continuity of the trackage was good, but without being able to do anything within the yard, it was kinda pointless to carry on with the situation we had.
So out came the drills, 20ga stranded wire in green, red and black, and the soldering station, and wiring was done. I even got the bus completed all the way down to the end of (temporary) track. Cam and I worked in our own districts – for me, I worked on completing the wiring to the West Siding Switch of storage track Arrowsmith, Cam worked down the hill and then while I was finishing the bottom of the hill and a portion of the yard, he finished the other part of it. Progress was made and we had a fully wired layout again.
Much cleaning was done and playtime began. Well, some say we were testing the layout…yeah… yeah, that’s it.
We certainly found more than few switches which had activation pins which needed grinding. All were fixed, and then began the massive task of trying to ready enough rolling stock for the ops session…
August 27 & 28, 2013
Having cleaned my workbench quite thoroughly on Monday, figured I should get at one last bit of wiring: the tail track of the wye.
Ordinarily, it’s be a reasonably simple thing, just wire in the track to an auto reverser and be done with it. But, no… I have to complicate things by making the tail track a programming track as well as making use of the Digitrax Zephyr as an auto-reversing booster. So not only do I have to wire in a 14ga wire from the other boosters for a common, I also need to wire in loconet, and then gap the rails all over the place, creating an isolated bit of track to ensure the programming leads aren’t subjected to full DCC power and making sure it all works at the end.
So, with a 4PDT switch, it’s all done. Never mind the fact it took me two full evenings to get it wired in…. Pics to come when I finish tying up the wires.
August 25, 2013
Back at it in the basement yesterday, primarily to address some much needed tasks.
Saturday evening, Cam and I had a good amount of playtime with running a port freight (me) and a Courtenay turn (Cam) and found a 3 hour ops session is quite realistic after the length of time we took doing abbreviated runs like those. I also found I really needed to get power into Arrowsmith siding. Dragging equipment into a track takes away a lot of realism when you use 5-DCC (aka the 0-5-0).
So, Sunday morning I started tackling that by gapping the rails just past the summit and installed feeders into Arrowsmith. Cam and Dan showed up shortly after I finished with the initial set of feeders and while I grabbed some lunch, they emptied the railway of rolling stock, parking it all in Wellcox. Of course they had a lot of fun doing that!
After lunch, we got to work on benchwork for Port Alberni. Cam, Dan and I got a fair bit of it done but not really well secured to the shelf brackets due to impending deadlines. So the three of us finished that, and made plans for the rest of it next weekend… We hope! Sooner we finish with the benchwork, the sooner we can keep playing!
August 7, 2013
Went downstairs to do some work last night for the first time since the ops session. Work on some niggling details and generally cool down.
Started with the turnouts in the staging yard and repair one of them at the far end of the yard, as the pin dropped out of the throwbar. Fixed that, though required a second hole in said throwbar. Others had positions tweaked and one repaired point. All working now and I’ve ground the pins down with a dremel tool so they don’t catch locomotives and stop them dead.
Also wired in a couple bullfrogs to power the switches and while I was at it, hooked up the track bus to a UP5 at the south end of Parksville Yard.
My thought with powering the UP5’s was initially to have just the 12V power supplied through the barrel jack on the side, but after hooking up the track bus, figured that would definitely be the way to go for all Ux panels, and that goes for the UR92 and UR91 too. The 12v supply will still be hooked up as a backup power for when the track is shorted, but the readings off a dt400 throttle without a battery show much better power with the track bus than without. Plus I get track indication as well!
Inaugural Ops Session!
A long overdue post, primarily because I’ve been waiting for a specific photo… Figured I’d go without it and post it when I get it.
So Jason Shron of Rapido Trains (a model train manufacturer who makes a lot of passenger equipment, save for the one I need on my model railway…yet) arrived in Calgary on the 30th of July and after his first gig at Chinook & Hobby West (North), we went for dinner with Sylvain Duclos at the Five Rivers. A vegetarian restaurant serving Indian fare. Interesting… About all I can say to that as I’m not one typically for curried anything. But the more important stuff for me was when we got home…
That evening was spent showing off the half-covered layout to both Syl and a really tired Jason. James Powell came by on the late side and had a good look around, but despite his offer to help with the cleaning, figured enough rest for his trip back to Vancouver Island was a better idea. All were really impressed, but I wish I had things a little further along to show them the layout without all the sawdust.
Wednesday was spent showing off the GMD-1’s at Eastridge and CMT. Glad to see a few more friends who have been asking when my layout is going to be on the tours for the CMRS. Likely next year folks… Also did a little bit of cleaning downstairs and finished off the wiring…
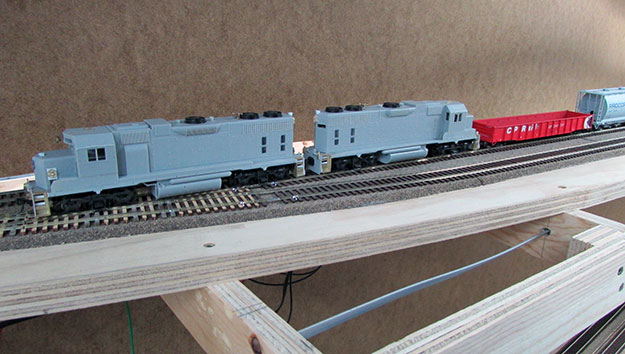
Close-up of Cam’s work-in-progress on a pair of Atlas GP38AC’s
Photo by Jason Shron
Thursday saw Cam arriving early-ish and we seriously attacked the layout and got it all cleaned up, track polished and all ready to go for Friday. Got most of the Quad-LN’s programmed for basic addresses (the rest will come later) and a few more cars were prepared and the pair of Atlas GP38AC’s were unveiled. Sans paint and handrails but looking really good. 3000 and 3004 will be very special units when they’re complete – thanks Cam!
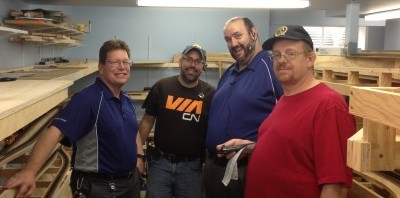
The first ops session crew – from Left to Right: Murray, Jason, Dave, and Cam
And then Friday morning arrived. First ops session and a few great friends made it for the big day. (Thanks Murray, Dave, Cam and Jason!)
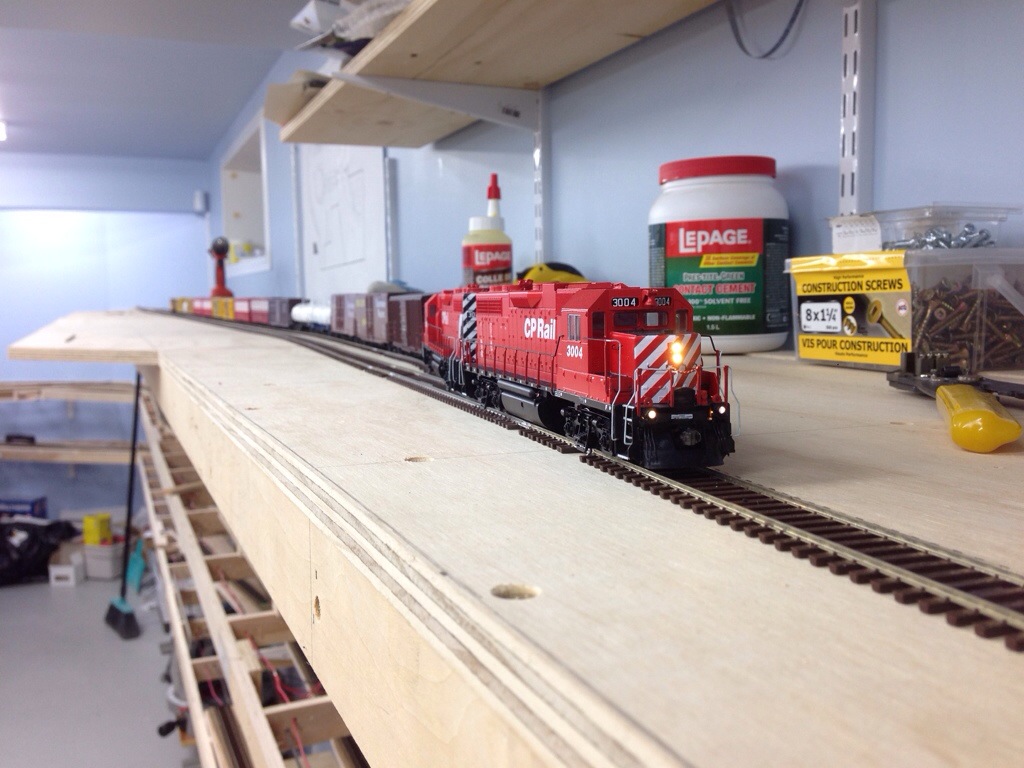
Jason expertly pilots CN GMD-1’s 1011 and 1021 past the Fletcher’s Furniture spur.
On account of a lack of working motive power on the island, the superintendent of the E&N made some phone calls to CN and acquired the use of GMD-1’s 1011 and 1012. These locos were dispatched to service the Nanaimo Switch Job. I…err, make that the E&N Superintendent didn’t send them anywhere else on account of the larger trucks.
Joking aside, things went quite well considering the first ops session is supposed to discover all the bad things and after all was said and done (and Jason on his way back to Edmonton), there weren’t that many things discussed which were horribly wrong. Most issues could be chalked up to not having enough time prior to set things up. Yes, there’s still more programming of the Quad-LN’s to do, operations stuff to setup in JMRI (to generate the switch lists), and rolling stock to prepare. This will no doubt lead to a lot of re-numbering and patching of rolling stock, in addition to more wheelsets and couplers to change out. Memo to rolling stock manufacturers: please no glued on coupler box lids, okay?
All in all, Cam and I are really stoked on how well things went.
We’re still nowhere close to being finished though… But that’s enough for now!
July 27-28, 2013
“All that’s left to do is everything” -Jesse James
Probably the best quote I’ve got from The show ‘Monster Garage’ which aptly describes what we have done, and what’s still needing to be done after he cram sessions over the past couple weeks.
To summarize what has been completed:
Trackage in the staging yard is now complete, spiked down (required a trip to the hobby shop solely for track pins! And then another for more #71 drill bits, both account hard, and unforgiving, birch plywood) and (mostly) fed. I say mostly because there’s probably a dozen feeders still needing to be hooked up to the track bus and about as many needing to feed the microswitches powering the frogs in the staging yard. That aught to be fun…
We have servos installed and running on most turnouts, in fact, all the turnouts which must be electrically controlled, are, though I still have a ton of programming of the Quad-LN’s to do, routes to line, etc. I also changed out the accessory bus power supply with a 6A 12V power supply for the entire layout instead of having two running on the layout. I’ve also got a UP5 connected in the staging area too. To finish that bit off requires finding a spot for the Zephyr to live, wiring it in for the programming track at the end of the wye, and other linked tasks.
And then there’s the cleaning needed. This requires a massive amount of vaccuuming of everything, plenty of testing and generally making the basement hospitable. Did I mention that Jason arrives in a little over 36 hours?
July 17, 2013
Spent an hour and a bit last night hooking up previously dropped feeder wires to the bus.
That is all…
July 13-14, 2013
A brief update…even though there was plenty of work done.
Over the course of the time spent downstairs on Saturday and Sunday, I got feeders dropped and secured to the rail for the entire ICG Nanaimo – Nanaimo depot sub-district. Not wired into the bus, but that will hopefully be completed this week. I also gapped the rails for that power district as well.
Cam was over for Saturday and some of Sunday and worked on getting track laid in the staging yard. Made really good progress too, having completed all but a few tail tracks on the southern end of the yard and half of the runaround track. Sunday saw the last bit of staging yard benchwork completed – that is, the reverse leg of the wye into the programming track, and a lot of that track is fitted, though still needs to be spiked down. We also found that cheap birch plywood has another nasty trait – loves bending the track pins! Coupled with the splintering capabilities, I can’t say I will recommend it for benchwork again.
I’ve also been working to get a servo programmed to become the block for errant rolling stock headed to the abyss. Mostly successful, but not entirely positive I can get the Singlet to function as I need it to – that is, having a microswitch operate as a toggle… More to come on that…
Cheers!
April 29, 2013
Finished up all the feeder wires and the bullfrogs in Courtenay this evening. Accordingly, I am now able to run freights all the way north… But until I get the layout vacuumed, nothing’s getting there!
Getting to old tasks
This past week has bee an interesting one. Of course SUPERTRAIN wrapped up last Sunday after a spectacular weekend and record attendance, and had a few people over to see the layout. Needless to say, Dan Garcia and Matt Soknacki of Rapido Trains were quite keen to see the layout as were a few others, including Steve Stark. Steve was introduced to me by Tim Horton (of BCR Dawson Creek fame, not the coffee shop) as a fellow E&N modeler. Steve is also an absolute fount of knowledge about the industries on Vancouver Island, and as a result of him, I’m needing to pull up a very short length of track at the end of the Superior Propane spur in Parksville and replace it with… Get this… Code 83 rail on Concrete Ties. Yup, there’s a 100′ long chunk of 132lb rail on concrete ties in the hydrogen peroxide facility. Yup, that spur was a dual-purpose bit of track according to Steve… Served as both hydrogen peroxide and propane!
In the past few evenings, I’ve also been taking care of a more necessary task, running bus wire and properly powering up the lower helix. After getting the bus soldered to the clips and then secured to the ready rod, gapped the rails at the lower end to ensure two boosters weren’t feeding a common set of rails, and made the connection of the bus to the appropriate PSX unit.
Fired up the system, did the quarter test and all good. And then I sent the Courtenay turn north from Parksville. Shortly after the train departed Parksville, I got sparks and beepage from the booster. Turns out that I have a DB150 which has the rail sync … Well, out of sync. A quick change of the output wires and problem solved.
Started the turn back down the hill and put the dayliner into service at Courtenay and had the two meet at Mud Bay. I suppose I should’ve taken a photo to commemorate the moment, but didn’t. Was having too much fun!
The past few weekends, and a Good (progress) Friday!
So I’ve been busy, and to be honest, not terribly inspired to write about the progress made on the layout.
But progress has definitely been made! A few weeks ago, I did a fair bit more wiring work to the Courtenay site, and we can (in theory) run trains all the way to the depot in Courtenay…. Which is good for the dayliner, but not for the Courtenay turn which needs access to all trackage in the town to do what it needs to do. That will come in time.
But more importantly…
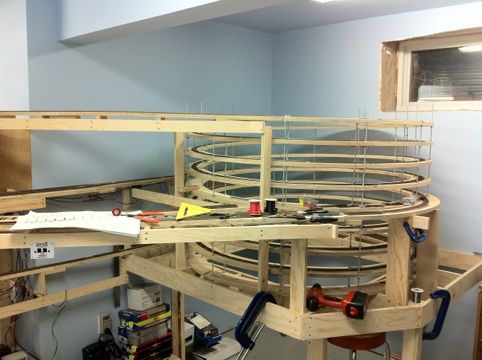
We have benchwork into Nanaimo! Cam, Dan and I worked over the past couple weekends to get benchwork built and this past (Good) Friday, Cam and I got track boards installed south to Vancouver Island Gas. This spur is rather interesting because of … Well, here’s a picture that explains it all:
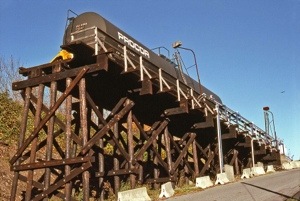
Cam and I have also worked out a solution for the bridge across the aisle to the staging yard. Instead of being a lift-out or a swing bridge, we decided on something more resembling a bascule bridge. It’ll swing up to vertical over the fridge, and the best part, we’re using self-closing hinges. The weight of the bridge will keep the pressure light when the bridge is down, but assist in raising it and will also ensure it stays open when it’s up. Of course, given the fact we need to incorporate a grade along the line to the VI Gas spur means we’ll need to incorporate some mechanism to keep rolling stock from going to the great abyss if it’s not connected to a locomotive!
That we’ll figure out over the next while…
Till then,
Cheers!
January 21, 2013
Spent a few hours last night separating bundles of salvaged 12 and 14 gauge wire (thanks Dan!) into appropriate colours, and then got to work installing the remaining pair of PSX-3’s. Lots of screws and nylon spacers getting the boards secure.
Wiring in the things reminded me why I prefer solid wire for these things. And even though it says the terminals are rated to fit a 12ga wire, it only JUST fits, and even then requires a lot of pushing and angling things just so, and that’s not counting the stranded wire frustration. I ended up using 14ga solid wire for the pass-thru connections.
December 29, 2013
Spent this morning washing a bunch of turnouts and then assembling them with the quicksticks. Found one of the skeletons I thought was originally code 70 was actually a code 83 turnout which is for the staging yard. Oops.
Cam came over and we got to work on finishing the cork to Courtenay. After that was done, the track laying came. Cam got started with continuing the trackage north from Union Bay, and I started in on another turnout skeleton, occasionally providing my eyes to the progress and ensuring the track was kink free.
Dan arrived after he finished up work for the day around 6. He joined Cam with the track laying stuff, and I got to work on making the little clips to wire in the bus to the lower helix. Once there was a fair amount more track installed, I worked on hooking up feeder wires to the track. By the time 9:30pm rolled around, we were getting to the “done” point, and called it a day.
To sum up, we have cork down all the way to the northern end of track in Courtenay, only two turnouts need to be finished and track laid to just past BC Pole. A very good day of progress!
August 5, 2012
I knew Cam would be busy with family today, but had a project that I knew wouldn’t be too hard to complete solo, and that was the installation of electrical power for the chop saw into the peninsula wall and also in the inside of the dispatchers booth, primarily for a computer or lights, or even a charger for radios.
Using some 14/3 household wiring, plus the bits I picked up yesterday, went about drilling holes through the 2×4’s and then stringing wire. A couple boxes secured to the wall, outlets secured to wires, and faceplates attached, I set to the last task and that was terminating my “semi-permanent extension cord” with a male plug which then plugs into the actual electrical circuit near the end of the wall. With everything plugged in, and I went to test it. Couldn’t find my circuit tester, but figured my voltmeter would verify power just as well, and found it read 148 volts.
Oh crap. That’s way high.
Tested a few other spots and found them high too.
Called Cam later that evening and he reassured me that the household wiring was fine, that things would’ve went poof a long time ago if that voltage reading was correct and that he would be happy to test the house with his multimeter. Sure enough…my multimeter is now usable primarily for continuity and that’s about it. Guess who’s buying a new one? I’m not that terribly concerned, it’s given me many many years of life, though now I’m beginning to doubt just how accurate the measurements I’ve made have been as of late…Perhaps my accessory bus isn’t actually around 17V, but more around a normal 12? We’ll see when I pick up a new one.
Cheers!
July 15, 2012
Saturday, went down to see Bruce (The Dispatcher) to pick up the first of the circuit breakers for the layout, a DCC Specialties PSX-4. Lots of good reviews for this and the unit will certainly help keep the bulk of the layout running when derailments and switches being run through short out the district.
Cam came over and we worked on getting things at the Booster Shelf cleaned up and sorted out to get the circuit breaker installed. Owing to the PSX-4’s rather large size, we had to build a secondary shelf to hold the power supplies for the boosters, and that allowed lots of things to be organized.
I’ll be ordering a couple PSX-3’s to subdivide the outputs from the other two boosters shortly, and here’s how the sub-districts will work out:
| Output | 1 | 2 | 3 |
| A | Parksville | Port Alberni | Upper Helix |
| B | Bryn | Arrowsmith | Lower Helix |
| C | Courtenay | Nanaimo | Staging Yard |
| D | Mud Bay | N/A | N/A |
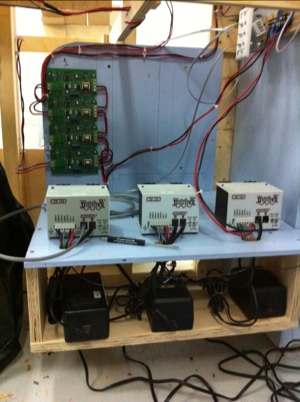
Here’s a picture of how it’s set up for the moment. The blue wall immediately to the right of the green circuit board (PSX-4) is where the PSX-3’s will go. Starting to look somewhat organized! Too bad I didn’t think to take a picture before we started on all this… Oh well, hindsight is 20/20, right?
June 24, 2012
Didn’t do much over the course of the weekend than acquire some Peco rail joiners on Saturday, and try to apply some firmware updates to the DT402D throttle and the UR92. The former was successful, the latter…. Well, let’s say the upgrade downgraded the functionality to nil.
A message has been sent to Digitrax and I’ll hopefully find out soon whether I’m sending it on a vacation to Florida. I suppose it’s not a really bad thing as I’ve still got a couple throttles to send down for repair/upgrading…and I should get some more trackwork going too.
June 17, 2012
And there ya have it. After a very lengthy wait, we finally have a train at the current end of track – the east siding switch of Arrowsmith. The train of course made it up the hill under its own power, and made obvious the need to fully check the trip pins on the cars I’m running. A couple candidates are those which derailed on the way up on account of the screws holding the track down.
By the way, this is the first train to run on the layout in many months… So happy to hear those units once again.
June 14, 2012
Spent a little bit of time in the basement last night, working on finishing feeders and busses in the helix. Got the upper helix red wire completed, strung the black (and found that length of wire is about 4″ too short…) and finished off all the feeders to both track and their ready-rod connections.
During all this, I’ve got one of my older iPods playing music. One song came on that I didn’t care to hear, so out I went to remedy the situation. I stood up a little too early…
Ow. Ow. Ow.
The bridge from Parksville to the lower deck had (emphasis on had) a UP5 mounted to the bottom of it, screwed in on the top pair of holes. I had stood up right into this poor piece of aluminum, bent the living daylights out of it, and in return it fought back, tearing a very loved shirt (obtainable only at the Apple company store at their worldwide headquarters in Cupertino, CA) and putting a couple good gashes into my back.
I’m now seriously contemplating a decision to go completely wireless for the throttles…
June 4, 2012
Holy. Crap.
It’s been how long since I’ve made an entry on this blog or done any meaningful work on the layout?!?
Apart from the prototype being given funding to survive (though a few extra million for bridges is now necessary for freight service), I haven’t done anything in the basement or written anything on this blog for virtually four months… And granted, the work done over tonight and last night isn’t much, it is progress.
So I started out by doing some cleaning. Always a good thing to do, especially when one is trying to figure out what to do next. Leaves one better prepared to actually do the work, rather than get frustrated at the fact you want to do something but can’t because of crap getting in the way. Swept the floor near the chopsaw, took care of a few bits of stuff that didn’t need to be there (like a top panel for a washing machine I no longer own…though it might actually come in handy at some point like a magnet board perhaps…) and organize some of the tools. Didn’t get as far as I should have, but progress nonetheless.
Then over to do some wiring work near the helix and the port sub. Realized I needed some height to work on those spots and set out to find a step stool. Except I didn’t have a milk crate to stand on or anything else that would substitute.
So I decided to do something to a dear piece of woodworking my brother built in shop class back when I was in high school… For those who know me, that’s a good 18+ years ago. It was a small-ish table, still on the tall side, with a small shelf underneath the main top. Nothing too fancy, but wood wrapped the edges of the plywood and solid wood for legs. Varathane on most surfaces.
Yes, I tore it apart.
It was getting rather beat up, and had served it’s purpose well. Most of the time it held my spraybooth, then during the construction of the layout, it’s been a collector of various tools for drywalling.
I took the top off, will repurpose it as a shelf somewhere, and then took the smaller shelf and removed it from the legs and tore the legs all apart. Most of that was easy given the fact it was broken already. Sawed 12″ pieces out of the legs (ruining the clean floor I just had) and then glued/screwed them to the four corners of the smaller shelf and voila. A step stool that’s both light and tall enough to allow me to whack my head against light fixtures and the ceiling. Not that I plan on doing that…
So while I’m up there drilling feeder wire holes for the track leading up to Arrowsmith siding, I’m still wracking my brain as to how I can efficiently get power to the ready rods and light up all the feeders I’ve lovingly wired to the track. And then I start to experiment.
The feeders hooked up already to the ready rods are with big ring terminals. A couple snips and they insert between the internal tooth lock washers really easy. Problem with using them is that it still requires a T joint and tiny wire – 18ga at best to make the connection to the bus which I’m using 12ga solid wire for. And then it dawns on me that I could make a few modifications to them and save myself a bit of work and a lot of extra connections. Here’s how:
- take one crimp, and hold it by the ring very firmly in a pair of pliers.
- using a sharp xacto knife, slice the plastic off the crimp.
- using small needle nosed pliers, open up the little hoop so it becomes a flat piece of metal. Use pliers and/or a hammer and the concrete floor to make the entire piece very flat.
- using pliers, bend the tab up and back towards the ring in a hook that will hold the wire passing by perpendicular to the ring.
- strip and solder the terminal to the wire and attach to the ready rod the same way I attach the others.
I’ll post pictures when I have a complete setup, but that I think will solve a lot of issues and make for a neat way to do up the wiring to the ready rod, likely on Wednesday or Thursday evening.
Nice to be back into this thing…
February 12, 2012
A wonderful day!
Cam came over shortly after noon and we got started on working the track further up the helix. I had prepped the last few pieces of the benchwork earlier but Cam did the final adjustments before securing the track down.
After a bit of lunch, Dan joined us and we started working on the benchwork out of the helix towards Arrowsmith. After prepping a little more cork than necessary, we pressed on with the benchwork fully into Arrowsmith siding (admittedly, it was more of a storage track than an actual siding in 1988.) to be able to use up the cork.
I also cut off the top of a few ready rods close to where the track exits out of the helix.
A great day of progress!
January 28, 2012
And more helix! The port sub helix is now a couple turns taller after a good afternoon of Cam and I working away at the benchwork, track and wiring. One more full rotation for the track and we’ll be exiting the helix and towards the summit. And it all goes downhill from there!
January 21, 2012
In some respects, building a helix requires quite a few things to be done nearly all at the same time.
Such was the case when Cam came over to get some stuff done on the layout. Since we’ve pretty much done everything on the lower and middle decks, we started in on the upper helix to carry the track up towards the summit of the Port Alberni subdivision. We managed within the space of about two hours to wrap the benchwork around a revolution and a half, and a little over a half turn on the track.
And on a completely different topic…
I downloaded Google’s SketchUp, with the intent of learning how to model the stations along the line digitally in the effort of having the pieces laser cut, making the assembly effort to be better and hopefully produce a better finished piece.
We’ll see how things go…
Recent Comments