December (mumble), 2013
As much as I dislike Omnibus type things, I’m afraid I need to use it here…
I’ve been down to the basement quite a bit over the last few weeks and haven’t been doing any updates to the blog so my apologies to James and my other lurker readers for not doing these more frequently.
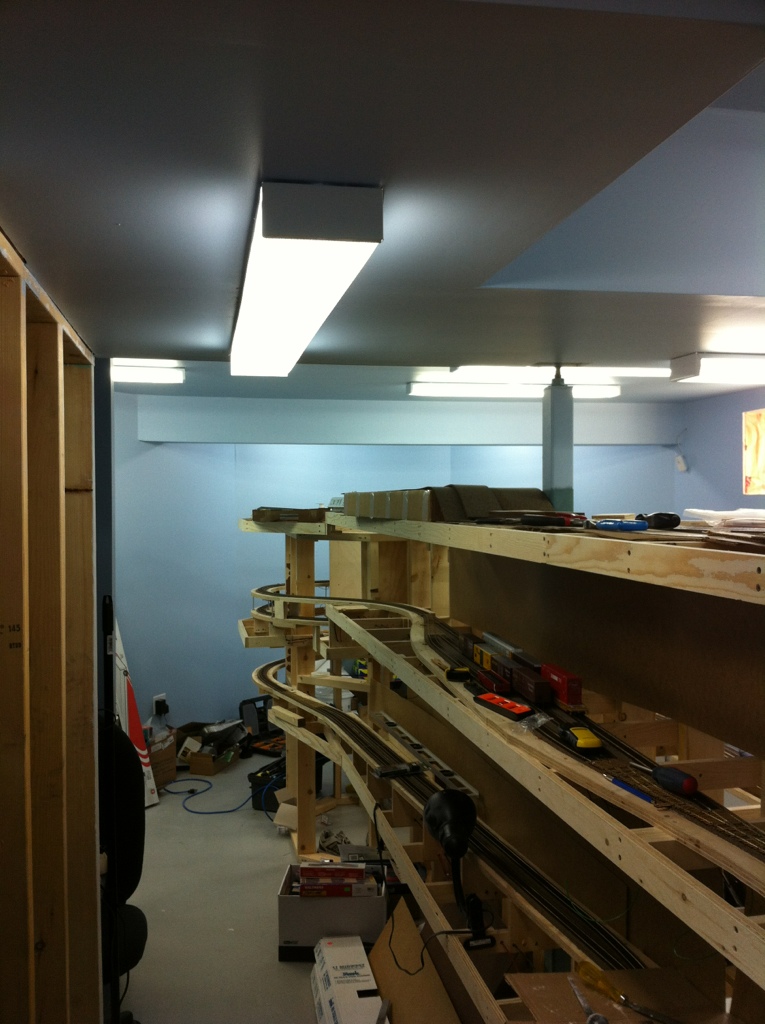
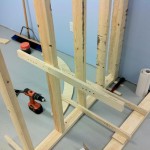
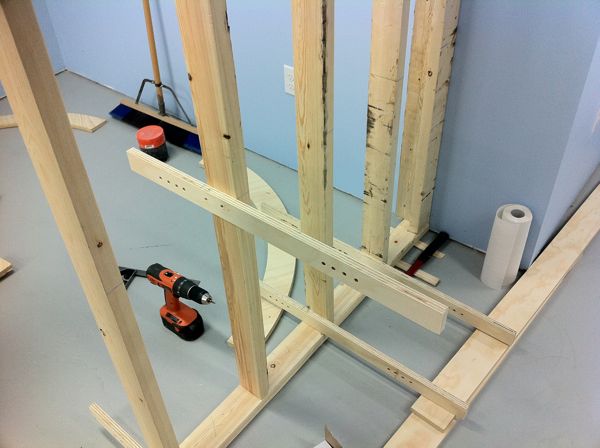
After getting the track boards cut, they spent a bit of time being left alone but they did get secured not long ago. Shortly afterwards, Cam and I cut a board and attached to the wall right at the bottom of the stairs. This will form the tail track and the northernmost trackage in Courtenay. This will come in handy for the crews working the Courtenay turn as they’ll likely need to do some shuffling of cars to switch on their way back to Nanaimo, as the vast majority of the turnouts are south facing.
I’ve also been busy building turnouts, mostly #6’s, but also a #8 curved turnout as well. Much as Cam would like Courtenay and the trackage into it to be arrow straight like it is in the prototype, my basement just won’t allow it, and I’d rather not give up a couple important industries (BC Pole and Dominion Tar) to accommodate that wish, so the turnout to the Courtenay team track will be situated on curved trackage. As far as we can tell, all industries in Courtenay in 1988 are present and able to be switched. I’m looking forward to operating it!
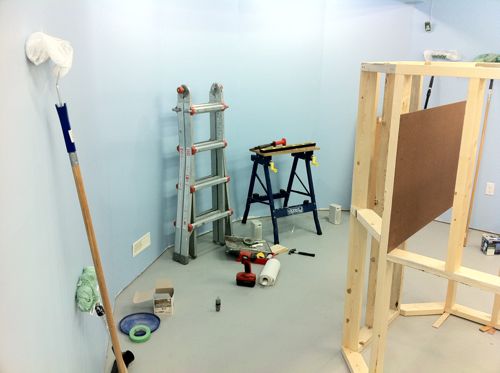
As we hosted a Christmas Brunch for a few important family members, I wanted to get the basement into some semblance of order and also do massive cleaning to make it presentable, I spent about three evenings getting a lot of cleaning/organizing/purging/etc. done. The results are fantastic. Family loved it, trains ran (though admittedly some dirty track in the helix caused some angst, more on that later) and all was good. I even spent the better part of a couple hours tonight doing the same to my workbench.
Couple days ago, spent a few hours in the morning to finish painting the stairs into the basement. Just plain white primer for now.
As I eluded to earlier, some dirty track has been bothering me. More due to all the dust in the basement, something rather unavoidable with all the construction happening, I decided to take advantage of the Boxing Day sale at PM Hobbycraft and looked at an Atlas track cleaning car. To the best of my knowledge, it’s the only vacuum equipped car, so picked it up and then proceeded to install a DCC decoder into it. I ended up removing all the wiring inside, hardwired the decoder in and after a bit of programming, am now able to control the speed of the fan. Ran it successfully through both helicies in front of a couple GP38’s. the results were promising. After a couple runs, the hopper was showing a few bits and the screen was covered in fine dust. The unit could definitely use a capacitor to assist the vacuum motor, and a couple other tweaks, but I’m satisfied with it. I’d post some pictures, but they’re too dirty. 🙂
Yesterday, spent a couple hours and laid some cork down through BC Pole and Dominion Tar as well as the mainline approaching both. Should have the rest of the cork laid tomorrow and probably some track soon as well.Had a real SOB of a time trying to get the lid unscrewed off the full 1.5L jar of contact cement though. I now own a couple strap wrenches…
Also received my order of track yesterday too. 10 bundles of code 70 flex, totaling 180′ of track, so should be good for a while. The three existing bundles weren’t going to make it to Courtenay. While we were out shopping, also picked up some 14ga stranded wire from MRO in red and black for bus wiring needs. My PSX-3’s finally arrived a week or two ago and I can get them installed.
Can’t think of anything else to mention. Thanks for reading this far!
November 10, 2012
With my wife out of town on a two week holiday to Hawaii for scrapbooking, I finally took some time to get to work on the layout. Of course, also good that Dan and Cam were willing to help.
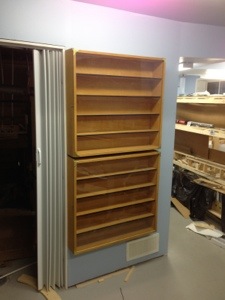
Some time ago, I acquired a couple display cabinets from another model railroader who was moving and downsizing. After sitting in the basement since spring, I finally have them installed on one of the unclaimed walls.
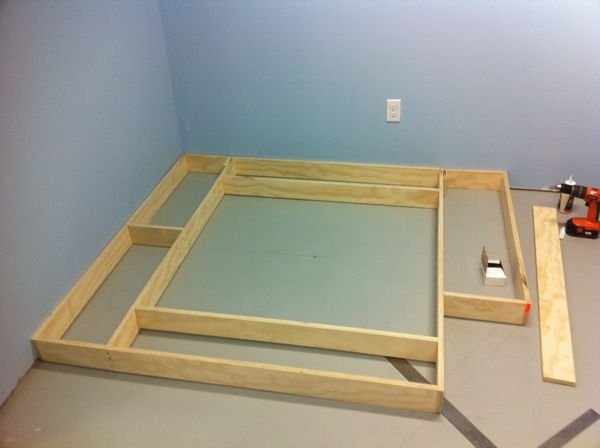
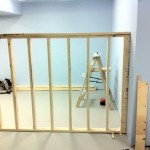
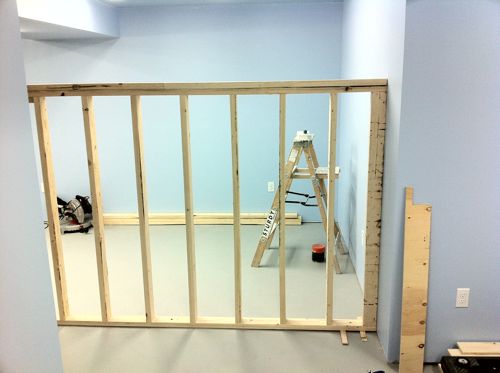
And then we got some work done on the trackboard into Dominion Tar & Chemical, drawing out where the main and the spur are going to go. Room for a 3 car spot plus a little more. BC Pole was also factored in and then since I could do some of that stuff on my own at a later time, figured on getting more of the benchwork done which does require a few more hands. And with that, we installed benchwork around the “nose” of the basement (south end) for the lower deck, and we now have the basic shape for Courtenay. We also found better spots for ICG in Courtenay, along with the team track across Cumberland Street from the station.
We ran out of usable 2″ wide plywood, so we’re not quite done with Courtenay’s benchwork, plus I’m needing to install a narrow shelf into the stairway for the escape track out the extreme north end of Courtenay’s diminutive yard. Next weekend, I should be able to acquire more plywood in the correct dimensions and carry on with the task!
Of note, it would appear Layout Tours for the CMRS have been moved up into March… If I’m going to have the Victoria Sub portion of the layout operational by then, I should get a move on!
August 12, 2012
Been a while since I’ve identified a post under “basement development”, but the work Cam and I did this weekend was certainly that work.
Saturday, we made a quick trip to Home Depot, picked up a sheet of 3/4″ MDF and four strips of pre-primed moulding. The sheet of MDF was ripped there to 10 1/2″ and 10 3/4″ wide, per the quick measurements I made earlier in the week.
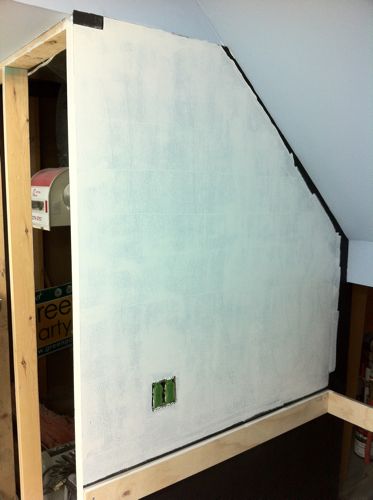
Sunday morning, I went downstairs and got to work putting a coat of primer on the sides and one of the faces, as well as finishing up the trimming of the drywall to the proper size.
Later that afternoon, Cam came over to assist with getting the shebang installed. After finishing the priming od the bloards, we needed to make a trip to Rona for some ‘tuck tape’ which I needed (but didn’t realize when we picked up the other stuff), we got to work on cutting and installing the casing.
And here’s where I found that the window wasn’t installed very squarely in the opening. A few custom cuts later, we had everything secured, and got the first piece of moulding nailed in. And then pulled it out owing to the fact the brads I was using were too short. Redone with 2″ long brads, all was made secure.
Still to be done is filling of the screw holes, nail holes, siliconing the seams and corners and for this window, applying some small moulding to hide the distance between the casing and the window.
Cheers!
August 7-8, 2012
Since the weather is rather warm in Calgary, decided to head downstairs to the basement and cool off, admire the work done thus far, dream a little bit, and just generally cool down.
While I was sitting there at the location soon to be occupied by the team track of Courtenay and Vancouver Island Gas, I looked at the standards holding up those far-from-level brackets and realized a rather important fact:
The standards are not necessarily plumb.
There are some curves in the standards, either from a rather zealous drive from the drill securing the screws, the taping and mudding on the wall not leaving a rather flat wall, or likely, a combination of both. So with the curve in the standard, the shelving brackets, especially the long 19″ ones, are pointing up. Thankfully I discovered this before much work was done and the fix for this is reasonably easy to implement. We’ll pull the brackets, pull the screws and shim the standards so they are straight and secure. That should fix the levelness of the brackets.
I also realized that if I’m going to get the windows finished, I should do so fairly soon, lest the work become a hell of a lot more difficult owing to the fact that the layout in front of the window at Port Alberni will be very deep… Cam agreed on this fact and told me to get the drywall prepped (ie: flush to the window frame) and on Saturday afternoon, we’ll acquire the casing and boards and get the windows finished. So, over that evenings and Wednesday, I’ve been getting reacquainted with the drywall saw, utility knife, rasp and most importantly, vacuum cleaner and getting that task taken care of on both windows. I’ll probably need to replace the vapour barrier on both of them owing to the fact that it doesn’t take well to long-term exposure to UV and my punctures with the saw.
Cheers!
Let there be light!
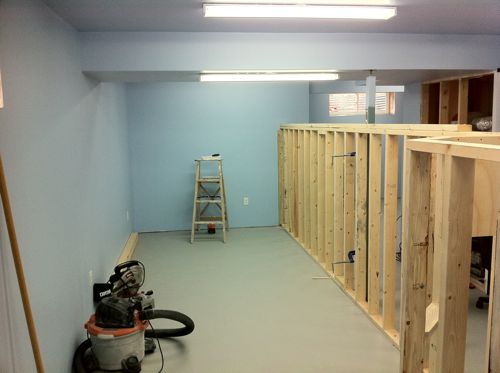
Ever since we changed the track plan and eliminated Wellcox yard, the lighting plan was already decided on. As such, Parksville and arrowsmith siding were always a little dark.
This morning, I rectified the problem with the installation of one more light fixture perpendicular to the rest of the fixtures in the basement.
I think it works wonderfully!
Look ma! No headknocker!
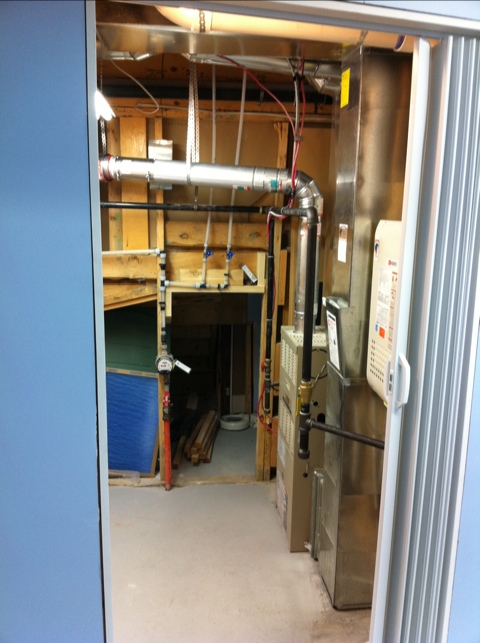
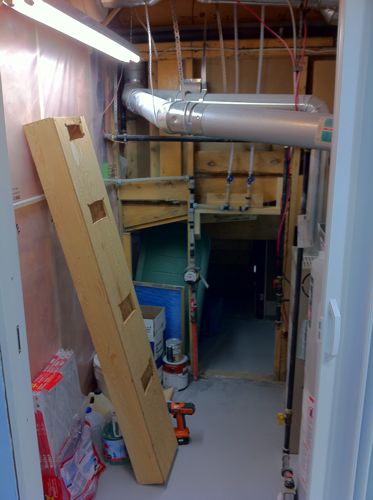
And the hot water tank is headed for the scrapyard (where I’m told they’re worth maybe a couple dollars) and I now have a clear entrance into the utility room where the staging yard will be. Maybe not as extreme as plans my friend Grant Eastman has for his basement (he is likely redoing the stairs into his basement for additional layout space) but at least it’s a move to improve our home and my crew’s comfort with operating this layout.
Last day of hot water tank!
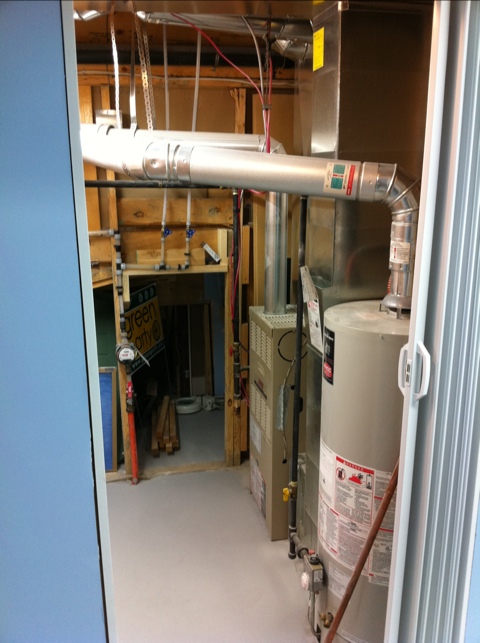
That flue you see coming from the top of the hot water tank is a real headbanger. Today is also it’s last full day as I’m having the entire hot water tank removed and replaced with a tankless hot water heater tomorrow.
February 20, 2011
So having the MacBook doing all the duties of updating the website is turning out to be a larger challenge than I thought. I still have yet to sync up the iPhone to the MacBook in iTunes, but at least I managed to sync up the photos! I’ve got them on the computer, but out of time to put them onto the page. Will get to that later. Today was a clean-up day – lots of sawdust to sweep up, vacuum and otherwise dispose of for further progress tomorrow! And oh yeah! Update the website!
February 5, 2011
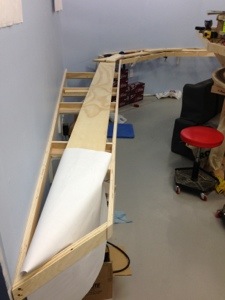
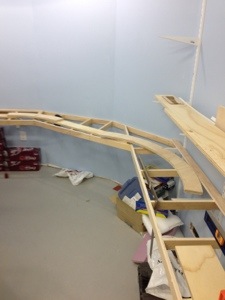
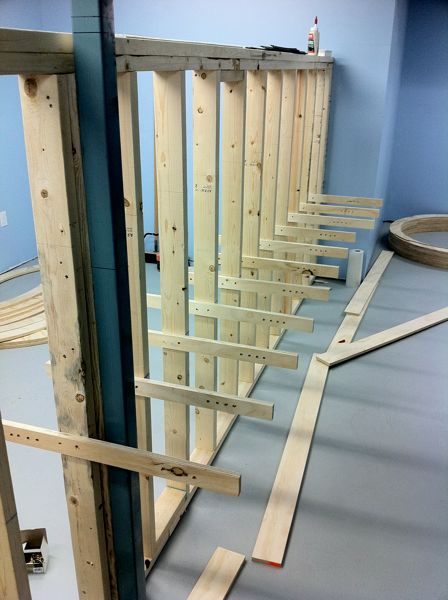
35th birthday today for me, and I spent most of it downstairs with Cam and Dan Hamilton getting a lot of stuff built. We like to term it “boning the fish” for the sheer fact that when you look at the 2″ tall bits of plywood extending out from both sides of the central wall, it looks much like a fish skeleton. We stopped short of where we wanted to be for want of more 2″ wide strips of plywood, but still some fine progress made!
Cam and Dan also got a fair amount of the helix base assembled using 4″ wide strips of plywood, though it’s not complete for the lack of a few more cross-braces to be put in for riser support for the base rotation of the helix trackbed.
-

- Boning the fish
-
- The first bit of benchwork!
-

- Most of the base for the helix
-
- The stack of 26″ helix parts – 8 levels worth.
Afterwards, much fun was had at dinner Michaelea made and a game of Empire Builder was played until the wee hours including Murray who came over just as we were getting started. Dan left early and Michaelea took over his empire and Murray ended up winning (Beginners luck!) despite his promise to his wife that he would let me win… Oh well, at least it was a nice win this time around compared to some of his past wins which were… shall we say “not nice”?
January 5, 2011
Merry Christmas and Happy New Year!
So it’s been a little while since I last posted an update, but can say there’s been only a slight amount of progress towards the basement, due to family visiting and spending time with people who want to spend time with me. Life does have to spend some time out of the basement at some point y’know!
Anyhow, a few updates with photos and links to follow:
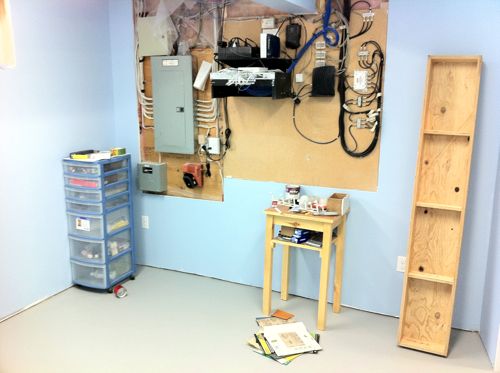
I’ve got the workbench area painted, and have been building a few code 83 turnouts (2 #6 regular and 1 #6 wye so far) for use within the wye leading to the workbench track. I’ve also taken advantage of PWRS’s sale on Atlas Code 83 flextrack and ordered a fair amount of it for use within the staging yard and helix. Should be showing up sometime reasonably soon. I’ll get the staging yard trackage done first most likely, though time will tell exactly how well that plan goes!
Cam and I also went to acquire several sheets of 3/4″ G1S plywood and had the helpful folks at Home Depot do the bulk of the cutting of the sheets into strips useful as “shelf brackets” of sorts for the trackage along the peninsula. We also got a few pieces cut for the staging yard and the major flat spots like Parksville. Several hours worth of debating, planning, etc. have led to a near final decision to build a 1 turn helix at the end of the peninsula to lengthen the run between Bryn and the Parksville industrial area (namely, the team track and National Silicates). A fair amount of 3D thinking to make sure that one decision doesn’t sink the chances elsewhere along the line.
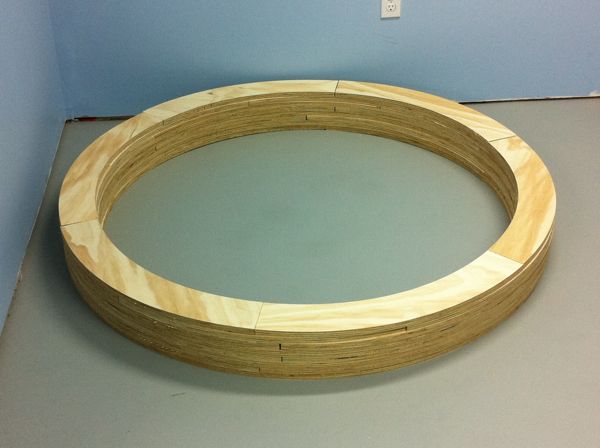
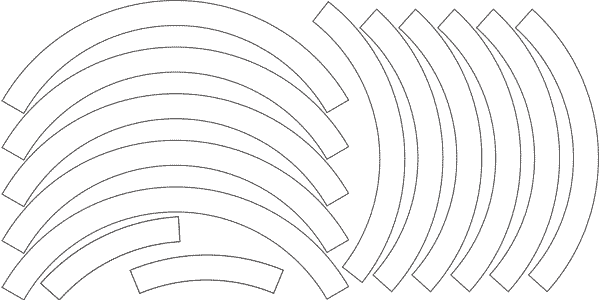
Lastly, I spent a fair amount of time in both CadRail and Illustrator coming up with a plan to have “Goodship Lollipop” help us with building the helicies and corner segments. So for those not in the know (which would be everyone except Cam, Michaelea and myself), Goodship Lollipop is a company which owns two computer controlled cutting/routing tables. Basically, save me the pain and frustration of having to cut perfectly perpendicular corners on curved segments to build the helix pieces. Was a little expensive, but likely a lot less fustrating and less than doing them on a laser cutter. Thanks to Timothy Horton for giving me the inspiration to have a computer help me out with those bits. Onto the Bolt Supply House to get the ready rod and associated hardware to get the helix into a more 3 dimensional shape!
Cheers!
-
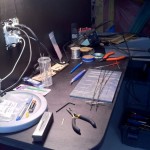
- Here is my workbench, working on making turnouts
-

- This is how I laid out the 26″ radius pieces onto a 4×8′ sheet of plywood

-

- This is how I laid out the 30″ radius pieces onto a 4×8′ sheet of plywood
November 13, 2010
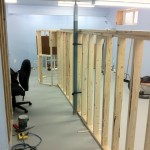
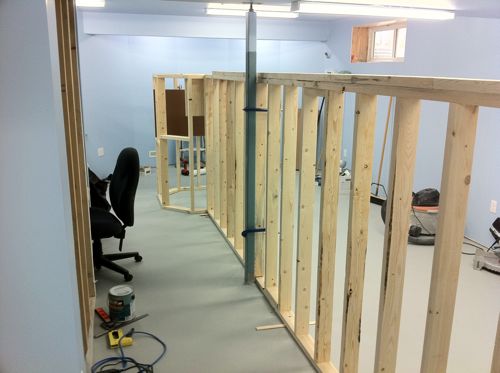
Today was the day everything got secured to the house! Cam came over late this morning and we put the wall up, securing it to the floor with ramset nails, wall with screws into a conveniently placed stud, and telepost with PL400 construction adhesive. I’ve now got a very stable peninsula wall dividing the basement for putting three decks of stuff up on it. It also marked the absolute END to any major changes to the track plan since I’m not going to pull nails which have been driven into concrete!
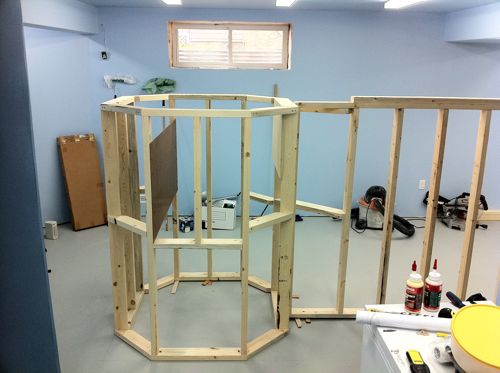
Turns out that square we drew on the floor for the peninsula-ending octogon was only a quarter inch out in one dimension from its final placement…Good stroke of luck there. Some shims for ensuring it was plumb and voila. Done. In the week leading up to the securing of the walls, I secured a sheet of hardened masonite into the octogon to provide for some cross bracing and then put a chair in there to envision dispatching from within the octogon. Turns out it’ll be a lot bigger in there than the workbench, and despite the crawl into the space once the layout is built, I’m thinking it’ll be a lot better in there than at the workbench… Cam suggested redoing the cross-bracing to provide a desk and proper setup within the octogon for dispatching which I’m inclined to agree with. There will of course be some changes taking place inside there to facilitate that. I’ll also need to acquire a fair number of FRS radios for the crews to properly communicate with the dispatcher. Any suggestions on what brand/make/etc.? Drop me an e-mail or post a comment on that or any other topic.
We also brought in a couple bits of pre-built benchwork for an aborted portion of Murray’s home layout which I acquired some time ago for use to see how they’ll work for the staging yard (as the height of these things are way taller than I’m allowing for the rest of the layout) and initial appearances look good. I’ll need new tops for both to fit the situation I’m in, but otherwise, a good recycling of the stuff.
And lastly, we got the workbench top fully installed. It was here that we pretty much decided to put the dispatcher inside the Octogon as Cam didn’t quite … fit in the space which means that I’m likely one of the few who will (and leaves me a pretty good incentive to not gain a whole ton of weight!) Now I’m looking to paint that too, but still deciding on whether it stays white or painted black with the rest of the wall.
And lastly, we secured the pair of water pipes leading to the outdoor faucets which were hanging down into the space intended for trains to enter the staging area.
Here’s a whole whack of pictures showing the entire basement with the new additions in place:
-
- One piece of benchwork for the staging yard and pipes secured in the utility room
-
- The other bit of benchwork for the staging yard in it’s approximate location but not it’s orientation!
-
- The helix goes here, once this stuff gets moved out of the way
-
- Mud Bay, Parksville and Cameron Lake will be here some day. For now, just part of the wall.
-
- Looking at the south end of the basement.
-
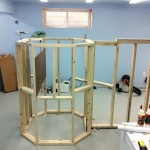
- The octagon in it’s final position. The dispatcher goes in the centre of it.
-
- More stuff to move. Envision Courtenay, Nanaimo and the Alberni Pacific along here…
-
- A long view facing north. Lots of work to do in here!
November 7 – 10th, 2010
This past week was spent working on getting the workbench area into shape. Specifically the biggest thing needing to be done was the relocation of the electrical outlet. During the planning of the layout, I envisioned having a relatively high-up workbench and to work on stuff on a bar stool which I had used on the previous workbench. Thus, I sited the electrical outlets at around 43-ish inches from the floor.
Turns out that height is smack dab in the way of the trackage coming off the wye under the stairs for my programming/test track. Whoops.
Thankfully I did leave myself enough electrical wire to be able to move the outlet down enough to put it underneath the trackage, so out the outlet box came (and thankfully the back of that wall was still open!) and a new hole cut. I fashioned a patch from another scrap of 1/2″ plywood and secured it to the wall in place and then started to sand it smooth with the rest of the plywood wall.
Ever have that dreaded feeling that once you clean one spot that you’ve now got to clean everything else to ensure that one clean spot doesn’t highlight the dirt everywhere else? Guess what? I ended up sanding that one spot so smooth that it would stand out from the rest of the plywood wall. So, out came a second sheet of 80 grit sandpaper and started sanding the wall smooth. Then came the wood filler, patch the cracks as best I could and then sand again with 150 grit. Following that is a fresh coat of primer, which will be sanded smooth to be followed by another coat of primer and then two coats of black paint, each with 400 grit sandpaper. At the end, I’m still undecided as to what will be on the wall other than the test track…
Here then are some shots of the progress on the wall after the patch has been installed and outlets moved:
-
- Patch in place, first bit of sanding
-

- More sanding
-
- Now has first coat of primer
October 24, 2010
So Murray showed up today with the ladder (a little giant system, which allows for an uneven base (ie: stairs) for it to work in a stepladder configuration) so I can now finish the painting. Cam and Murray also brought a chopsaw later in the day and proceeded to build a fair amount of the workbench. Time constraints for Murray (and by extension Cam whose stuff was in Murray’s truck) meant they had to leave a little before the task was complete, but the stuff they did leave were tasks I could handle easily on my own.
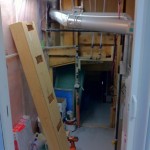
Except for the fact I decided to take advantage of the chop saw and finish another task I’ve been itching to get done, and that’s installing the accordian door for the utility room. Voila!

Granted, I’m not done with the door quite yet as I’ve got the casing/baseboard/whatever-the-heck-you-call-that-moulding to go around the doorway, but the major bit is done and it works as well as can be expected for a relatively cheap vinyl accordian door. At least the aesthetics are satisfied!
October 23, 2010
Spent a bit of time today going through the turnout needs for the layout. As in getting a substantial amount of sticker shock at how much I’m needing to spend to get the stuff to build the 68 turnouts in the layout. Thankfully it’s still nowhere near what it would cost if I bought them, but still…I think I’m going to order just what’s necessary now to build the skeletons of the turnouts and then the QuickSticks later.
Of course, this isn’t including the massive amount of flextrack needing to be acquired to connect the turnouts or the parts needed to actually control the turnouts (and the polarity of the frog) themselves.
Still waiting for the ladder, chop saw and friends to help out with getting the workbench installed and the partition wall built…All in due time I guess.
October 11, 2010
Admittedly, this website should’ve been up far before this point, but on the behest of those on the CanModelTrains Yahoo! group, I decided to get something going. I’ll also confess to being quite encouraged by Tim Warris of Fast-Tracks fame and his blog about the Bronx Terminal of the CNJ and it’s construction.
So at this point, the basement walls still need a second coat of paint, the stairway painting needs cutting in (need special stepladder for that) and a second coat of paint, windows need casing, doorway needs to be installed for the Utility Room, and lastly, the workbench area needs the floor primed and painted before I can claim the basement development complete and then I can move forward to getting things built. Oh yeah, I guess baseboards would be nice too.
Happy Thanksgiving!
Recent Comments