Modelling the E&N in HO Scale in my basement

Latest

April 5, 2014

With the trackwork finished for the moment, attention turned to getting the trackage actually wired up properly.  As the train actually managed to make it all the way to the main yard track, we knew the continuity of the trackage was good, but without being able to do anything within the yard, it was kinda pointless to carry on with the situation we had.

So out came the drills, 20ga stranded wire in green, red and black, and the soldering station, and wiring was done.  I even got the bus completed all the way down to the end of (temporary) track.  Cam and I worked in our own districts – for me, I worked on completing the wiring to the West Siding Switch of storage track Arrowsmith, Cam worked down the hill and then while I was finishing the bottom of the hill and a portion of the yard, he finished the other part of it.  Progress was made and we had a fully wired layout again.

Much cleaning was done and playtime began.  Well, some say we were testing the layout…yeah… yeah, that’s it.

20140418-085059.jpg

We certainly found more than few switches which had activation pins which needed grinding.  All were fixed, and then began the massive task of trying to ready enough rolling stock for the ops session…

March 29 and 30, 2014

With my second ops session planned for just after SUPERTRAIN (good grief, what was I thinking?!?), I was thinking I should get something done for the layout. Not that Cam didn’t sort of prod me in that direction either, no…. (Insert shifty eyes here)

Anyway, we figured it’s be great to actually get a train all the way into Port Alberni, even if it ended up at a temporary staging yard of sorts, as I haven’t had time to focus on doing up a real, accurate track plan for P.A.

Side note here. Earlier, Cam and I were discussing the track plan and realized that the tight confines of the trackage near the wye in Port Alberni was a guide, but we needed to make sure what was planned was actually doable. As such, I’m going to draft up the plan in CadRail and then print it full size so we know exactly where things go. Needless to say, such a plan is going to take a while to fully draft.

For a very long time, we’ve had the sub benchwork down the hill started… But not quite complete. This past Saturday, Cam and I worked on fixing that, and getting that little bit of track board finished and secured. After a bit of a meal, we got the contact cement out and laid the cork from where we left off just prior to the MP25 trestle, all the way down the hill. As we weren’t going to put cork in P.A. until we had a plan, we used a long cedar shim to ramp the track from the cork to the plywood.

After dinner, track laying down the hill began in earnest, and that was complete that evening. Of note, we actually slightly superelevated the curves on the way down the hill, for some aesthetics, but more for keeping runaway rolling stock from wanting to jump the rails on the way down.

Sunday, Cam arrived and we got the temporary staging yard built. A three track, double-ended affair with commercial #6 turnouts, it’s not great looking, but will hold two full port freight trains… One to arrive and the power can switch the caboose off and put it on the other train and come back to Wellcox with a different train.

We cleaned up the layout after the trackage was complete, powered up the layout and ran a couple GP’s (3000 and 3004) up to Port to see how far we’d get.

Surprisingly enough, we got all the way to the yard, and into it!

20140331-072808.jpg

20140331-072828.jpg

March 23, 2014

A brief update this time around.

Cam was over yesterday with a mutual friend from the Free-mo group named Carl. The primary reason was to show Carl the layout and the progress since he last saw it several years ago.

After Carl left, I figured we could get “something” done on the layout.

We decided on benchwork… And then proceeded to get the trackboard completed down the hill into Port Alberni, which we successfully completed along with a section of the plywood representing the paper plant and the first part of the yard. We’ll hopefully tackle cork and at least some trackage before SUPERTRAIN, as I’m wanting another ops session with some friends visiting from Toronto just after the show. I’d like to be able to run the Port Freight all the way into Port Alberni instead of just to Arrowsmith…

Cheers!

January 11, 2014

Yes, it’s been a little while, again.

Still busy with SUPERTRAIN stuff, but I have been trying to keep progress going forward in the basement. Maybe not really in the trackwork/benchwork realm but in the rolling stock. I now have three skeleton log flats which are nearly ready for decals and a couple 50′ long flat cars suitable for idler flats. More on the five pack later.

Cam has also been really busy over the week getting all the last details added and painted on 3000 and 3004, in preparation for the ‘Homecoming’. Friday night he escaped from work a little early and came with me to Dave’s place to get some last minute touch-ups and details done. All tested and these things are awesome.

The next day (ie: Saturday/today according to my dating scheme here), I was busy doing a ton of cleaning in preparation for the party. Cam arrived around 1pm and we got to work on niggling issues with the layout…specifically the problem turnouts, at Parksville and ICG Nanaimo. The former was needing rails spiked to the ties and some minor adjustments, the latter needed to be shifted and spiked. Will still need some work, so some flags (aka yellow and green pushpins) were setup and and a Daily Bulletin was issued to advise of the slow order through the turnout.

I also did a thorough vacuuming of the track and thought that would be all. Not quite as it turned out.

Guys started showing up just prior to the appointed time and the layout was deemed okay to turn on (oh yeah, forgot to mention… A fair number of frogs in the staging yard needed gapping) and the locos were fired up, assigned and coupled up to the Courtenay turn and Cam had the Honours to be the engineer to run the train containing a lot of his work (3000 and 3004, as well as the skeleton log flats) out to the end of the line and back.

20140114-072601.jpg

That’s Jeff Simpson in the foreground admiring the train with Cam running in the background.

Jeff was accompanied by Josh Soles and Matt Cummins who gladly accepted a throttle and 6101 to run VIA 198 and 199 out to Courtenay and back. A little quickly mind, but at least most of the crews running freights gave the passenger service minimal delays. Chuck Johnstone, Tyler Federoshyn, Dan Hamilton and Kevin Pyle also made appearances and some of them had opportunities to run trains as well. Kevin has built a few of the Kaslo skeleton log flats and agreed that they’re too light to run empty, but he’s got a good means to produce the poles… I’ll be leaning on him for a drill press and his expertise to make the poles I need for the two industries loading them…

All in all, a good day, summed up in this picture of Josh admiring the two GP38AC’s:

20140114-073321.jpg

It will be fixed

In some respects, building something gives you knowledge of how something goes together.

It also (hopefully) gives you knowledge of how to repair it.

Due to the cold outside, the non-functioning humidifier on the furnace and the fact the basement is warmer now than in the summer led to another rather nasty kink in a really unfortunate spot: Parksville Junction.

20131213-211117.jpg

This shot, taken from above, illustrates what happens when things aren’t allowed to breathe.

The last time this happened, at the ballast spur turnout on the lower deck, I cut the rails and they managed to straighten themselves out.

Sadly, this didn’t happen here. After cutting some gaps, the rails did not return to where they should. As a result, some selective repair will now have to take place.

Here’s the progress on the demolition:

20131213-211455.jpg

Wish me luck!

Modelling…

So the past few weeks have been primarily occupied with getting web pages done up for SUPERTRAIN – not so much for the public, but for the people who will bring their displays and wares to the show.

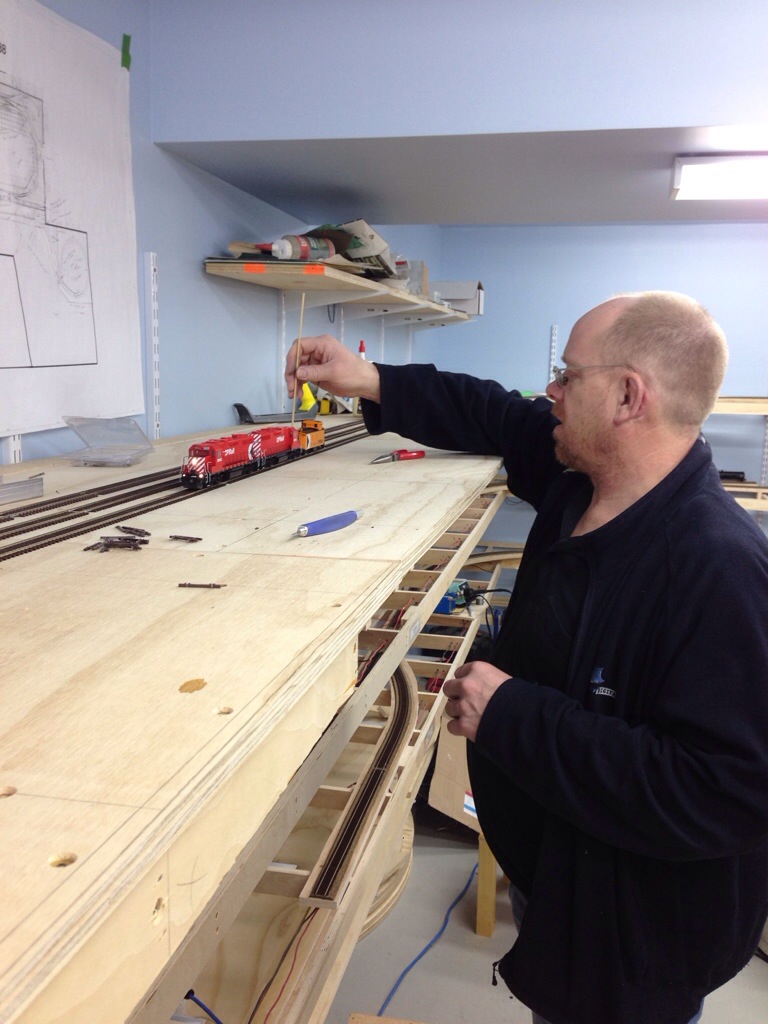
But that’s not to say I haven’t been doing nothing for the layout. Thanks to Dave Bedard for inviting Cam and I down to his place over a few evenings over the past few occasional weekends to do some modelling. He’s worked on some of his locomotives, a couple of mine (those GP38AC’s you saw in Jason Shron’s pictures? Now painted and decoderized, just getting the final details added like handrails, grab irons, lift rings, etc. I’ll fill you in on those, with pictures, once they’re complete.

Actually, that was more Dave and Cam’s work. I’ve been working on a rather unique car that was rather essential for the layout:

The CP skeleton log flats.

These cars are really spindly things, purpose built for carrying logs and poles. I’ll be loading them with the latter, and there in lies the challenge for modelling such a car: there’s nowhere to put weight when the car runs empty. Kaslo made a resin model but resin isn’t a heavy material, and there’s just a tiny cavity in the centre sill to put weight. To operate my layout, properly, I need to be able to deliver empty cars to the two industries in Courtenay, and the resin cars are simply not able to be made heavy enough to operate properly. Solutions were investigated, including photo-etch brass (filled with liquid gravity), shapeways metal, and borrowing the centre sill from an Atlas Trainman bulkhead flat car.

Until Cam found, quite by accident on Walthers, a kit of the very car I need, made entirely from solid cast pewter (aka, metal), from Custom Finishing. In stock for around $27, an order for four cars was quickly placed and picked up when they arrived at Hobbytech.

The kits were produced back in the late 90’s and thankfully didn’t sell out (either that or the molds still function) so I could get them some 15 years later.

They are as old school as you can imagine. Though the direction sheet indicates these are an easy build, nothing could be farther from the truth. The amount of filing and fiddling with these kits is the most I have ever seen…I would charitably say that between Cam and I, we’ve filed about a half-ounce of pewter from the parts that make up a single car.

But the results I think will be more than worth the effort. Especially when I think of how much time I would’ve spent trying to learn and design the car from photos and crude folio drawings, without any assurance of the resulting parts coming out to my satisfaction.

You tell me: doesn’t this partially finished car look pretty good?

20131209-225545.jpg

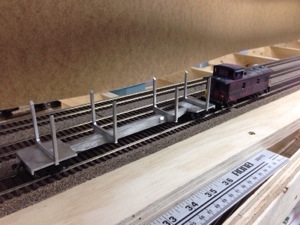
The car is sitting on ExactRail 70 ton trucks (complete with semi-scale 33″ wheels) with Kadee 78 couplers. The kit needs a thorough washing, shimming the two centre bunks and gluing to the sill, but otherwise ready for paint and decals. Two other cars are in process, coming close to the same state, and the fourth hasn’t come out of the bag yet. I’m likely going to leave it like that to get a rough idea what the starting and finishing weights are.

I suppose the caboose deserves mention too. It’s an older Athearn end-cupola steel caboose, factory dipp…err, painted in CP script for international service. That scheme is way old for my layout, so out came the windows, off came the roof walk and cupola. After a good long soak in 99% iso, plus plenty of scrubbing, the car is as you see it now. Cam also plugged the old roof walk holes, and it’ll be seeing a few coats of True Line Trains Action Yellow and decalled for CP Rail. So after that is finished and I have another one arriving from Florida via eBay, I’ll have, I think, enough cabeese to operate the layout. But all of them will be stand-ins.

And that is a bit of a shame. The cupola is wrong, the roof is supposed to be a peaked raised panel roof instead of a curved roof, and the windows are not right. Yes, they’re steel, have the cupola at the end and painted in the right colours. And for now, that will do. There just isn’t a kit (yet) available for the proper caboose, and I’m not going to scratchbuild five of them either. I did have an opportunity to get a proper brass caboose, painted in the right paint scheme, for $300-ish but the wife vetoed that purchase. And in some respect, I’m glad she did. Because what the island had was a consistent fleet of cabeese, and having one correct and several stand-ins would’ve made the correct one stick out like a sore thumb. So until I’m able to do a wholesale replacement, the stand-ins will have to do.

Sorry for the novel on such a tiny aspect of the building, but it’s something to read…

Cheers!

Milestone #(mumble)

With Athearn’s release of the 33,000 gallon tank cars suitable for LPG and Anhydrous Ammonia in the Genesis line, I picked up three of them labelled for Procor.

Shortly after getting home with them, Cam and I took inventory of them for coupler replacements. One thing shocked us both:

I have enough propane cars to fill every facility on the layout, their replacements and a few more to cycle on and off the island.

I’m done buying propane cars!

So with the exception of the skeleton log cars, I’m coming very close to having enough rolling stock to fully operate the layout. I just need to acquire enough metal wheels (hey, buddy, can you spare me some 33″ semi-scale Intermountain wheels?) and couplers to operate them with.

Amazing, eh?

August 27 & 28, 2013

Having cleaned my workbench quite thoroughly on Monday, figured I should get at one last bit of wiring: the tail track of the wye.

Ordinarily, it’s be a reasonably simple thing, just wire in the track to an auto reverser and be done with it. But, no… I have to complicate things by making the tail track a programming track as well as making use of the Digitrax Zephyr as an auto-reversing booster. So not only do I have to wire in a 14ga wire from the other boosters for a common, I also need to wire in loconet, and then gap the rails all over the place, creating an isolated bit of track to ensure the programming leads aren’t subjected to full DCC power and making sure it all works at the end.

So, with a 4PDT switch, it’s all done. Never mind the fact it took me two full evenings to get it wired in…. Pics to come when I finish tying up the wires.

August 25, 2013

Back at it in the basement yesterday, primarily to address some much needed tasks.

Saturday evening, Cam and I had a good amount of playtime with running a port freight (me) and a Courtenay turn (Cam) and found a 3 hour ops session is quite realistic after the length of time we took doing abbreviated runs like those. I also found I really needed to get power into Arrowsmith siding. Dragging equipment into a track takes away a lot of realism when you use 5-DCC (aka the 0-5-0).

So, Sunday morning I started tackling that by gapping the rails just past the summit and installed feeders into Arrowsmith. Cam and Dan showed up shortly after I finished with the initial set of feeders and while I grabbed some lunch, they emptied the railway of rolling stock, parking it all in Wellcox. Of course they had a lot of fun doing that!

After lunch, we got to work on benchwork for Port Alberni. Cam, Dan and I got a fair bit of it done but not really well secured to the shelf brackets due to impending deadlines. So the three of us finished that, and made plans for the rest of it next weekend… We hope! Sooner we finish with the benchwork, the sooner we can keep playing!

August 7, 2013

Went downstairs to do some work last night for the first time since the ops session. Work on some niggling details and generally cool down.

Started with the turnouts in the staging yard and repair one of them at the far end of the yard, as the pin dropped out of the throwbar. Fixed that, though required a second hole in said throwbar. Others had positions tweaked and one repaired point. All working now and I’ve ground the pins down with a dremel tool so they don’t catch locomotives and stop them dead.

Also wired in a couple bullfrogs to power the switches and while I was at it, hooked up the track bus to a UP5 at the south end of Parksville Yard.

My thought with powering the UP5’s was initially to have just the 12V power supplied through the barrel jack on the side, but after hooking up the track bus, figured that would definitely be the way to go for all Ux panels, and that goes for the UR92 and UR91 too. The 12v supply will still be hooked up as a backup power for when the track is shorted, but the readings off a dt400 throttle without a battery show much better power with the track bus than without. Plus I get track indication as well!